The thighs, though, they don't go up any higher, and as you can see in my photo above, I'm showing way too much black on my hips. Sure, the thighs are comfortable to walk in, but they probably won't fly for EIB or Centurion approval.
I've honestly been thinking about this since I sent my approval in, and it's been one of the few things I've been fretting about in regards to the armor and being approved at all. So, I've decided to revert the thighs to (close to) original condition.
Thighs in their current condition not only look strikingly different from other TKs, but they could harm my chances of eventually taking this kit to EIB or Centurion status. It was time to revert them.
Reverting these pieces isn't like hitting CTRL-Z on an art file and undoing it magiacally. As I so sagely stated in a previous blog, to paraphrase, It's a lot easier to remove pieces than to put them back on.
Although I'm not yet completely done as of time of writing (6/2/16), I'm 90% there, and some have asked for pictures and description of the procedure, so let me document what I've done so far and make another entry later with the finished product.
Let's start with the thighs as they were for my 501st submission:


As previously described, they need to come up underneath the drop-down boxes on the belt, and hug the cod plate better.
I first retrieved the last pieces I cut off from the outside of each thigh. I re-connected these by butt joining them to the thigh pieces with ABS paste and clamps, to better ensure that the re-added pieces were flush with the thigh pieces as best as possible. This was necessary to not only avoid unnecessary sanding, but to ensure that the pieces were as continuous as possible for a good look.

I then found the pieces I had originally cut from the top. One thigh had this as one large section; however, during my "fitting" I had cut the armor off in sections until (I thought) I had the right fit. This piece wasn't going to be fit for re-adding to the armor as it would require a lot of shimming in and of itself before I could consider shimming it back onto its original thigh.

I was, however, able to use the strips taped back together as an outline of what a replacement piece should be shaped like. Using these pieces and a spare piece of ABS cut out from the inside of the thigh during de-molding, I was able to fabricate a new piece for this thigh, in almost the same shape as the original. (Note that I've omitted the spiky points near the top as I find them terribly annoying.) Thankfully the edge return (on which the strip rests) for the fabricated section was minimal on the original pieces, and nothing I could't re-add with a few layers of ABS paste and sanding.

The top pieces were shimmed back on using backing supports, glued to the thighs and shimmed pieces using CA glue, as they'll be permanently attached and require added strength, since the tops of the thighs take extra stress as they often get crammed into a trooper's hip when the leg is flexed. Other strips were also added to the sides to help retain the shape of the thigh in those areas.

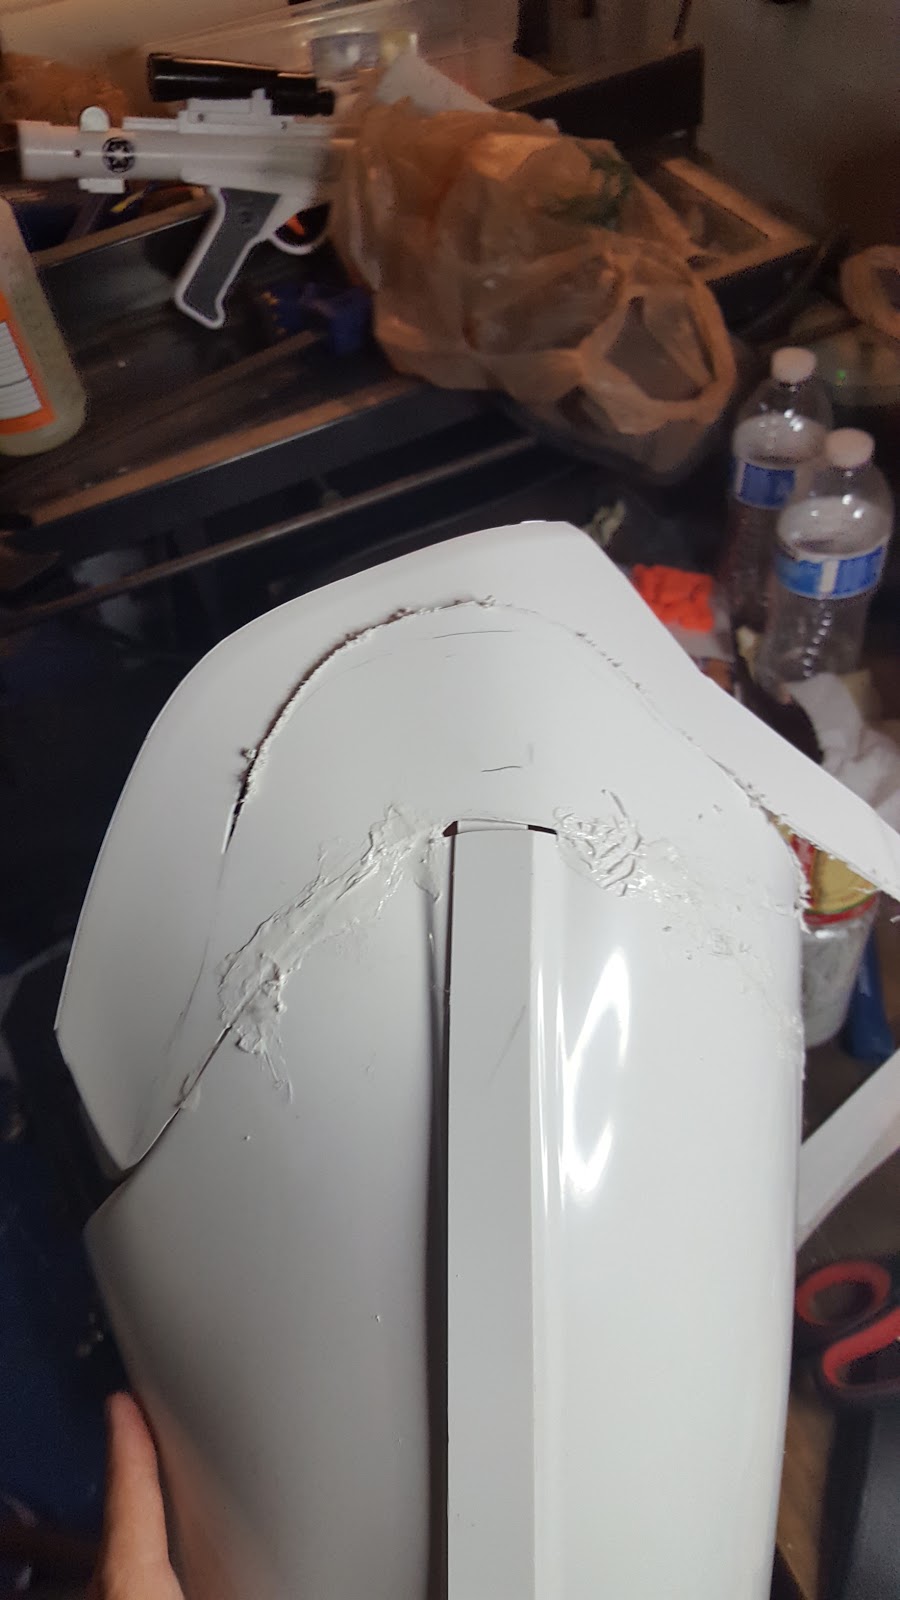
Once cemented in place with CA glue, ABS paste as added to the joints to form the pieces together with the cover strips neat the top of the thigh pulled away to access the whole jointed area.
To be honest, the easiest way to apply ABS paste in these situations is to just use your fingers. This way, you can press it into the cracks, smear the more liquid paste like finger paint, or sculpt more solid paste like soft clay. When you do this, make sure your hands are clean or use silicone gloves. Remember to wash your hands when you're done.


The rough ABS paste was sanded down. Then, more paste was added in divots, pock marks, and other depressions in the armor, and then sanded down. This process was repeated several times with 100 and 150 grit sand paper until the seams were smooth for the most part. ABS paste was also added at certain parts on the top of the thigh near the edges of the added pieces, to help better secure the pieces and to maintain the shape of the top of the thighs.

I plan to use a new batch of unadulterated ABS paste and very clean thigh pieces for the last coat, to color match the thighs as best as possible, as a final coat that can be lightly sanded and polished to make a natural-looking thigh piece. But before I did this, I had to figure out how to make the strips long enough to fit back onto the re-added pieces, since it had also been trimmed.
I had purchased a plastic sign from Home Depot to use as spare parts, however, after some experimentation I discovered that it wasn't made of ABS. So I went with an alternate plan: I shimmed scrap strip back onto the existing strip using the same methods I used on the rest of the thigh. And it worked surprisingly well.
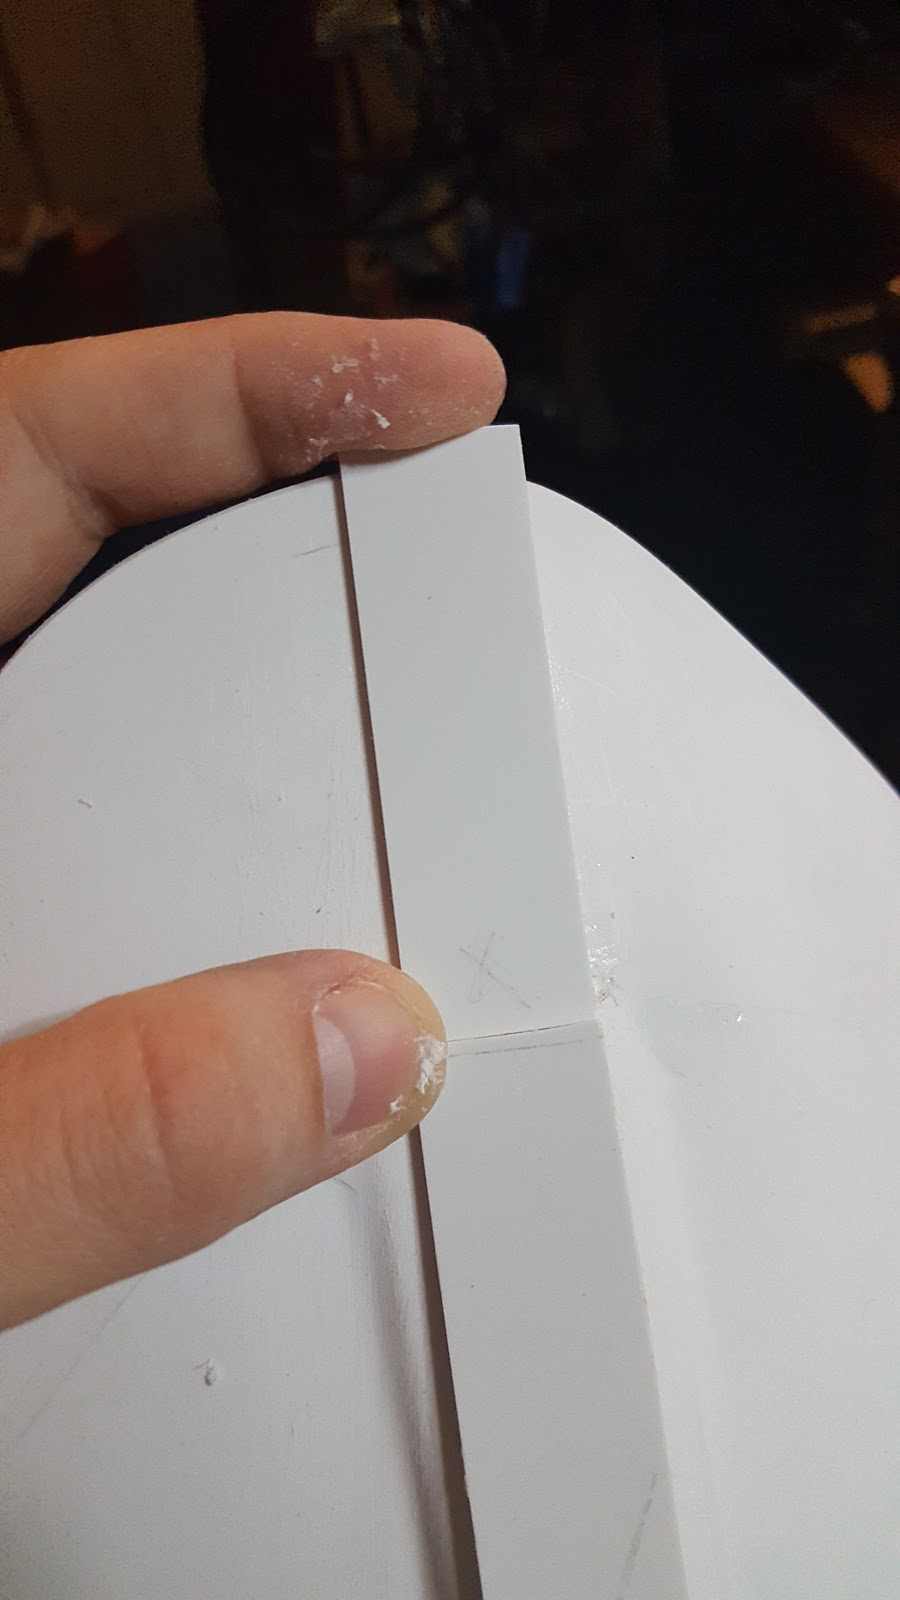

The scrap strips were but joined to the existing strips using a carefully-cut matching joint and CA glue which, despite the small cross-section for adhesion, worked extremely well. Afterwards, I coated the seam with ABS paste and sanded down. When I put the final ABS paste coat on the rest of the thighs, I'll do the same here to even better hide the seam to give the appearance of one continuations piece of strip.


In the next blog, I'll show the finished pieces with the final coat of ABS paste, sanding, and polishing. Until then...
No comments:
Post a Comment