Featured Post

The TKTalkie v4 - Press 6 for the Imperial March

Upgrading - the Path from v3.15 to v4.0 (Note: I had started this draft last year but never finished it, due to personal issues and cuttin...

Showing posts with label approval. Show all posts

Thursday, April 21, 2016

Fit For Duty, but Room For Improvement

Yesterday evening almost a week to the minute from the initial acknowledgement of my submission, I received the following email:

Hi Erik,

Thank you for your patience! We have finished our review and have reached a decision. Congratulations! Your costume has been approved and I've moved your application into the next phase. Welcome to the 501st Legion!  
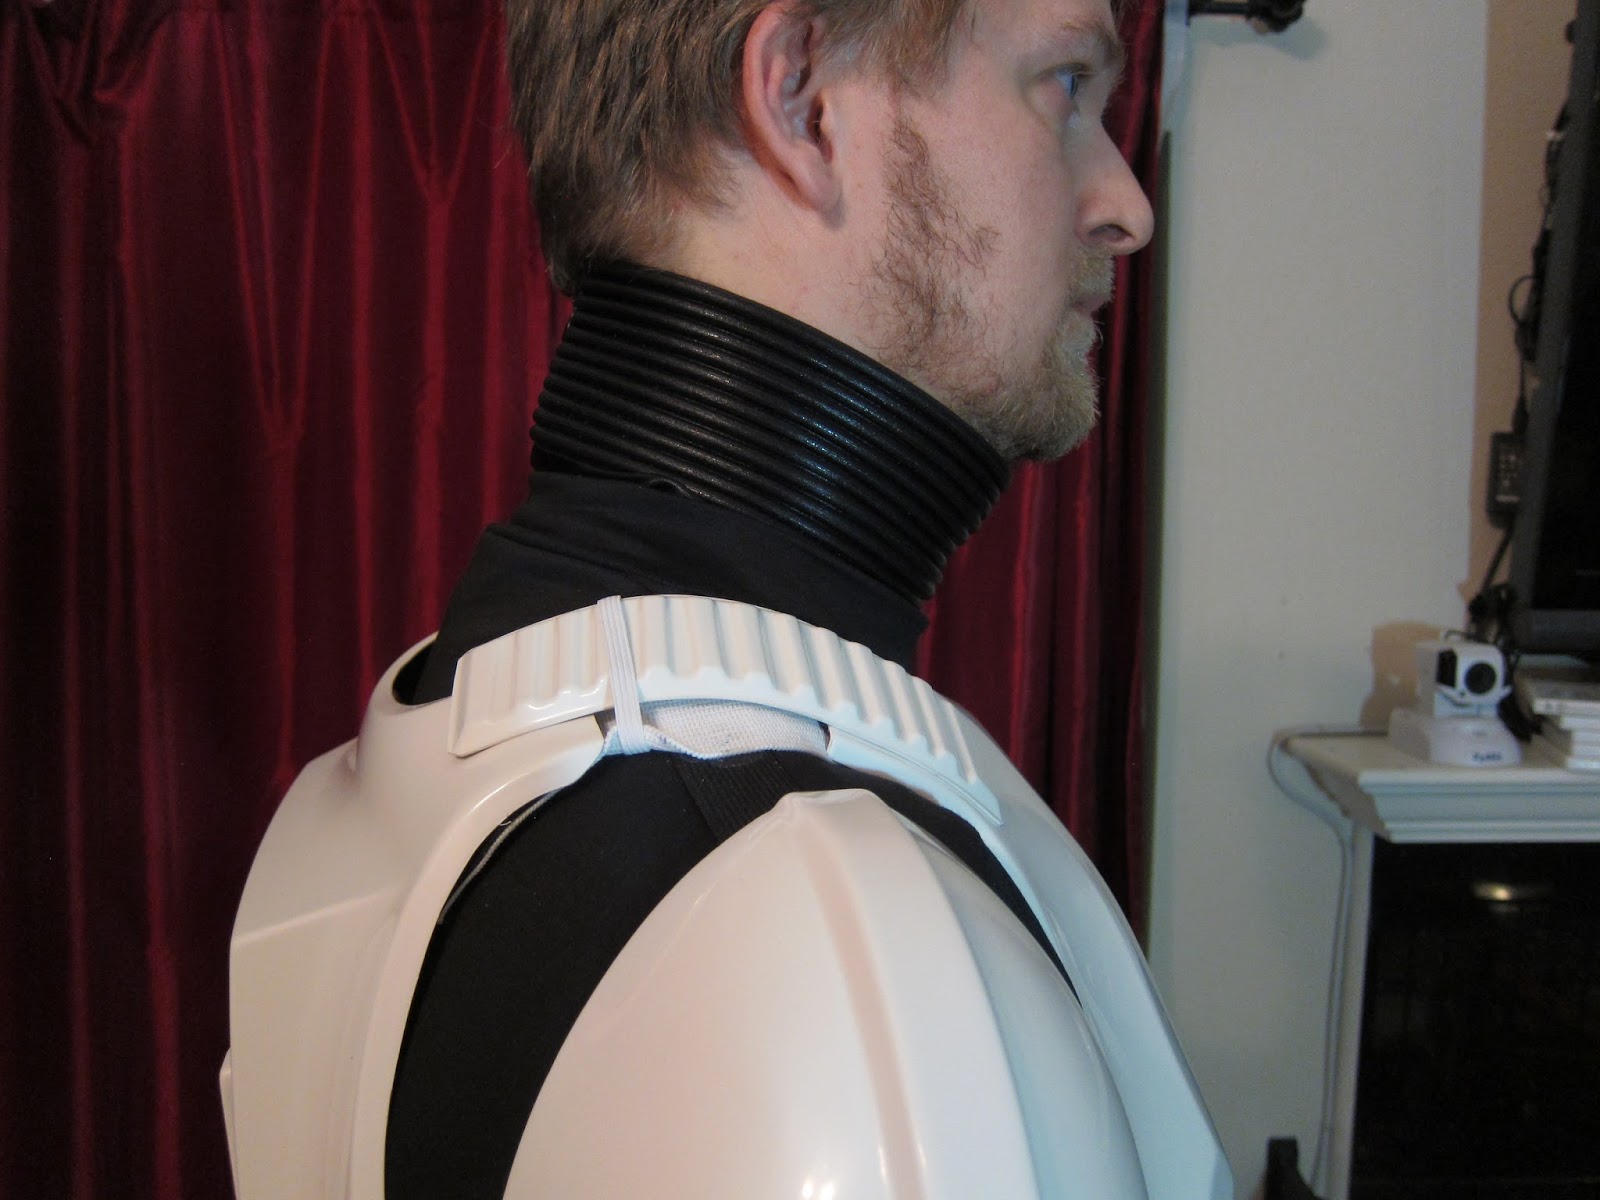
There are a couple of suggestions on changes to your armor to make it fit a little better.
1) Shorten the straps on your shoulder bells, this will reduce the black undersuit from showing through on the shoulders 
2) Bring you thigh armor up higher - you may need to simply shorten the straps on this as well 
Once you receive your TKID and welcome letter from the 501st legion, here is some information you'll need to get started: (...)

It's official - I've been approved to be a member of the 501st!

Approved - but with caveats.

However, I found the email slightly bittersweet as it confirms something that I've known was probably true - I trimmed my thighs too short.

The shoulder bells will be an easy fix as I just need to fasten the H&L straps farther into the bell - that's just a donning issue. The thighs, though, they don't go up any higher, and as you can see in my photo above, I'm showing way too much black on my hips. Sure, the thighs are comfortable to walk in, but they probably won't fly for EIB or Centurion approval.

I've honestly been thinking about this since I sent my approval in, and it's been one of the few things I've been fretting about in regards to the armor and being approved at all. So, I've decided to revert the thighs to (close to) original condition.

It won't be easy, but it won't be terribly hard either, with my knowledge of shimming thanks to my thigh backs. And I have most of the scraps I cut out in solid pieces, so they should be relatively easy to re-attach with backings and ABS paste. The only exception is the top of the left thigh, which came off in strips when I was "fitting" my thighs for fit (but not to the ab/ cod plates; therein lies the problem), so I'll fabricate a new piece to join there after doing some "forensics" to mimic the original shape. I will probably need some ABS sheeting from Home Depot or Amazon though, in order to create new back (and possible front) cover strips to help make the operation easier. Fortunately, once I have all the parts in place, I don't think it will take more than a few hours to perform, given how fast the ABS paste seems to set up.

I'll be covering this in detail... in my next blog post.

Before I end the post, though, I'd like to give a shout out to my parents, who helped make me the hobbyist and Star Wars geek that I am today - and now a member of the 501st. My father has worked with models since he was a boy, which is how I picked up my love of modeling. In the 1980s, he even created a Space Shuttle launch pad from scratch, which Revel later used to help create their own model kit of the same. If you want to check out his site, you can find it here at lakecountyspaceport.com

Monday, April 11, 2016

Submission, hold.

The Southern California Garrison's OC Squad just hit their 76th member this past Saturday. For a few reasons, I'm hoping to be it's 77th member. Therefore, having addressed all the concerns I had with the armor upon my last fitting, I decided to take my own submission photos before it was too late. As I'm submitting for the Southern California Garrison, I used the steps outlined on their page here.


I'm hoping for Tier 2 EIB (Elite Infantry Battalion) with the armor as it currently is (the 501st CRL can be found here).  I've included some close-up here for further reader reference, for those things required for at least Tier 2. Unless otherwise noted, everything was supplied by and constructed per the instructions of ANOVOS.

* Rivets for the right knee ammo pouches. Rivet heads are painted white (not mentioned in ANOVOS instructions).


* Sniper knee follows counters of leg armor, no rivets present.


* Minimal gap between ab and kidney plates (NO gap required for Tier 3).


* In addition, left ab and kidney plates use three split rivets and bands to connect to each other; rivet heads are painted white (altered from ANOVOS instructions).
* Holster is affixed with two fasteners (the other fasteners have been covered to mimic the Stunt look).


* Shoulder straps have no rivets and are glued into place.
* White elastic shoulder straps with an elastic strap for the ABS shoulder straps (NOT required for Tier 2 but required for Tier 3) (NOT ANOVOS supplied or instructed).


* Rubber gloves (latex or rubber hand guards required for Tier 3).


No inside edges on the wrist ends of the forearm armor (NOT required for Tier 2 but required for Tier 3) (not ANOVOS instructed).


* Proper button color (required for all levels) and a belt with three rivet covers.


* Two male snaps in the posterior plate and one rivet in the ab plate cod piece.


* The thermal detonator's clips must be touching or very close to the cap ends.


Obviously there were other things I did to the kit outside of the scope of the ANOVOS instructions, but these were the most important for Tier 2 EIB.

Looking at Centurion specs, I'd have to make the following adjustments to the armor to be certified:

  • Eliminate the gap between the ab and kidney plates, through either getting in better shape or shimming the kidney plate (and re-doing the rivets) (Cost of new rivets + my labor in shimming, ABS paste, sanding, polishing, etc.)
  • Replace the hand guards with rubber or latex versions, cemented to the gloves ($35 - $40).
  • Replace the belt with a better 3rd party belt, like a Kittle belt or similar ($40 + my labor in transferring the ANOVOS belt hardware to the new belt; non-trivial due to eh rivets and glue used on the ammo pouches).
  • (Optional) re-do the rivets on the ab and kidney plates for better vertical placement (Cost of new rivets + my labor in shimming, ABS paste, sanding, polishing, etc.).

For reference, the helmet as-is from ANOVOS is fit for Level 3 Centurion certification (the flaws are screen accurate), although some garrison GMLs (but not all) are requiring the frown to be re-painted to remove over spray and to taper and extend it the frown,  andz/ or that the Hovi mic tips to be replaced.

I'm on hold with any building until I get approval or suggested fixes. Until then...

UPDATE: being new to the process, I've been informed that the GML will grant basic approval if the costume passes muster; thereafter, EIB or Centurion approval goes through whitearmor.net. I'll start this process once I get approved.