Featured Post

The TKTalkie v4 - Press 6 for the Imperial March

Upgrading - the Path from v3.15 to v4.0 (Note: I had started this draft last year but never finished it, due to personal issues and cuttin...

Showing posts with label amplifier. Show all posts

Thursday, May 25, 2017

Upgrade: TK Talkie v3 - Can You Hear Me Now?

Disclosure: I haven't been paid to promote any items in this post or been given any free samples for blogging.

A couple of months ago I built my TK Talkie v2, a device one of our 501st members in the Star Garrison devised using off-the-shelf Teensy Arduino hardware and some clever programming. He put his design and tutorials on his site at tktalkie.com.

Recently, TK Talkie came out with the v3 iteration of the device, which adds a Bluetooth Low Energy (BLE) module on top of the v2 design, and overhauled the file structure on the SD card, allowing integration with a phone app supported by iOS and Android. This allows the v3 device to use the following, powerful features:
  • Saving, editing, deleting, and switching between multiple profiles, allowing for multiple setups or costume profiles on a single SD card an a single device
  • Altering gain levels (Line In, LIne OUt, Mic, master volume, etc.) and equalizer settings on the fly (without the need of a computer as with the v2 device)
  • Switching between the Line Out or Mic outputs on the fly (for example, if you need to switch to your wired mic because your wireless mic is dead or broken, or cross-talking with another wireless mic)
  • Selecting a background loop, or turning it on or off on the fly
Previously many of these things could only be done with the TK Talkie connected to the computer while using the Arduino serial mode to make adjustments. Multiple profiles weren't possible without multiple SD cards. So this upgrade was a major improvement for ease of use and utility.

This video does a much better job of demonstrating it than I could put together.


With all these incentives, I decided to upgrade my v2 device to v3 using the online tutorial. I recommend reading the tutorial to better understand the build and my personal take on it.

To upgrade my current v2 to the v3 wasn't too hard, although there was a slight learning curve on the software side. Before that, though, I'll talk about my take on the v3 hardware.

Hardware

The key to the v3 build, really the only hardware difference from the v2 hardware, is the BLE module. TK Talkie's own design adds the BLE module to the Teensy board using 3.5mm jacks to make it removable. However, the BLE module shouldn't be disconnected while the device is powered on. Add this to the fact that the case I happen to use with my v2 device had plenty of room for the additional BLE module, and I decided to directly wire the BLE module to the Teensy without using a male/ female 3.5mm jack since I don't feel the need to disconnect it with all the space in my case anyhow.

One of my personal pitfalls with this design was the wiring and female pin connectors I used between teh Teesny board an dthe BLE module. Although they only require crimping, they should also be soldered to make a better, more dependable electrical connection. This was also exacerbated as I used small-gauge telephone conductors to have flexible wire between the BL and Teensy, since each piece is installed on a different half of the hinged case. Because I had a loose connection on one of my RX / TX conductors, the app would often connect, but not be able to pull up the profile or present the settings screen. I ended up removing the old ends and replacing them with modular female ends (with a touch of solder for good electrical contact) in a casing. Once this was fixed, I had zero issues using the app. This means that you can connect the BLE pretty close to the Teensy without any worry about Bluetooth connection.

Before and After pictures of fixing my BLE wiring

Software

With the hardware ready, it was time to load the software using the Arduino software and the Teeensy plugin. This was fairly straightforward, although I found that Windows didn't download the files correctly, typically saving tham as web pages with markup instead of as the .txt, .h, or .ino files required for the various directories. In fact, it was much easier for me to make my own files and structure with the proper names and extensions, and simply copy the text from the sketch sources and then paste them into those files.

Once the new files were uploaded, I was able to start personalizing things. One thing to keep in mind is that all files should be 8 or less characters in length, including profile names and sound names. This name size was done to make file access as fast as possible. Any filename longer than eight characters won't be read by the program. This affected a profile I created off-app and caused me to not be able to use it.

One thing to keep in mind is that you can change the background loop on the fly, but you must ensure that the effects_dir, loop_dir, and sounds_dir point to the correct directories, as there's currently no way to adjust these on the app (to be added in a future release). With the v3 file structure, these sounds are stored in their own directories, typically on the root of the SD card, so the sounds can be used by multiple profiles. All your sound files should be loaded to the SD card beforehand, including any background loops you may want to use, and referenced by the profile before loading the SD card into the TK Talkie (just edit your profiles with any basic text editor). Really, the only limits are your desired sound and the storage space on your SD card.

The App

The app is supported on iOS and Android. So far, the app works OK. Typically, I have to connect to my TK Talkie twice to communicate with the hardware, but this may because of my integration of the BLE close to the Teensy board and audio riser, whereas the reference design places the BLE module on its own dongle away from the other boards.

However, once it is connected (and with my wiring and pin connectors fixed), it's now terribly easy to make changes on the fly. For example:

  • If I'm at a troop with mingling, I can set my device to use the profile with the background loop.
  • Alternately, I can turn it off when it's not appropriate, or apply a saved profile without the background loop.
  • If the loop is too loud, I can turn the volume on it down compared to my Line In/ Mic gain.
  • I could make a new profile with less bitcrusher distortion for a cleaner sound.
  • If there are too many troopers with wireless mics and I get cross-talk with another trooper, I can switch to the profile for the wired mic and use that instead (and adjust the loop as necessary).
  • Turning off the mic volume but using voice activation to launch random Jawa sounds (and saving it as its own profile for your Jawa costume).
There are a lot of possibilities.

I can make these changes while wearing the armor too, which helps if I need to turn off a loop or swap out profiles after I've suited up. I have to fiddle with my chest plate far less with the app interface, unless I need to adjust my Pyle Pro's main volume.

Speaking of volume, one thing to keep in mind is the Line Out Volume with the current app, which actually works in reverse (to be fixed in the next update): that is, the lower the number is, the higher the volume. This threw me for a loop the first time I took the unit out in the field, as I had the volume set to 3 and was easily getting feedback. I've suggested that the interface be changed so that the volume is a negative number, like many home theater receivers (that measure output in -dB), going from -3 (highest) to -31 (lowest). With my Pyle Pro already amplifying, I set the TK Talkie to 31, the lowest setting, and adjust the main volume on the Pyle Pro.

Now that I have the basics down, I'm going to learn how to adjust the equalizer and bit crusher settings so I can dial them in some more. The fact that the app allows you to toy around with these advanced settings, without needing to go through a console connection, truly helps add to the utility of the app.

Final Thoughts

If I had to rate the system, I would give it a 4.5 / 5. The app is still slightly rough around the edges, but it's certainly a contender with other systems out there. The TK Talkie site has a comparison between itself and other systems, and although you may need to consider author bias, it's a decent comparison in features and considering your options.

Beyond my thoughts above, when you build or upgrade, definitely give yourself time to build and acclimate to the system. I rushed mine a bit to use it on an upcoming troop and it didn't go so well. Now that I have things fixed and a better understanding of the device, it's an invaluable part of my kit.


Above is the TK Talkie inside the upper right of my chest plate. The input is my wireless mic receiver to Line In on the TK Talkie. The output is Line Out to my Pylo Pro. A small USB battery under the Pyle Pro powers the TK Talkie for many hours. Everything's secured with H&L tape, which is your friend.

(One note is that I tried to feed the TK Talkie from the Pyle Pro power source by using a step-down transformer and a power switch, and although the TK Talkie got power from it, the power had far too much noise on it to be useful, even with a filter or two in place. I may reinvestigate this later, but for now a simple $10 USB battery is the best option (although just one more thing I have to worry about charging).)

If building your own TK Talkie is out of your comfort zone, you can now order them through the TK Talkie web site at http://store.tktalkie.com. Personally, I may build a few for my garrison to order when time allows, but now there's an alternative for those who might not be as comfortable with a soldering iron and development software as others.

That's it for the blog for now. Once my troops in May or finished, I may clean up the armor and finally submit for EIB status with FISD. Until next time, carry on troopers!

Tuesday, February 28, 2017

Upgrade: Sound off! The TK Talkie SFX Box and Non-Canon Accessories

Disclosure: I haven't been paid to promote any items in this post or been given any free samples for blogging. I'm just a user reporting on some neat items purchased out-of pocket by either myself or my wife :)

So since I found out about the TK Talkie system, I've been interested. The iComm and RomFX systems have always been cost prohibitive, and the idea of building a sound FX box from scratch was appealing. And in the end, it was much easier than I expected.

TKTalkie is a system that was put together by TK81113 using a Teensy 3.2 microprocessor board, a Teensy audio board, and Arduino software. Once assembled and programmed, the system runs off of any old USB 5V battery bank. Input comes from a wired or wireless mic, output goes to your PA system or helmet speakers. Here's a video from TK81113, the guy who created it.


This project required the following:
  • Teensy 3.2 USB Development Board
  • Audio Adaptor Board for Teensy 3.0 - 3.6
  • Two or three 3.5mm audio jacks (female)
  • Lead wires (red, white, black). Solid core works best for through-board soldering
  • Soldering Supplies (iron w/ fine tip, solder, flux, wicking braid (in case of mistakes))
  • Small diameter shrink wrap (for the wire ends on the audio jacks)
  • A small non-conductive box in which to mount the system (personal preference - you could always just shrink wrap it)
  • A USB battery or other 5V 1A power supply with a micro USB connector.
    -> Some have run power from their PA's battery using a step-down voltage limiter, but in the mean time I'm using a Patriot Fuel Active USB Battery (2000 mAh).
Overall, I think I spent perhaps $65 or so total, including the boards + shipping, the USB battery, the plastic box, and the mic jacks, but not counting the 2GB MicroSD card or PA system and wireless mic that I already owned.

Thanks to his tutorial on the TK Talkie site (tktalkie.com), doing this project was a breeze. I used two 3.5mm jacks for the Line In and Line Out (I had a third for the Mic lead to use for a backup wired mic, but running the leads from the board to the mounting spot in the box was awkward and I removed it for now). Since I use a wireless mic, Line In is better suited for a non-amped input. The Line Out delivers a non-amped output to my Pyle Pro, wherein I can connect to the Pyle Pro's Mic or Aux jack.

On the software side, for getting files onto the SD card (namely the starting config and the sound files) I used a MicroSD USB reader for my computer, and then installed the card into the Teensy once finished. The Teensy software work is all done by USB cable from the Teensy to your computer.

Although I've yet to purchase a 3D printer (some day, I hope), I was able to purchase a small box from my local Orvac and attach a hobby box hinge (you can get these at craft stores like Michael's or Hobby Lobby) to it to access the MicroSD card that stores the board's config and sound files.

That little circuit board in the middle is the TK Talkie.
So small, so simple, so awesome.

At first the system didn't work out so well. I believe it was because of the default config's bitcrusher settings (the bitcrusher is the part of the program that makes one's voice sound tinny). Later I ended up using the config posted by TK81113, and besides turning up the effects_gain to 0.5 to help make the radio static pop out more, it suited me fine. I've reprinted TK81113's config here for reference:

        # Set overall output to about half
        [volume=0.5000]
        # Line-In level. Valid values are 0 to 15
        [linein=7]
        # Line-Out level output. Valid values are 13 to 31
        [lineout=27]
        # Plays when TKTalkie starts up
        [startup=STARTUP.WAV]
        # Background loop
        [loop=CHATTER.WAV]
        # Background loop volume
        [loop_gain=0.010]
        # Voice channel gain on the mixer
        [voice_gain=0.3500]
        # Trigger level to turn on speaker when I start talking
        [voice_start=0.1700]
        # Limit to turn off the speaker when I stop talking
        [voice_stop=0.020]
        # Amount of time to wait (in milliseconds) before playing a sound effect
        [silence_time=350]
        # Not using a PTT
        [button_pin=0]
        # Sound to play when PTT is pressed
        [button_click=TKT_CLK3.WAV]
        # Button sound effect volume
        [button_gain=1.0000]
        # 1 = Microphone, 0 = Line-In
        [input=0]
        # Not used since I'm using Line-In
        [mic_gain=15]
        # Volume level of the sound effects on the mixer
        [effects_gain=0.2500]
        # Equalizer: 0 = off, 1 = Bass/Treble, 2 = Parametric, 3 = Graphic
        [eq=3]
        # 5-Band equalizer since I'm using graphic. Values are -1 to 1.
        [eq_bands=-0.75,0.00,-1.00,0.00,-1.00]
        # Gives the voice a tin-can sound
        [bitcrushers=16,41000,16,8096]
        # Background noise level for when I'm talking
        [noise_gain=0.1500]
        # This is only used when using a serial interface to program in real-time
        [debug=0]

The fun thing about this system is that you can make adjustments on the fly using the Arduino software's built-in serial console which runs over the same USB connection you use to program it (for you old-school types, no need for an additional terminal emulator or USB to serial adapters). This was especially helpful in making my adjustments in real time to drill down the system. Running the calibration command was also useful in dialing in the voice_start and voice_stop parameters. If you use the console commands, remember to use the save command to commit your changes to the SD card's config file.

I also replaced the default "too short to be a stormtrooper" startup sound (no offense Carrie, Requiescat in Pace) with a custom sound. It's pretty easy to do: just find or make a WAV file you want to use, rename the old startup sound file (best not to delete in in case you want to use it again), and save your new sound file to the SD card as STARTUP.WAV.

Another note is that the sketch (source code) and Teensy board are very customizable. Although some of the pins are in use by the audio board, other analog and digital pins on the Teensy can be used for additional buttons and dials. For example, one could make a dial to turn the volume on the background loop up or down, or maybe just a button to start and stop/ pause it. KMan and I were scheming up making a daughter board/ control riser connected to the teensy with a modular connector, so that controls could be surreptitiously placed in an easy-to-reach place, like near the edge of the chest plate, so settings could be adjusted on the fly through buttons, dials, or other human interfaces. I may have to experiment in the future, although   TK81113 has stated that he'll also be coming out with his own set of updates in the future.

Props for non-canon troops

For non-canon props (like these and the orange pauldron I sometimes sport), 501st members should check with their garrisons for what's allowed. For LFL (official LucasFilm Limited) troops these props aren't allowed, but otherwise each garrison has their own rules for what to wear with a costume.

Going back to background loops, another piece I recently received from my awesome wife for the holidays was the Bluetooth Star Wars Comlink from Episode 4. Here's a YouTube unboxing video of the comlink.


The white clip that ships with it, as you might be able to discern from the video, is a bit crap, especially for TK duty where an errant arm swipe could easily knock the thing off one's belt. So I fabricated a holder for it using some scraps from an old belt and four rivets. I used about 8" for the belt loop (3" for each side plus an inch on each end to fold over and for rivet overlap) and a small but to fit around the comlink with enough overlap for rivets. The trick is to soak the belt loop piece in water until it's saturated, then clamp it onto shape until it dries out. This give the crisp belt holder shape to the leather so you can rivet the overlapped ends together, and then rivet the comlink holder loop to that.

My phone (to which the device links) sits in a cheat pouch also attached to the right side of my belt.

Comlink and leather holder shown here during a recent troop


Close-up if the comlink holder. Two scraps of old belt + four rivets.

Overall, the comlink worked well. It isn't very loud but loud enough to give some atmosphere. The main problem is that it's essentially a Bluetooth headset (yes, you can make and receive calls with it) and only has a 1.5 hour talk time (especially with the volume turned all the way up). For longer troops, that might be an issue. In the future, I'm hoping to run a background loop through the TK Talkie, either as-is or with a volume dial or on/ off button.

I'll have to add a photo of my phone pouch, but it's essentially just a gloss 3" x 6" (approx) black leather pouch with a triangle closure and a single snap. I riveted a belt loop onto the back to attach it to my belt for non-canon troops. It could also be used for bin/ car keys, trading cards, etc.

That's it for now. I'm always fiddling with things, so I'll post more when I have something else to talk about. Until next time :D

Monday, April 11, 2016

Final Touches Pt 2 - Electronics

Once the E6000 was dry for my tabs in my chest plate, I took out my Pyle Pro, removed the neck/ waist strap that comes with it, got some extra Velcro loop (that I purchased for my boots), and fashioned a harness to keep the box in my chest plate. I don't currently have an iComm, so it will sit center in my chest. With the E6000, I can easily change this configuration if/ when I pick up an iComm.


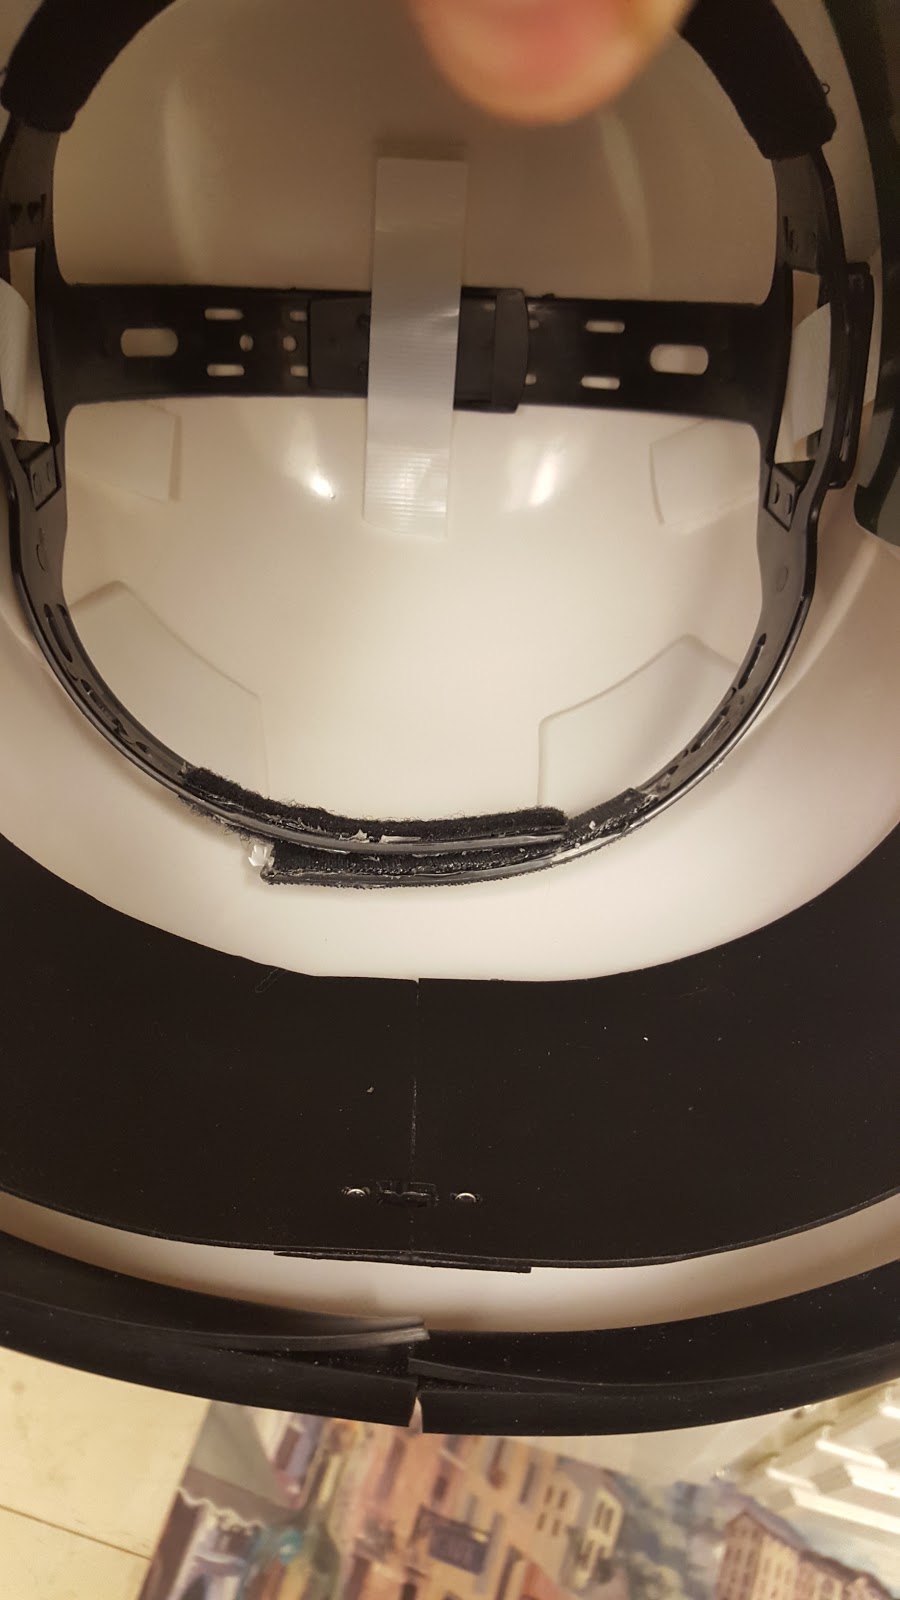
After getting all the other items taken care of, it was time to finish the helmet fans I had started a month ago while working abroad. All the pieces were there, but I had to re-solder all the joints to fix a cold solder joint (it ended up being a lead from one of the battery boxes).

Before I started fastening the wiring and fans in place, I used two 40mm x 40mm pieces of screen (leftover material from a screen window kit) over the fan holes, to protect my face from the fans during operation. These were fastened in place with low temp hot glue. The fans themselves are 30mm x 30mm, leaving area for the screens' hot glue without interfering with getting the fans flush with the blank.


I started by gluing the battery boxes with low temp hot glue on either side at a correct width such that they'd fit inside the respirator areas at the bottom of either side of the helmet (in-universe schematics for the helmet can be viewed here :D). I had to do and redo this a couple of times to ensure that the wires had enough slack to bend when the blank was curved to fit into the helmet. It made some of the PlastiDip pop off of the blank, but this is the side that will be hidden, so it hasn't a big deal so long as the pieces stayed in place when the glue cooled. I then fixed the switch into the blank with twisted and trimmed silver wire, and reinforced with low temp hot glue.


Finally, I added some cable keepers to the back for cable management. Cables were secured using more twisted and trimmed silver wire. The screws that came with the fan were meant to go through the fans' mounting holes and into the material, so I had to use replacement screws that went through the blank and secured into the fans' mounting holes (fortunately I've built more than a few desktop PCs and have plenty of spare mounting screws).

When finished, the business side looked like this:


Here's the side the will face towards the inside of the helmet:


When mounted in the helmet, the fans sit behind the inductor filters (where the Hovi mic tips are mounted).


The back center of the helmet has the switch that turns both fans on and off.


Overall, the fans are a little noisier than I expected. Like the Echo fans, I may add foam to contact points on the blank to reduce vibration of the fans against the helmet and therefore reduce noise. I'll have to do some initial testing to see how well this will work and find optimal placement of the foam. I could also replace the digital switch with a slide switch to control fan speed and noise.

I plan to PlastiDip the inside of the helmet, but not until I have 501st approval, so I have one less thing to worry about if approval doesn't go smoothly and I need to fix or replace something. I'll cover my submission on the next blog!