Featured Post

The TKTalkie v4 - Press 6 for the Imperial March

Upgrading - the Path from v3.15 to v4.0 (Note: I had started this draft last year but never finished it, due to personal issues and cuttin...

Showing posts with label knee. Show all posts

Saturday, April 9, 2016

Final Touches Pt 1 - Let's Touch ALL THE PIECES

As I get into the final stretch of this build before submitting for the 501st as IEB (Tier 2), I need to correct the issues I found during my last fitting.


First, I started with the rivets on the left side of the armor. I scuffed up the heads with 350 grit sandpaper, being careful not to scuff the armor, and then painted them gloss white per the CRL.

Next I wanted to tackle the extra Chicago screws in the belt that are not in the Stunt CRL but have been installed by ANOVOS. Instead of removing them and covering up the holes, I doubled down and not only kept them, but added washers to the upper two. The reason behind this was that I've already seen the two remaining screws tear through a few ANOVOS belts, so I wanted to keep all the screws to give the belt extra strength - not only that, but reinforce the upper two screws, as I was going to cover them up with iron-on patchwork.

My main issue is that the patch I had was too white. So to rectify this, I made a tea bath to stain the patch off white; then, I soaked the patch in the tea bath for less than a minute.


The patch came out a shade darker than the belt.


I ran it through a slight bleach soak. After that, it was about as right as I could get it without messing it up. But before I installed the patches, I installed the washers with the Chicago screws. Then the patches were installed over all that hardware.


I also took the time to put some loop tape over the hardware on the back of the belt, as the screws and rivets scratched my armor during the last fitting.


I gave the clips on the thermal detonator a similar treatment.


One of the things pointed out during my fitting was my wandering right shoulder strap. Without the elastic loop to keep it in place, it wanders too far center (at least I'm hoping so; otherwise I'll have to remove and re-glue it). For those loops to work correctly, though, I'll need a wider cloth shoulder strap underneath it.

the Stunt CRL for Centurion specifies that the cloth part should be white, preferably elastic. This being the case, I decided to take the plunge, deconstruct the ANOVOS shoulder straps, and replace part of them with white elastic. First I took 2' wide elastic and cut two lengths equal to the length of the current ANOVOS straps. I sealed the ends with CA glue to prevent fraying.


Next I took apart the ANOVOS straps by cutting the threading with a hobby knife; then I used those pieces along with the white elastic to make the new shoulder straps. I hate sewing, though, and decide to use E6000 to glue everything together.


After letting them site for a day, they came out very good. I simply needed to use some extra glue and magnets to tap down some stray corners.


Besides that, I also:

*Added elastic cinches to my TK Boots to make getting them into the shin armor easier (loop tape on the heal helps with initial placement and tightening)


*Trimmed the hand guards down for better presentation (untrimmed one on left, trimmed one on right). Used a hollow sanding on the front and back to add some curvature for better fit.


* Cleaned up the eyes of my bucket with the Dremel sanding drum, a hobby knife, miniature files, sand paper, and raw nerves (messing up was not an option).


* Refitted the sniper knee for better fit (NEEDED MORE CLAMPS):


* Cleaned up the right shin from a mis-installed sniper knee (thanks Shingate!)


* Glued down the final edges of the flannel I installed on the bottom of the shins to prevent damage to Te TK Boots


* Painted the rivets and gluing down the ammo pack on the right thigh


* Covered up the inside ends of the split rivets with low-temp hot glue to avoid catching on the undersuit (or my skin, for that matter)


* Cleaned up the ABS paste fill I did on the bottom of the left thigh to get rid of a huge armor gap


* Added some strap loops inside the chest piece for my Pyle Pro amp, using spare ABS from the kit


Finally, I also worked on the fan system for my helmet. I finally determined where the fans would be placed. I measured and marked the blank for fan placement. Using one of the fans and a Dremel burr, I marked where to drill the mounting holes, and then used a drill but to drill them out. I also used a Dremel cutting disk to mark a cut-out for the fan blades, but not how you might think. The disk only provided the stencil.


Using the drill and a drywall bit, I was able to remove the circular section; then I used the Dremel sanding drum to clean it out.


I then marked and cut a square hole for the switch in a similar manner, using a hobby knife for the 90 degree corners. The holes to either side of the square cut-out will be used to mount the switch to the blank.


Lastly, I clean the blank of burrs, sanded it, and commenced to coat it with PlastiDip spray.
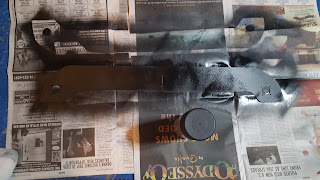

That's it for tonight. And after tonight, the only thing I'll really want to do before sending approval pics is finish the fan system and get the Pyle Pro mounted in the chest piece. I eventually want to PlastiDip the inside of my bucket, but I plan on doing that after approval (if I mess up, it will delay me getting good approval pics).

Tuesday, April 5, 2016

Fit, for Imperial Consumption

I've been working on this armor on and off since 31 January. I figured it was about time to throw it all on and see how everything fits together.

With some help from my wife, getting our older child to bed and then helping me with the thermal detonator and the right shoulder bell, I was able to get everything on.

Assembly happened in the following order:
  • Socks and underwear
  • Compression pants
  • Neck seal
  • Compression shirt
  • Ab garter (for my gut, underneath shirt)
  • Thigh garter belt (over shirt)
  • Thigh armor
  • TK Boots
  • Shin armor
  • Ab armor/ posterior plate/ kidney plate/ belt/ back plate (hanging from kidney plate))
  • Chest plate (moving back plate into position)
  • Fastened belt
  • Arm armor (already connected to each other)
  • Fastened shoulder bells to straps (assist from wife)
  • Thermal detonator (assist from wife)
  • Gloves
  • Hand Guards
  • Helmet
Here's the initial look:


My initial findings:

  • I need some tape or low-temp hot glue over the split rivets, especially for the right knee. The rivet ends like to poke into my undersuit and skin (ouch).
  • I need some white H&L tape to help cinch the TK boots to my legs to help with fitting the shin armor 
  • My left kneecap was getting pinched between the thigh and front of the shin. I trimmed that part of the shin. I might also get some foam to put behind the front of the shins to add extra cushion.
  • The back of my left knee was getting pinched between the thigh and shin armors. My thigh pieces are sitting too low, but especially my left thigh. I adjusted the loop tape in both thighs to be optimal and as symmetrical as possible (so the thighs are at the same height).
  • The snap loops for the garter belt were twisting. I'll attempt to reinforce these with E6000 to help them keep their shape. I may also try using them inverted to help control torsion.
  • I need to finish mounting my helmet fans; that bucket's like a sauna.
  • Still need to paint some of those rivets white.
  • Tighten that garter belt to keep the right side from popping out near the bottom (and do some crunches :P ).

After passing it into the FB ANOVOS group, they offered the following additional comments:

  • Right shoulder strap seems off. If making the strap keepers doesn't adjust it properly, I may need to re-mount it. Bothersome, but doable.
  • I need to trim my hand guards and adjust for fit. Making a hollow sand (curving in towards the middle) is my first thought, but I'll also probably trim the total thickness. I honestly haven't trimmed this since cutting them out of the blanks.
  • The bucket seems a bit high. I did modify the fit for the stock ANOVOS helmet strap to sit farther back to accommodate my glasses inside the bucket. I'll have to ensure this ins't causing any issues, or else mount old glasses inside the bucket instead and re-mount the head strap.
My wife is impressed and posted a picture to FB. My stepmother asked, "Is it done done or does it still need final fitting and tweaking?" She owns a '68 Mustang (not the sport version, mind you) that's been restored a few times (the salt they use on Midwestern winter roads doesn't help classic cars), so I replied, "It's like your Mustang; it's never really done :-P But it's pretty close to being ready for trooping ;-)"

That being said, it seems that I only have some minor fixes to make before being ready for my approval photos, which I plan to do at my squad's next armor party on 17 April at the latest. That should give me plenty of time to buff out the scratches on my right shin due to the colloquially-named "Shin-gate," as well as working on the minor issues above.

In addition, my squad had a bulk buy-in from HyperFirm. I would love to have the time and patience to tweak my Disney blaster into something more screen-accurate, but ultimately it wouldn't be fit for Centurion, which I'd like to eventually get once I piecemeal more items together (like a Kittle belt and latex hand guards). All in all, I'm getting an Elite E-11 for the piece of a standard E-11. And once again, my wife supported me, thanks to us having a little extra money.

More blog posts will come as I continue these minor tweaks and personal touches, until I'm 501st certified :) Until the next post...

Monday, March 14, 2016

The SoCal Garrison OC Squad Armor Party - Thighs, Abs, and Buttons

Yesterday was the armor party. And until my first big troop, it will be hard to beat this event.


More images by Wayne Kaataa:


More images by Roger Chacon:


Here I am talking to a friend of mine in her Anovos TK armor:


The party was coordinated by the Orange County Squad of the Southern California Garrison. Many of them were on hand to give build advice and talk about the 501st as an organization.


It used the food court of a local large high school. with each person able to use a whole table for his or her armor projects. There was plenty of work space, power, and wisdom to go around. And a droid:


And also, belt sanders.


At one time, up to four sanders were deployed, all in use at one time or another. I took advantage of these along with several other builders, many of who were first time builders such as myself. Having completed a bit of the build myself, I had several people asking me questions about how they should assemble and trim limb pieces; I gave them what advice I had and also pointed them to this blog. It cut into my build time but worthwhile to help out fellow builders.

Edit: DO NOT trim thighs for length until the end of your build. Mistakes were made. Consider the following a cautionary tale.

Although I wasn't able to get enough done in time to start fitting, I was able to get quite a bit done towards that end. First, let's talk about thighs. After talking with future squad mates, it was decided that they needed to be trimmed down from the top. At first I started small, but I was wasting so much time cutting and belt sanding that I derided to size up my left thigh first, and then make the same changes to the right thigh. I don't have many "before" shots of my left thigh (save in my previous posts), but here's an "after" shot:


In total, I trimmed almost 3" off the top so that the pieces wouldn't gouge into my hip bones when I flexed my legs or leaned over. I simply aped the contour line of the original armor to the length I measured up the strip, cut with the Dremel cutting disk, and sanded using the sanding melt. I repeated this on the right, except I cut much more off in one go now that I had a good idea as to how much to remove:

Cut... cut more.. and more...

I may also trim down the back top of the thighs, once I get more fitting done.

I also knocked out the back of the knees on both thighs and shins while I was at it, as well as cleaning up some inside edges to avoid armor bite.

How do you cut curves with a Dremel cutting disk?
Carefully.

Also, I was the guy in the green running shirt and compression pants. HI!!!

I cut out the shoulder straps and buttons as well, finally. These were the last pieces to get cut out from the molds:

Before belt sanding... and after!

The squad recommends to glue reinforcement ABS strips on the the inside back of these pieces, as they're prone to snapping in half lengthwise. I'll perform this step at home.

After trimming the thighs, it was finally time to start adding straps. because I need the ab plate to dictate the position of my chest plate, I plan to star strapping from the bottom up. However, as I forgot to bring a regular standard screwdriver (my Leatherman notwithstanding) I screwed up my first split rivet (on my kidney plate, so easy to remove if it comes to that, thankfully), and almost my snap tool as well. I salvaged the snap tool but decided to leave the strapping for after the party, where I have plenty of screwdrivers and also metal taps. I was, however, able to fasten the two snaps in the cod piece, and made sure the cod strap would fasten, so there's that (sorry, forgot to get a picture).

That was it for the day. They were wrapping up the event when I left with a raffle for, ironically, helmet fan systems (see my previous post). All were included, and had I won, I probably would have given it to a needy trooper since I'm well on my way towards making my own. I was going to work even more on my armor last night after the kids went to bed, but due to the Daylight Saving Time change (and my kids not adjusting too fast too it), combined with the COLD THAT JUST WON'T DIE, I needed rest. Until the next session then...