Featured Post

The TKTalkie v4 - Press 6 for the Imperial March

Upgrading - the Path from v3.15 to v4.0 (Note: I had started this draft last year but never finished it, due to personal issues and cuttin...

Showing posts with label sniper. Show all posts

Saturday, April 9, 2016

Final Touches Pt 1 - Let's Touch ALL THE PIECES

As I get into the final stretch of this build before submitting for the 501st as IEB (Tier 2), I need to correct the issues I found during my last fitting.


First, I started with the rivets on the left side of the armor. I scuffed up the heads with 350 grit sandpaper, being careful not to scuff the armor, and then painted them gloss white per the CRL.

Next I wanted to tackle the extra Chicago screws in the belt that are not in the Stunt CRL but have been installed by ANOVOS. Instead of removing them and covering up the holes, I doubled down and not only kept them, but added washers to the upper two. The reason behind this was that I've already seen the two remaining screws tear through a few ANOVOS belts, so I wanted to keep all the screws to give the belt extra strength - not only that, but reinforce the upper two screws, as I was going to cover them up with iron-on patchwork.

My main issue is that the patch I had was too white. So to rectify this, I made a tea bath to stain the patch off white; then, I soaked the patch in the tea bath for less than a minute.


The patch came out a shade darker than the belt.


I ran it through a slight bleach soak. After that, it was about as right as I could get it without messing it up. But before I installed the patches, I installed the washers with the Chicago screws. Then the patches were installed over all that hardware.


I also took the time to put some loop tape over the hardware on the back of the belt, as the screws and rivets scratched my armor during the last fitting.


I gave the clips on the thermal detonator a similar treatment.


One of the things pointed out during my fitting was my wandering right shoulder strap. Without the elastic loop to keep it in place, it wanders too far center (at least I'm hoping so; otherwise I'll have to remove and re-glue it). For those loops to work correctly, though, I'll need a wider cloth shoulder strap underneath it.

the Stunt CRL for Centurion specifies that the cloth part should be white, preferably elastic. This being the case, I decided to take the plunge, deconstruct the ANOVOS shoulder straps, and replace part of them with white elastic. First I took 2' wide elastic and cut two lengths equal to the length of the current ANOVOS straps. I sealed the ends with CA glue to prevent fraying.


Next I took apart the ANOVOS straps by cutting the threading with a hobby knife; then I used those pieces along with the white elastic to make the new shoulder straps. I hate sewing, though, and decide to use E6000 to glue everything together.


After letting them site for a day, they came out very good. I simply needed to use some extra glue and magnets to tap down some stray corners.


Besides that, I also:

*Added elastic cinches to my TK Boots to make getting them into the shin armor easier (loop tape on the heal helps with initial placement and tightening)


*Trimmed the hand guards down for better presentation (untrimmed one on left, trimmed one on right). Used a hollow sanding on the front and back to add some curvature for better fit.


* Cleaned up the eyes of my bucket with the Dremel sanding drum, a hobby knife, miniature files, sand paper, and raw nerves (messing up was not an option).


* Refitted the sniper knee for better fit (NEEDED MORE CLAMPS):


* Cleaned up the right shin from a mis-installed sniper knee (thanks Shingate!)


* Glued down the final edges of the flannel I installed on the bottom of the shins to prevent damage to Te TK Boots


* Painted the rivets and gluing down the ammo pack on the right thigh


* Covered up the inside ends of the split rivets with low-temp hot glue to avoid catching on the undersuit (or my skin, for that matter)


* Cleaned up the ABS paste fill I did on the bottom of the left thigh to get rid of a huge armor gap


* Added some strap loops inside the chest piece for my Pyle Pro amp, using spare ABS from the kit


Finally, I also worked on the fan system for my helmet. I finally determined where the fans would be placed. I measured and marked the blank for fan placement. Using one of the fans and a Dremel burr, I marked where to drill the mounting holes, and then used a drill but to drill them out. I also used a Dremel cutting disk to mark a cut-out for the fan blades, but not how you might think. The disk only provided the stencil.


Using the drill and a drywall bit, I was able to remove the circular section; then I used the Dremel sanding drum to clean it out.


I then marked and cut a square hole for the switch in a similar manner, using a hobby knife for the 90 degree corners. The holes to either side of the square cut-out will be used to mount the switch to the blank.


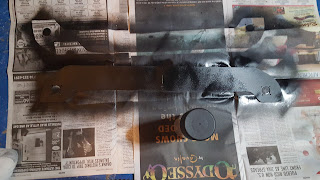
Lastly, I clean the blank of burrs, sanded it, and commenced to coat it with PlastiDip spray.

That's it for tonight. And after tonight, the only thing I'll really want to do before sending approval pics is finish the fan system and get the Pyle Pro mounted in the chest piece. I eventually want to PlastiDip the inside of my bucket, but I plan on doing that after approval (if I mess up, it will delay me getting good approval pics).

Wednesday, March 2, 2016

That Darn Sniper Knee, the Undersuit, and Them Boots!

Why no blogs lately? Well, I had a bug problem in my house, and it actually took a slight amount of destruction to root out the cause and eliminate their food source, between Sunday and Monday night, working until past midnight each night. Tuesday I finally got out of the house with my wife to see Deadpool (I loved it) and went to bed early, considering my past two nights. So I didn't get any building done.

BUT!

I've received more than a few requests regarding the sniper knee on the left shin - apparently I've become something of a shin-obi <RIMSHOT>. How does it go on? Why does it look better on the right shin? How can I secure it?

The simple answer is that you need some "gentle persuasion" (read: CLAMP THE HELL OUT OF IT) and at least three clamps (more won't hurt). You may also need to trim the right edge of the knee pad (as it's worn on the shin; that is, the side facing the body's center line).

Here are some pictures from a previous post, Sexy Knee and Shapely Thighs:


So here's the trick tot the sniper knee: according to the 501st CRLs (which are a good reference even if you're not going for approval) the knee plate should follow the contours of the shin piece and not use any rivets if possible.

The trick here is to measure twice, cut once (if necessary, and it probably will be on the aforementioned side), and glue in place. To measure properly, though, clamp the pad in place AS IF you were going to glue it. The reason why is that this piece is going to need flexing to get in place, which pushes the edges of the guard out. If there's any overhang, you'll want to ensure you cut off the correct amount instead of having to worry about it after the piece is glued in place.

Speaking of flexing, for the interior corners of the knee plate, round them out. DO NOT leave any sharp angles; they're very prone to forming cracks over time (especially since the piece will be flexed into place), meaning that at the least you'll probably have to repair them with ABS paste; at worst, you'll have to find a new knee plate.

You could also try a hot water bath to help shape the piece to proper fit; I've never done this, but I know that USKWrath has done so with some of his pieces.

Once you have the piece measured and cut, mark the places on the shin where the edges of the plate make contact. Then, scuff the points just short of those marks with sanding paper; also, scuff the top of the center strip at the knee. Scuff the interior of the knee plate at the same points. Put down some E6000 on the scuffed shin.

Then, clamp the edges, then center, of the knee pad in place. This will require some back-and-forth between clamps so that you can match the contour of the shin as best as possible while getting the center of the pad to make as much contact with the shin as possible. You'll probably have a gap on the bottom of the pad between the pad and shin, but try to keep it minimal (a small gap, BTW, is screen accurate :P)


Update: here's a method used by Josh Silverback Hopkins using 7 (!) clamps. Note how he also uses a clamp to keep the shin closed while cementing the knee plate, in order to make the job easier. Two clamps on each side of the center of the plate, and two on each edge.


The results are fantastic.


Sniper knee aside...

With me getting ready for fitting, and my Anovos soft parts not yet shipped, I decided to take it upon myself to get something that would pass for an undersuit.

I tried a few department stores (Costco, Target, WalMart), but nobody had any long-sleeved compression shirts in stock anymore as they're getting ready for spring and have limited shelf space. I ran out of time to get to a sporting goods store before needing to pick up my son, although a place like Dick's Sporting Goods would almost certainly have what I needed.

Therefore, I was resolved to find something online as to not waste more time pecking and pawing through brick & mortar stores. I asked the Anovos FB Group for advice, and received several recommendations, including the Russel Training Fit compression shirt (Walmart Supercenter), BCG compression pants (Academy Sports), and a FlexFit compression set (Kohl's). However, since I was cycling to work Wednesday and Thursday, going out to a store wasn't really in the cards for me, hence the online shopping, although having some brands in mind was good, and worth mentioning here to anyone also looking for solutions for a spare undersuit.

There are a lot of Under Armor fans out there. It's a little more pricey, but its advocates swear by its sturdiness. From my POV, though, understand that I need to spend money on home repair, I had to drop over $100 on TK Boots, and I'd still like to pick up some parts for my Disney Parks E-11 blaster that will need to come from England (~$40). Right now, I just need a suit that will do for fitting and light trooping, so I'll consider Under Armor later, especially if it's on sale :)

Ultimately, I went with something inexpensive but with good Amazon reviews: Time to Run Men's Compression Wicking Running Top and Time to Run Men's Compression Tights. Certainly not as fancy as Under Armor, but it will get the job done for now and isn't terribly expensive. They're also on Amazon Prime as my wife and I are members. Also on Prime were Alaska Bear Natural Silk Thermal Glove Liners and a Vega Vega Logo Soft Cloth Helmet Bag, which I also picked up. Previously, I also picked up this Sterilite 40 gallon container at Target for less than $20 for armor transport - it should fit everything short of the helmet, or at least that's my hope :P

Finally, I paid for my TK Boots last night and received shipping confirmation. I'm looking forward to seeing them and trying them on :D

Thursday, February 25, 2016

Stripping Them Thighs

... so hopefully this will be the last time I need to attach the sniper knee to my shins :P Still need some Novos to help clean up the other shin.


Anyhow, it was time to start setting the strips on the thighs. I measured the taped-together pieces one last time to ensure the dimensions were good, or at least close. Using UKSWrath's reference, you can see that the strips don't go all the way down to the knees, so after sanding one side of each strip, I measured using the actual strip and sizing it up to the longer of the two sides. I can trim down later after gluing.


Once the strips were marked for length, I put the center line down the sanded side of the strip to help ensure I didn't glue too much onto the one side of the thigh.


After that, it was just a matter of scoring & snapping the strip, beveling the corners with the Dremel sanding drum, applying the E6000 to the thigh piece, and clamping on the strip. Wash, rinse, and repeat three more times for all four edges.


I originally decided to not join the two thigh sides together at the front in case I needed to trim more, but in hindsight that's a silly notion, since if I were to need to trim, I'd be trimming off the back of the parts anyhow, not the front edge return. Besides, these thighs are pretty snug already, so it's very doubtful that I'd need to trim. But it is what it is, and at least doing it this way will make forcing the two butt joints together a bit easier without worrying about the strip sliding off while trying to get the two ends clamped in tight.

You'll also notice that I inadvertently did the treatment for the outside of the right thigh and the inside of the left thigh. Chalk that up to trying to rush the step before it got too late. Again, I doubt I'll need to trim any more, but I'll know more after the strips set and I can tape them together one last time before gluing. If I have to remove a strip for the purposes of trimming the thigh pieces, worse things have happened :P


These are the only pieces I have yet to trim. I'm getting down to the point where I'll need to start worrying about installing strapping, rivets, and snaps. And I'm still waiting on my arming suit, gloves, and boots (which should be available next week with any luck). With an armor party coming up next Sunday, I'm looking forward to meeting fellow squaddies and TK builders, and getting some advice on final touches for the armor :)

Wednesday, February 17, 2016

The Shell Swap (... and This is Why I Use E6000, pt. 2)

I was set on not working on the armor last night. But there was a discussion based upon something that was gnawing at me, and could prove detrimental to my build.

Remember this picture I posted regarding the shins and the huge gap on the right shin closure, and the tight fit on the left shin closure?


A few other people were having the same issue. There was some discussion here and there about the possibility of the pieces being mixed up, not by the builders, but by the numbering Anovos put onto the pieces.

Looking at the back of the pieces as they were, I could tell something was amiss. The ankle profile (as they were taped up to simulate closure) also didn't fill me with confidence that I had the pieces assembled correctly.

This can't be right, can it? I know the kit is "screen accurate," but...

Having used E6000, and despite the pain it would be to test the theory, I did the only sensible thing I could think of, and pull the pieces apart, almost down to the strips. And then I started assembling them by swapping pieces.

After several iterations of test clamping, observation, and getting over denial, I came to the conclusion that the pieces were mislabeled by Anovos, and I had cut and assembled them incorrectly.

Here is the correct order of the pieces for my particular kit:


In this configuration, the pieces closed better in the back, the shins were both much more symmetric (as far as symmetry goes with this kit), and the curves lined up better in regards to the inner pieces curving for the calves inward more (approaching the ankles from the top) than the outer pieces.


Thankfully, I had cut the pieces rather symmetrically in that each piece was 8" near the knee and 6" near the ankle, making swapping them less painful. However, some of the pieces were still sanded in order to make adhesion better for the cement (for strips and the sniper knee), so I will need to get (sooner rather than later) some Novus 1-2-3 to remove those sanded areas.

So I removed some strips, cleaned up the old adhesive best as possible, paired the pieces together as they should be, re-cemented, and re-clamped/ placed magnets.


The back of one shin will have some extra scuff as that edge was sanded for the back edge strip that had to be moved to the correct piece. However, it will be covered up by the cover strip on the closure, probably using the H&L tape for the time being.

All in all, I think this will be complete salvageable. My problem probably isn't reflective of all kits, but if things are looking weird with your shins, consider that the labeling from Anovos may be incorrect. I'm not sure if it's related, but my kit was also missing the artwork (which is now being shipped separately from Anovos).

EDIT: there's no correlation between mis-numbered pieces and missing artwork. At least one kit I've heard of had the artwork AND mis-numbered pieces.

Edit: for the results of the swap, see my next blog post here.