Featured Post

The TKTalkie v4 - Press 6 for the Imperial March

Upgrading - the Path from v3.15 to v4.0 (Note: I had started this draft last year but never finished it, due to personal issues and cuttin...

Showing posts with label paste. Show all posts

Monday, May 9, 2016

The Thigh Re-Re-Master Pt 2: Mr. Sandman

It took longer than I wanted to finish this project, but other events took precedence, such as preparing for my century ride for the Tour de Cure in Long Beach and, of course, my family and home. However, once the Tour was over, I was able to finally finish these pieces.

Before I moved on to the final paste layer and sanding, I needed some build-up on the edge of my fabricated piece, as it was too thin and especially thinning near the edge due to sanding. What I did is used ABS paste build-up by scraping the paste off on the back edge of the piece. The considerable layering and build-up required me to wait until the next evening, after the paste had hardened, to sand and shape the build-up to match the desired edge shape and thickness.


That was the last of the major work needed to be done to the pieces, and all but exhausted the "build-up ABS" I had been using to this point. For the final front layer of paste, in order to get the best color match to the rest of the pieces, I whipped up some new, pristine ABS paste, making sure to use only fresh scraps (and ensuring that none had the terrible film that sneaked into my last batch and had to be fished out of my work constantly) in a new glass jar. This mixture was more liquid than paste to help ensure the coating was more uniform and less thick to reduce the amount of sanding required, since it was only being applied superficially and not structurally.

Once this paste was ready for application, I applied it using my fingers (using clean, washed hands) like one would do when finger painting. I dabbed a bit onto the seam area and spread it with my finger until the paste started to set, then I would repeat until the entire work area was covered. After coating the entire work area of one thigh, I moved to the other. When that thigh was done, as the paste set up fast due to its thin coat, I started sanding the first thigh with 150 grit paper to remove streaks, and repeated on the second thigh. I then repeated this entire process to add a second coat. Overall, it minimized the seams between the pieces significantly.


With that process done, it was now time for final sanding and polishing. this was accomplished using the following sandpaper grits and processes:

  • 350 grit
  • 600 grit
  • 600 grit wet
  • 1500 grit wet
For the wet sanding, for those unfamiliar with the process, I simply dipped the sandpaper in a plastic bowl of water to get the paper wet, and then sanded with the paper and water. This method helps to polish the area before final polishing, and is also used in automotive finishes.

As I sanded, I took care to look for deeper scratches (drying off wet areas with a paper towel to inspect work areas). If need be, I'd drop to a rougher sandpaper or start over on certain sections to help remove deep scratches.

Once I was satisfied, I applied Novus 3 and then Novus 2 plastic polish until the thigh was nice and shiny.


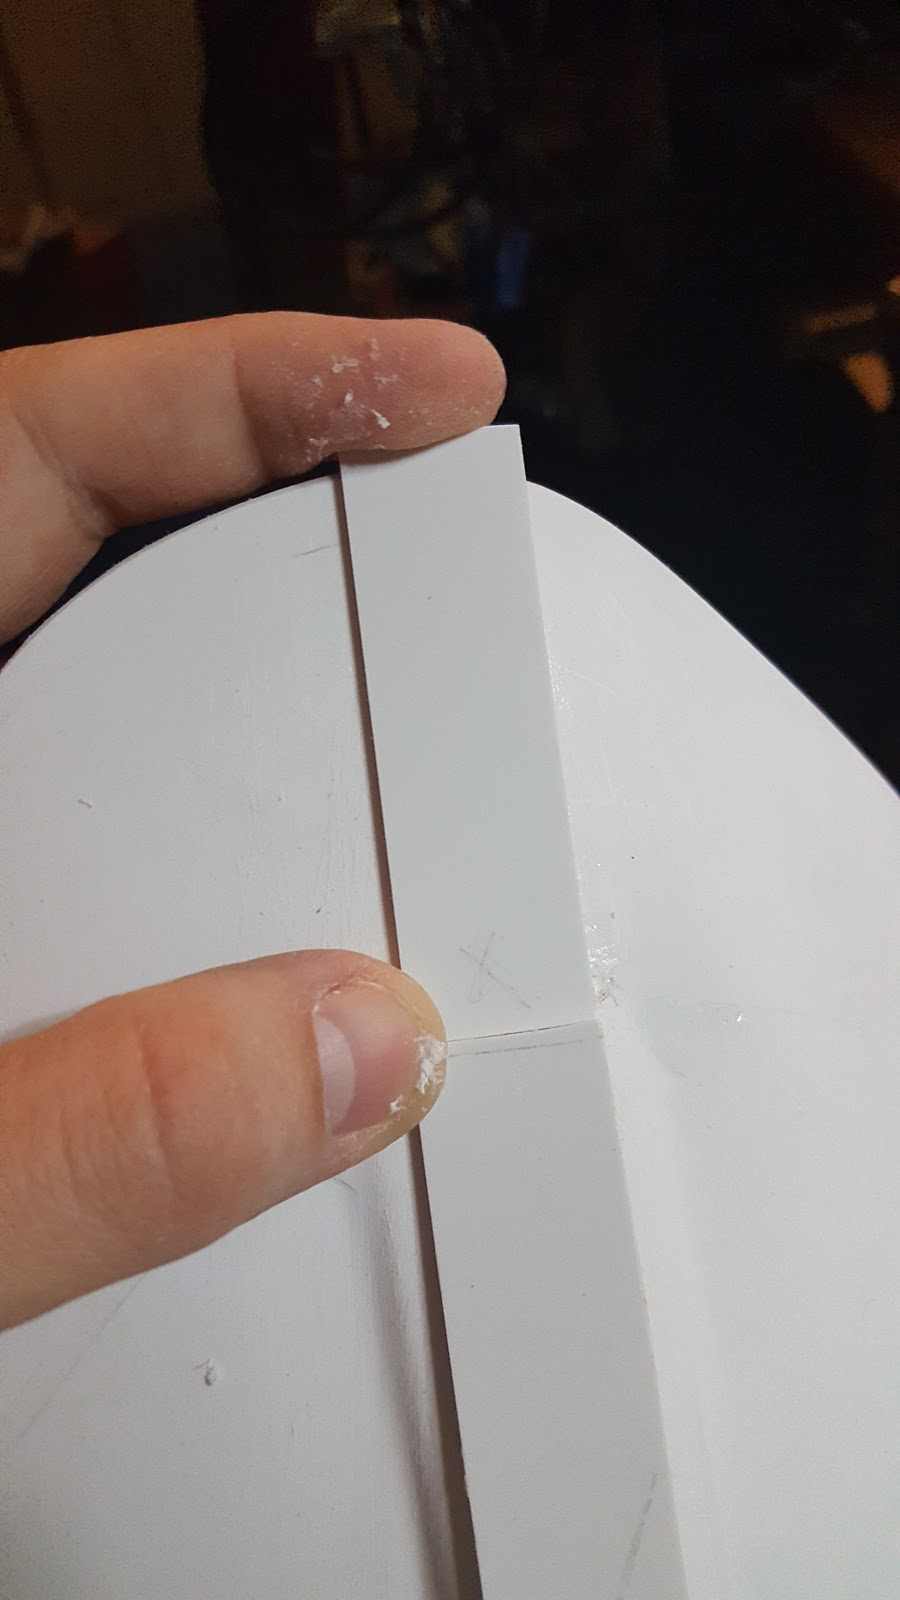
The above processes where also applied to the strips simultaneously. Satisfied with my work thus far, it was now time to re-apply the strips. I simply needed to cut a small amount from the top of one strip, notch both strips with 45 degree angles for aesthetics, and re-attache them to the thighs using good old E6000 (this gives me the option to replace the strips with new ones in the future). 24 hours later, and the pieces are fit for trooping once more.


There are still some scratches to remove from the multiple sanding sessions, but nothing more than what would be considered normal scuffing in most spots. In any case, I wanted to at least get the strips back into the pieces so I can continue removing scratches so I con polish them even further.

Overall, this rebuild took a bit of work, but I would have actually been finished earlier if not for the tour Tour most of all (as I had to get my gear ready for the century ride). I'm now ready, I think, to start pursuing my first 501st troop.

Obviously, there are still tweaks I'd like to make;with the addition of my HyperFirm E-11 blaster, I may end up replacing the limp ANOVOS belt with a more firm belt sooner rather than later, which will be a bit of work removing the plastic parts from the current ANOVOS belt due to the rivets and the dreaded pink glue on the rivet covers (I'll probably opt for another method to fasten the plastic to a new belt, as other troopers have). After I make some minor tweaks to the bottom of my shins (to further reduce rub against the boots), my hand guards (adding a second elastic loop to prevent slipping up or down my hands) and my abs plate (retouching button paint due to minor scratch), I'll through all the armor back on along with the new blaster and see how things go. And I still want to Plasti-Dip the inside of the bucket so I can work on future mods there.

Until my next update...

Monday, May 2, 2016

The Thigh Re-Re-Master: CTRL-Z, CTRL-Z

To recall from my last blog post:

The thighs, though, they don't go up any higher, and as you can see in my photo above, I'm showing way too much black on my hips. Sure, the thighs are comfortable to walk in, but they probably won't fly for EIB or Centurion approval.

I've honestly been thinking about this since I sent my approval in, and it's been one of the few things I've been fretting about in regards to the armor and being approved at all. So, I've decided to revert the thighs to (close to) original condition.

Thighs in their current condition not only look strikingly different from other TKs, but they could harm my chances of eventually taking this kit to EIB or Centurion status. It was time to revert them.

Reverting these pieces isn't like hitting CTRL-Z on an art file and undoing it magiacally. As I so sagely stated in a previous blog, to paraphrase, It's a lot easier to remove pieces than to put them back on.

Although I'm not yet completely done as of time of writing (6/2/16), I'm 90% there, and some have asked for pictures and description of the procedure, so let me document what I've done so far and make another entry later with the finished product.

Let's start with the thighs as they were for my 501st submission:


As previously described, they need to come up underneath the drop-down boxes on the belt, and hug the cod plate better.

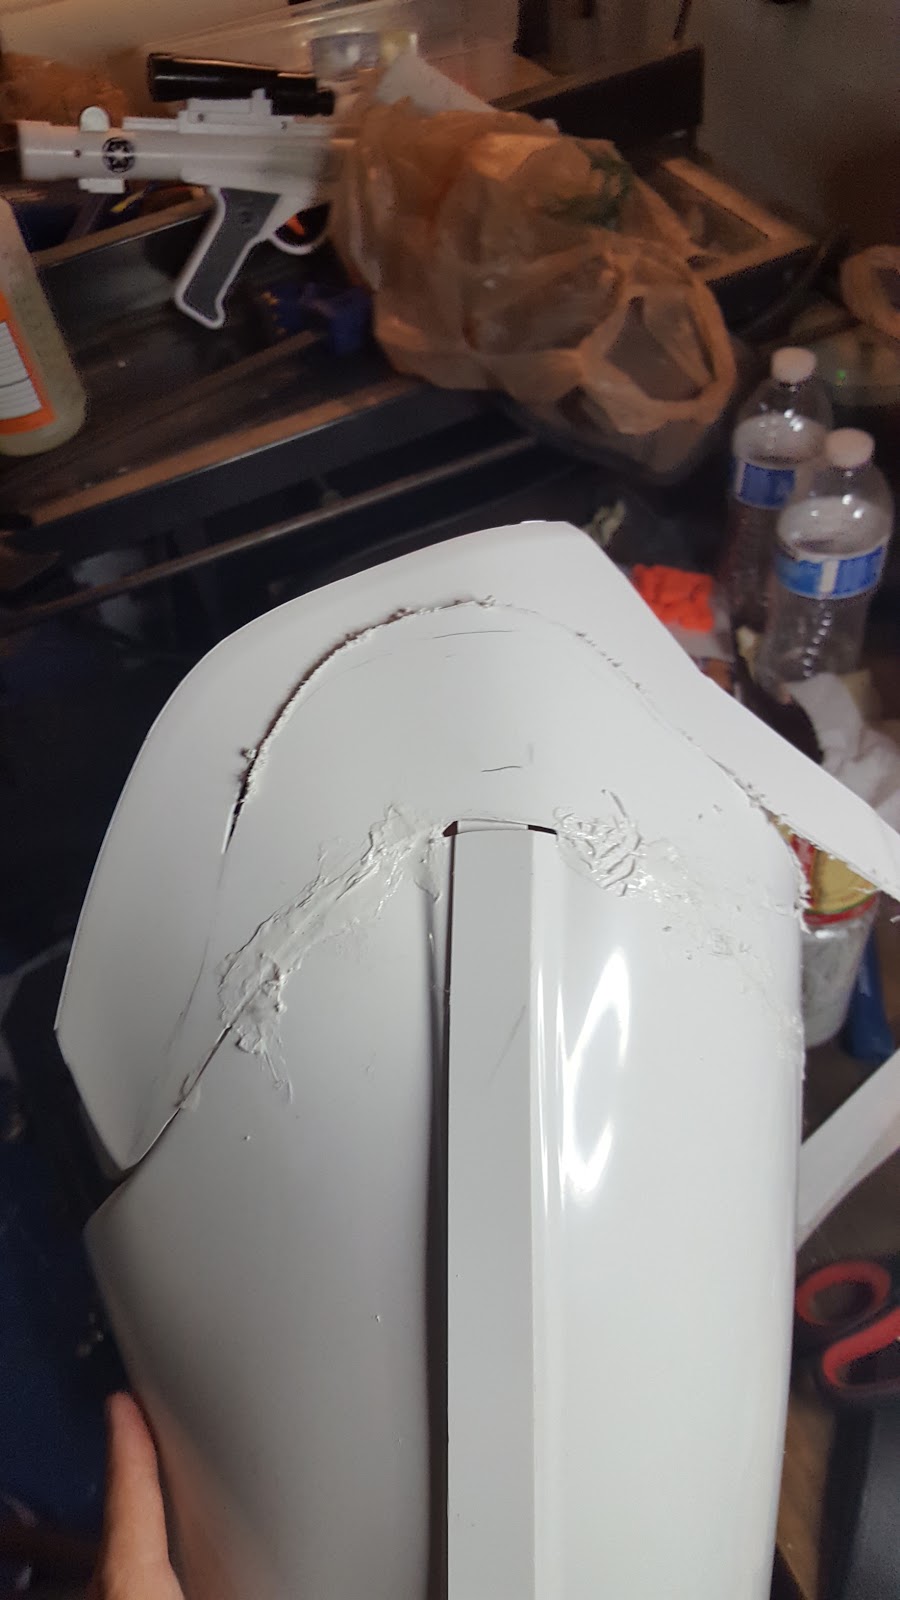
I first retrieved the last pieces I cut off from the outside of each thigh. I re-connected these by butt joining them to the thigh pieces with ABS paste and clamps, to better ensure that the re-added pieces were flush with the thigh pieces as best as possible. This was necessary to not only avoid unnecessary sanding, but to ensure that the pieces were as continuous as possible for a good look.


I then found the pieces I had originally cut from the top. One thigh had this as one large section; however, during my "fitting" I had cut the armor off in sections until (I thought) I had the right fit. This piece wasn't going to be fit for re-adding to the armor as it would require a lot of shimming in and of itself before I could consider shimming it back onto its original thigh.


I was, however, able to use the strips taped back together as an outline of what a replacement piece should be shaped like. Using these pieces and a spare piece of ABS cut out from the inside of the thigh during de-molding, I was able to fabricate a new piece for this thigh, in almost the same shape as the original. (Note that I've omitted the spiky points near the top as I find them terribly annoying.) Thankfully the edge return (on which the strip rests) for the fabricated section was minimal on the original pieces, and nothing I could't re-add with a few layers of ABS paste and sanding.


The top pieces were shimmed back on using backing supports, glued to the thighs and shimmed pieces using CA glue, as they'll be permanently attached and require added strength, since the tops of the thighs take extra stress as they often get crammed into a trooper's hip when the leg is flexed. Other strips were also added to the sides to help retain the shape of the thigh in those areas.


Once cemented in place with CA glue, ABS paste as added to the joints to form the pieces together with the cover strips neat the top of the thigh pulled away to access the whole jointed area.

To be honest, the easiest way to apply ABS paste in these situations is to just use your fingers. This way, you can press it into the cracks, smear the more liquid paste like finger paint, or sculpt more solid paste like soft clay. When you do this, make sure your hands are clean or use silicone gloves. Remember to wash your hands when you're done.


The rough ABS paste was sanded down. Then, more paste was added in divots, pock marks, and other depressions in the armor, and then sanded down. This process was repeated several times with 100 and 150 grit sand paper until the seams were smooth for the most part. ABS paste was also added at certain parts on the top of the thigh near the edges of the added pieces, to help better secure the pieces and to maintain the shape of the top of the thighs.


I plan to use a new batch of unadulterated ABS paste and very clean thigh pieces for the last coat, to color match the thighs as best as possible, as a final coat that can be lightly sanded and polished to make a natural-looking thigh piece. But before I did this, I had to figure out how to make the strips long enough to fit back onto the re-added pieces, since it had also been trimmed.

I had purchased a plastic sign from Home Depot to use as spare parts, however, after some experimentation I discovered that it wasn't made of ABS. So I went with an alternate plan: I shimmed scrap strip back onto the existing strip using the same methods I used on the rest of the thigh. And it worked surprisingly well.


The scrap strips were but joined to the existing strips using a carefully-cut matching joint and CA glue which, despite the small cross-section for adhesion, worked extremely well. Afterwards, I coated the seam with ABS paste and sanded down. When I put the final ABS paste coat on the rest of the thighs, I'll do the same here to even better hide the seam to give the appearance of one continuations piece of strip.


In the next blog, I'll show the finished pieces with the final coat of ABS paste, sanding, and polishing. Until then...

Monday, April 4, 2016

Strapping Extremities

In addition to the thigh pieces, I also worked on strapping for my arm pieces, and a garter system for the thighs.

First, I'll mention that I did finally receive my soft parts from ANOVOS on Good Friday. But since my office was closed, I didn't actually get them until the following Monday. The ANOVOS undersuit is actually more loose than the stuff I purchased on Amazon, but still fits well. The rubber gloves are what I'll be using to certify for EIB for the 501st.

Now let's talk about the arms. I basically did the arms up per the ANOVOS instructions. I used some longer pieces of H&L tape inside the shoulder bells to help with adjusting placement for the bicep pieces.


After fitting, I decided there was too much inside edge in the shoulder bells for comfort; after all, these were some of the first pieces I trimmed and haven't been retouched until now. I removed a bit of it not only helped with the margin between the bells and the biceps, but also improved flexibility of the bell pieces to give them more give.


As for the thigh pieces, in preparation for finishing this project, I decided that, like many out there, I didn't want to attach the thighs to the inside of the ab plate as per ANOVOS instructions. Instead, I decided to create a garter belt system like many troopers use, but incorporate the parts from ANOVOS to make the build easier, and more adjustable thanks to the H&L tape.

I rummaged around and found an old untrimmed (full length) web belt that was a "field find" from my paintballing days. The first thing I did was unravel it and apply a fresh coat of dye (I used some leather dye I already owned). I did end up taking off the buckle and belt tip for this project after the pictures were taken.


I let the dye dry overnight and then put the belt through a few wash cycles to knock out excess dye - no need getting that on the inside of my armor pieces. Once it was dry, I trimmed the belt for size, leaving me a sizable amount for the next part of the project.

Next, I made loops to fit over the belt that would hold the ANAOVOS snaps for the thigh straps. Because the snap plates were longer than the width of the belt, I didn't have to worry too much about making these too small to fit over the belt. I took two 6" strips of web belt scrap, folded them in half, and then used a leather punch and small leather rivets (again, stuff I already had) to create the loops. I used CA glue on the edges of the webbing to keep them from fraying (I did the same with the actual belt as well).


The snap plates themselves were wider than the webbing; therefore, I removed 5mm from each edge of the plates to fit them to the web loops, using the old score & snap method.


Finally, I attached the plates to the side of the loop that would face INSIDE towards my body, using E6000 cement and excessive clamping. The reason is because the straps were designed to fasten to the ab plate, and the snaps open opposite to the hook tape that fastens to the loop tape to be attached to the inside of the thighs.


Once I'm done reshaping the thigh pieces, I'll be testing this system out to ensure it will stand up to good trooping. Until then...

The Thigh (Re)Master Pt 1 - Shimmy Shimmy Shake

As I mentioned in my last post, after fitting the thighs some more, it occurred to me that, although I have the thighs properly trimmed for length, I don't have them trimmed for shape. However, more importantly, they don't come up as far as I need them to (when I'm standing). They're too tight, especially near the top where almost no material was trimmed (save the front edge returns). Therefore, I'll have to accept the fact that I need to shim them.

To begin, I found scrap ABS strips of the appropriate length and width (> 1"). However, to get more width, I decided to use a hot water bath to flatten them out. I did this using a pot of boiling water and two cutting boards to act as presses. The pieces ended coming out a little curved, which is fine since the back of my thighs (where the pieces will be going) are also curved; the pieces are also flexible, so getting them in place should be a big deal.


I also made some ABS hooks for my bicep pieces (should I need them) while I was at it, to add to the biceps to hook the shoulder bell straps as many troopers do. It was simple enough to add the hooks using a hot water bath, small tongs, and my Gorilla Grip gloves.


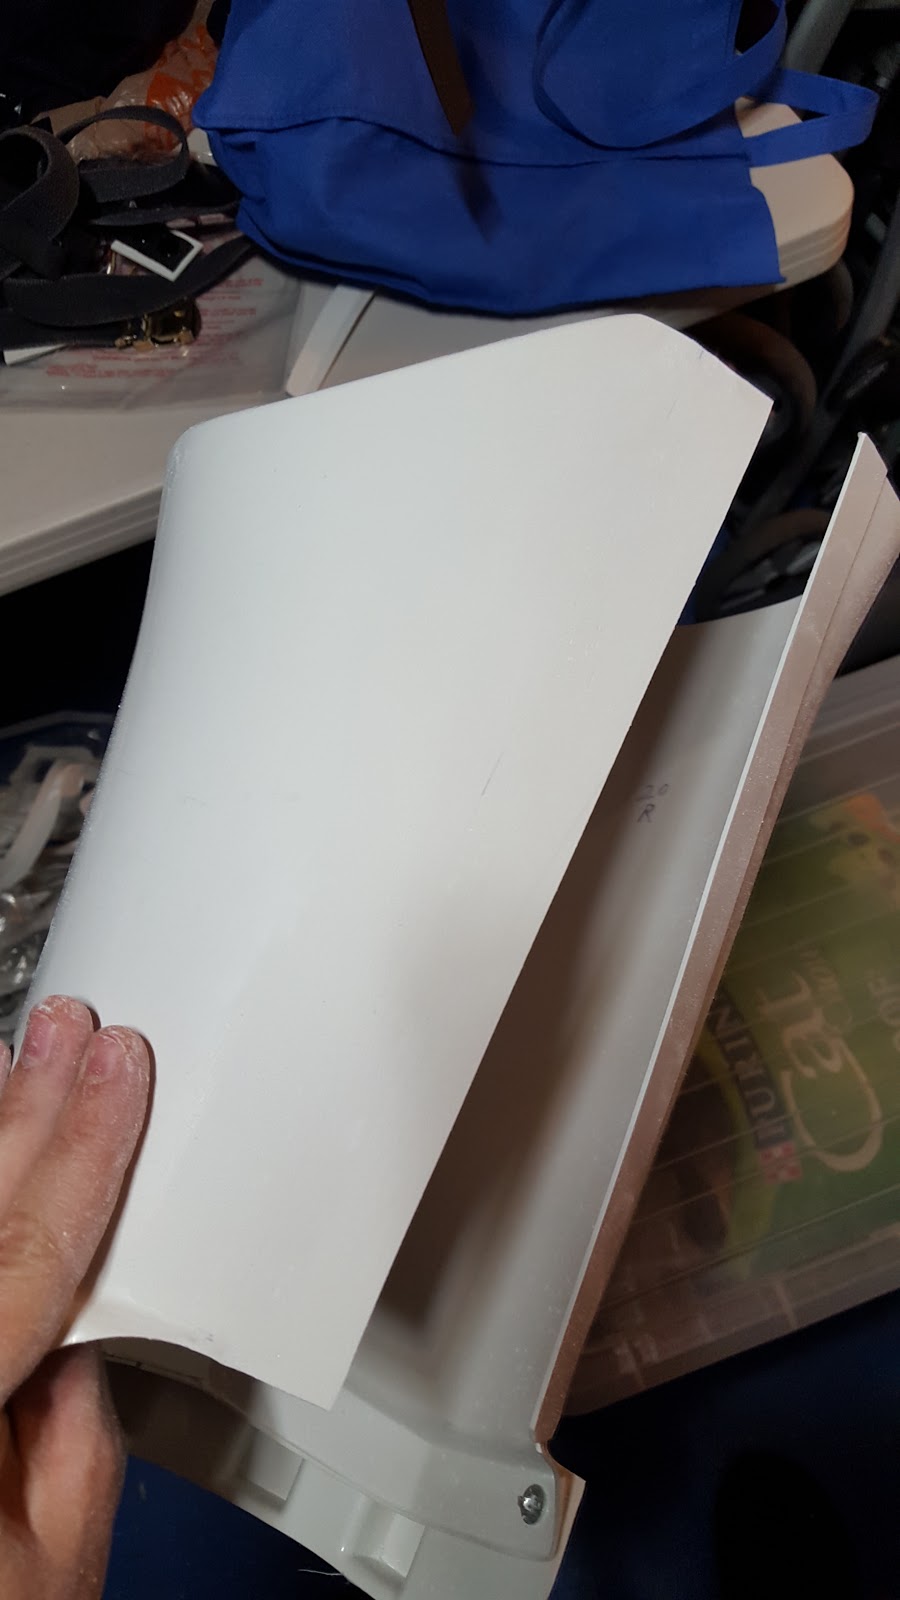
I separated the thighs in the back, with the center strip attached to the outside piece; teh shims will be added to the inner thigh piece. After creating the shims, I cut them to a rough length and taped them in. I found that, with the shims at full width, they made the pieces too big, which is a good thing - it's easy to trim down the shims, but harder to find bigger pieces to use as shims if they're too small. I performed additional measuring and fitting without the shims to determine the best width. I trimmed them to 1" width top and bottom, making sure both edges were straight. I may trim more near the bottom after I get the shims permanently attached, when it will be easier to do more test fitting.


With the shims ready, I created six splints, three for each thigh for top, bottom, and center. The splits would hold the shim in place while I used ABS paste to cement them to the inner thigh pieces. Because this will be a permanent fixture, I used CA glue to cement the splints to the inner thigh pieces, and then the shims.


I then used ABS paste to attach the shims to the armor. In retrospect, I wish I had used some CA gel first, and then ABS paste - you'll see why in a moment. Also, when applying ABS paste to shims, I recommend applying it with your fingers using a latex glove, to reduce the lumpiness of the paste. I did NOT do this on my first application, and the outcome was a bit gloppy, requiring a lot of sanding to be flush.

Speaking of sanding, after the paste was dry, I hit large lumps with the Dremel sanding drum, then used a sanding block with 150 grit. I wish I had some lower grit paper, because this step took longer at 150 grit. However, once everything was flat, I followed up with 350 grit, 600 grit, and then 600 grit wet sanding to make everything as smooth as possible before polishing.


For polishing, I used Novos 3, then NBovos 2, to work out the deeper scratches and then polish up. I found that, for scratches that wouldn't come out with Novos 3, additional wet sanding with the 600 grit paper was necessary. The shims came out alright after this was all said and done.


Once finished, and after taping up again to confirm fit one last time, I cemented the back of the thighs back together with E6000.

But as is the case with many of my projects, this part did not go off without a hitch. lamentably, when I was getting the pieces back together, the shims cracked near the knees. This is why I wish I'd used CA gel to fasten them to the parent piece before applying ABS paste.


I let the E6000 cure first. Then, I fixed the cracks by first applying CA liquid (to get into the crack) and holding the pieces in place until the glue set. Then, I covered the crack with an amount of ABS paste applied by finger for minimal coating. Once it dried, I was forced to apply the entire sanding and polishing process all over again.


After this, the shims were done for the most part; however, there are some visible lines on the shims that I may need to address before approval. However, I still need to apply the strapping system to the thighs, as well as fix the shape on the top. I'll be covering this in a future post. 

Monday, March 21, 2016

Oh, snaps! (And rivets, and ABS paste...)

So I did a bit of work over the past couple of nights. Where do I begin? Probably with the ab plate this time.

The instructions and 501st CRLs call for a snap in the upper right of the ab plate. I followed UKSWrath's blog for more details. Marked the hole, double-checked the measurements, drilled, and tapped the rivet, male end towards the inside (to snap to the strap). Easy.


I needed to start getting the torso plate ready for strapping. Now, if you're using the ANAOVOS instructions, you'd just toss some H&L tape into the left side of the torso and call it a day for that side. But as it is, I (eventually) want to try for Centurion some day (I'll probably have to settle for EIB for the moment due to budgetary concerns, and not wanting to replace the belt just yet). This means that you need three MORE rivets on the ab plate's left side to correspond with the three on the kidney plate. At least ANOVOS gave me PLENTY of spare split rivets :D


Now, where you measure from top to bottom is debatable. UKSWrath does it one way, but since I started out with the kidney plate and am a noob to this, I did it another way. Fortunately, it doesn't matter so long as the rivets or 10cm from the edge of the plate and evenly spaced. This is because the belt will cover up the bottom rivets anyhow. The 501st will accept them in either configuration (if that's your goal).

So instead of having to re-do the kidney plate rivets out of OCD, I kept them as-is and drilled the holes in the ab plate to match. I first lined up the kidney plate, made marks for approximation, verified the measurements on the ab plate with a rule, and drilled.

Now it was time for the groin snaps. Wait... the split rivet is supposed to go in the cod plate, NOT the snaps? ... well f**k.


Yeah, I messed up. Thankfully, snaps are easy to remove with some pliers and "gentle persuasion" (and I have spare #6 snaps from my snap anvil set), but the holes don't exactly disappear with an eraser. And even if I keep one of the existing holes, the other has to go bye-bye. I'll have to make some ABS paste.

Until then, I can get the snaps in the proper piece - the "posterior" (butt) plate. Easy peasy. I drilled a hole about 20mm from the edge of center, then another hole 20mm from that, to match the strap supplied by ANOVOS. Then I set my snaps. I ended up using the snaps that came with my snap anvil as they worked better and match the snaps on the strap.


At least the snaps are in the right place now. In my butt... plate.

Now for the shoulder strap plates. During the armor party, the sqaddies advised us that these straps just love to snap in half lengthwise while trooping, and advised us to reinforce them with scrap ABS on the underside. That being said, I had plenty of scrap ABS, but wanted to match the shape of the straps as much as possible. I tried a heat gun at my office but encountered some "baconing" (where the edges of the pieces start to look like cooked bacon). So I had them take a hot water bath.l


This was challenging for me as a novice builder, but worked out as I was subjecting scrap ABS to the hot water bath as opposed to "real" pieces. What I did was soak the scrap in boiling water for 30-40 seconds, removed the piece, and formed the curve to the room-temperature shoulder straps by hand using my Gorilla Grip gloves. I further used the old rolling pin to remove baconing and any other warp. Each scrap required a few passes. I found it's better to be slow and methodical than to try to rush, lest you ruin the piece and have to start over.

Once the pieces were finished being curved, I used the Dremel sanding drum and sanding block to remove an leftover warping, then glued the pieces under the straps with several clamps and plenty of E-6000.


Later in the evening I went to Home Depot and picked up some industrial acetone for about $8, to start making ABS paste.

Only one of these items is for human consumption.

In a nutshell, here's how you make ABS paste:

Get a glass jar. Add some cut some scrap (make sure there's no clear protective film first; it won't dissolve in the acetone), add acetone until pieces are slightly covered, and then wait a few hours, mixing occasionally with a metal or wood stirrer. Once applied, it dries pretty fast. One can probably work with it in a few hours after you put it on, although I've been waiting 12+ hours due to real life.

But while that was setting up, I decided to work on another part of the ab plate - the snaps for the belt. Using a mix of the instructions from ANOVOS and UKSWrath's guide, I put my marks at an ideal height exactly 170mm from center in each direction (340mm or 34cm total from snap to snap) at a height determined by using a clamped straight edge as a guide line.


I also placed the belt over the plate as I wore it to ensure the snaps would line up.


After triple-checking, I drilled the holes and set the snaps. Now, getting the belt onto and off of these snaps is a pain - it's like the crimped the snaps on the belt stiffer than those on the ab plate straps (which use the same size snaps). I applied a very very slight amount of WD40 to the male snaps on the ab plate to help hasten them, which seemed to help a bit. When donning the armor, you'll probably want to fasten these snaps BEFORE putting the armor on, and unfasten AFTER you take the armor off, to avoid damaging the plate. But yes, the belt fit just fine with the measurements as described above.

Now that the ABS paste was set up, it was time to cover the one hole in the cod piece. I applied paste to the hold and both sides of the plate, using a scrap ABS piece as a scraper to control lumping.


Time to let that set.

Working with the belt, I found it flaccid, to say the least. So I took the advice of other ANOVOS builders (beyond replacing the cloth part of the belt outright) by gluing the ABS plate to the belt, and applying clamps and magnets.


Since the top is the part from which the cloth will hang, I clamped the top foremost, and used magnets elsewhere. That should help stiffen up the belt for now, and allow me to replace the cloth with a Kittle belt in the future. This is because, according to UKSWrath, the stock ANOVOS belt won't fly for Centurion status, even modified (I still need to remove or cover up some of the holster rivets for Stunt cert). But I don't have $40 to spend just on a belt at the moment, so that will have to wait until later. For now, this mod will get the job done for at least Elite certification (once I take care of those rivets).

That's it for now. I was able to get started on sanding the ABS paste on the cod, but because the snap had left a circular score ring, I had to sand down again and apply a second coat (no pictures). Next session I'll probably be finishing up that area and finally getting the strap and split rivet in place. once that's done, I can apply the left and right straps for the ab and kidney plates, and then the butt, chest, and back plates, then the limbs, and then... close to done? We'll see.

Until then...