Featured Post

The TKTalkie v4 - Press 6 for the Imperial March

Upgrading - the Path from v3.15 to v4.0 (Note: I had started this draft last year but never finished it, due to personal issues and cuttin...

Thursday, April 21, 2016

Fit For Duty, but Room For Improvement

Yesterday evening almost a week to the minute from the initial acknowledgement of my submission, I received the following email:

Hi Erik,

Thank you for your patience! We have finished our review and have reached a decision. Congratulations! Your costume has been approved and I've moved your application into the next phase. Welcome to the 501st Legion!  
There are a couple of suggestions on changes to your armor to make it fit a little better.
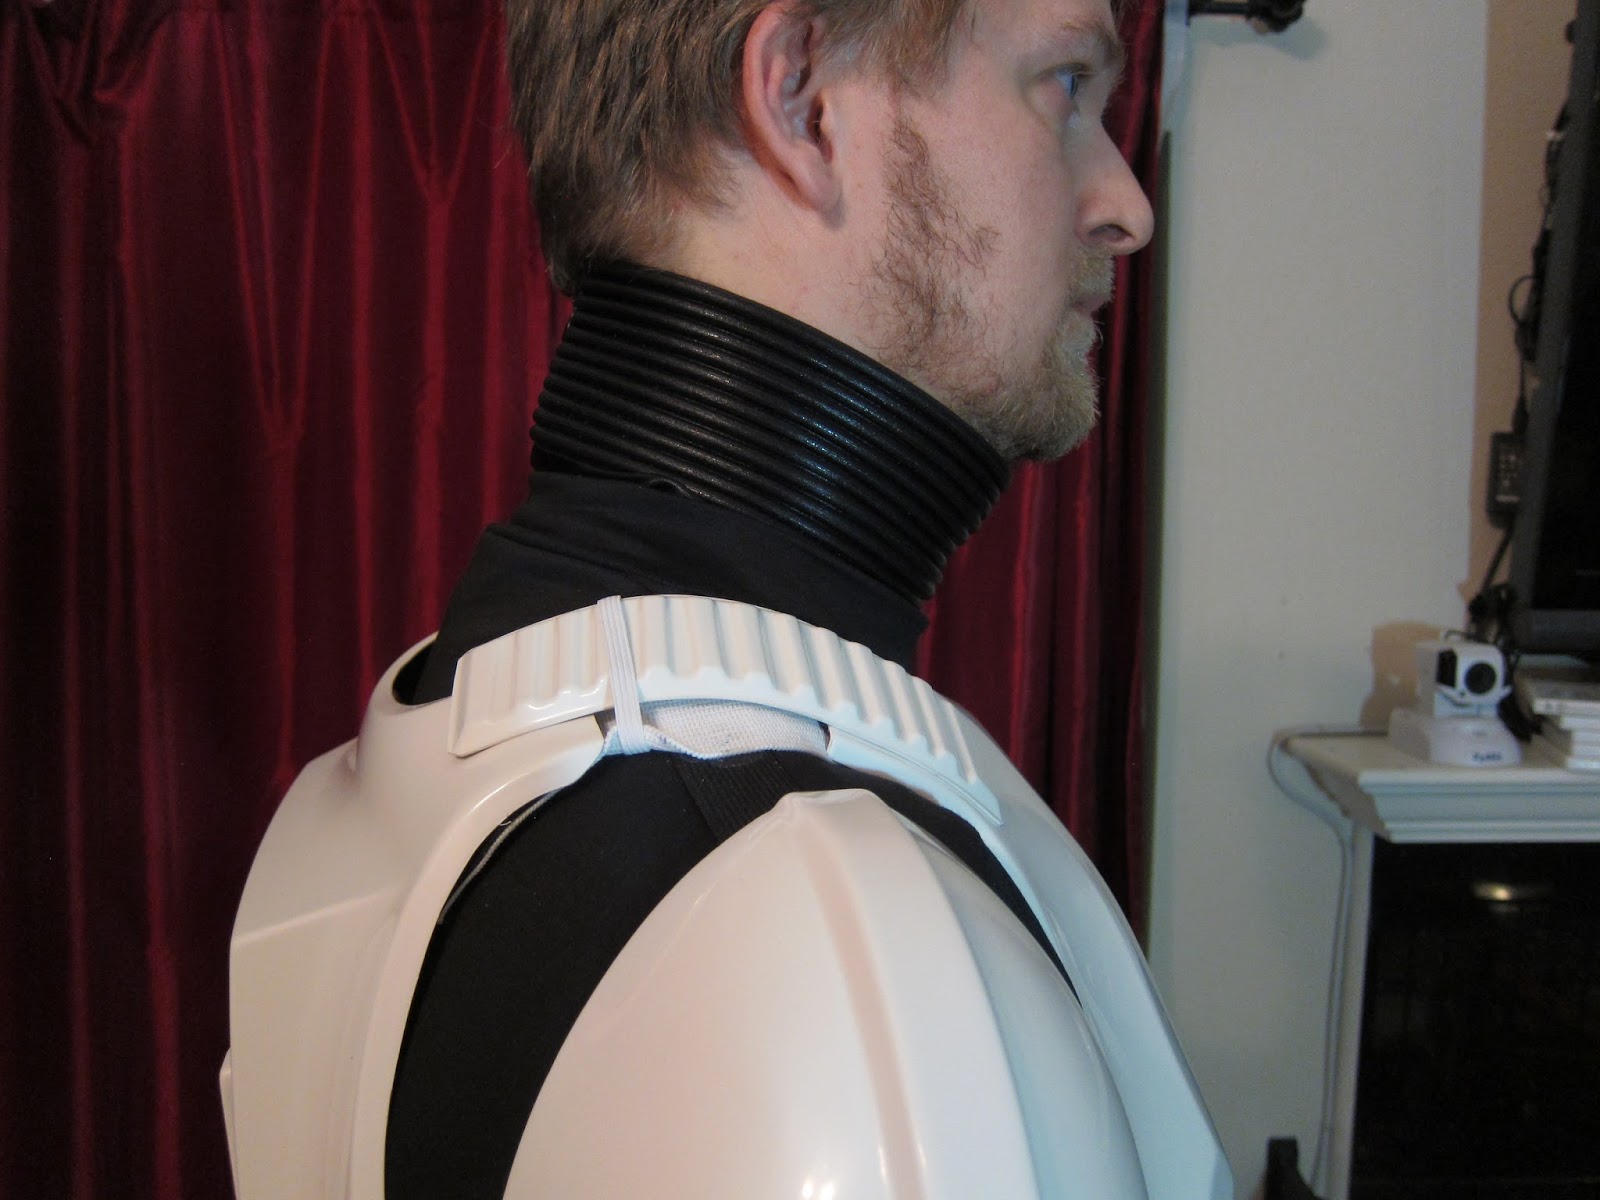
1) Shorten the straps on your shoulder bells, this will reduce the black undersuit from showing through on the shoulders 
2) Bring you thigh armor up higher - you may need to simply shorten the straps on this as well 
Once you receive your TKID and welcome letter from the 501st legion, here is some information you'll need to get started: (...)

It's official - I've been approved to be a member of the 501st!

Approved - but with caveats.

However, I found the email slightly bittersweet as it confirms something that I've known was probably true - I trimmed my thighs too short.

The shoulder bells will be an easy fix as I just need to fasten the H&L straps farther into the bell - that's just a donning issue. The thighs, though, they don't go up any higher, and as you can see in my photo above, I'm showing way too much black on my hips. Sure, the thighs are comfortable to walk in, but they probably won't fly for EIB or Centurion approval.

I've honestly been thinking about this since I sent my approval in, and it's been one of the few things I've been fretting about in regards to the armor and being approved at all. So, I've decided to revert the thighs to (close to) original condition.

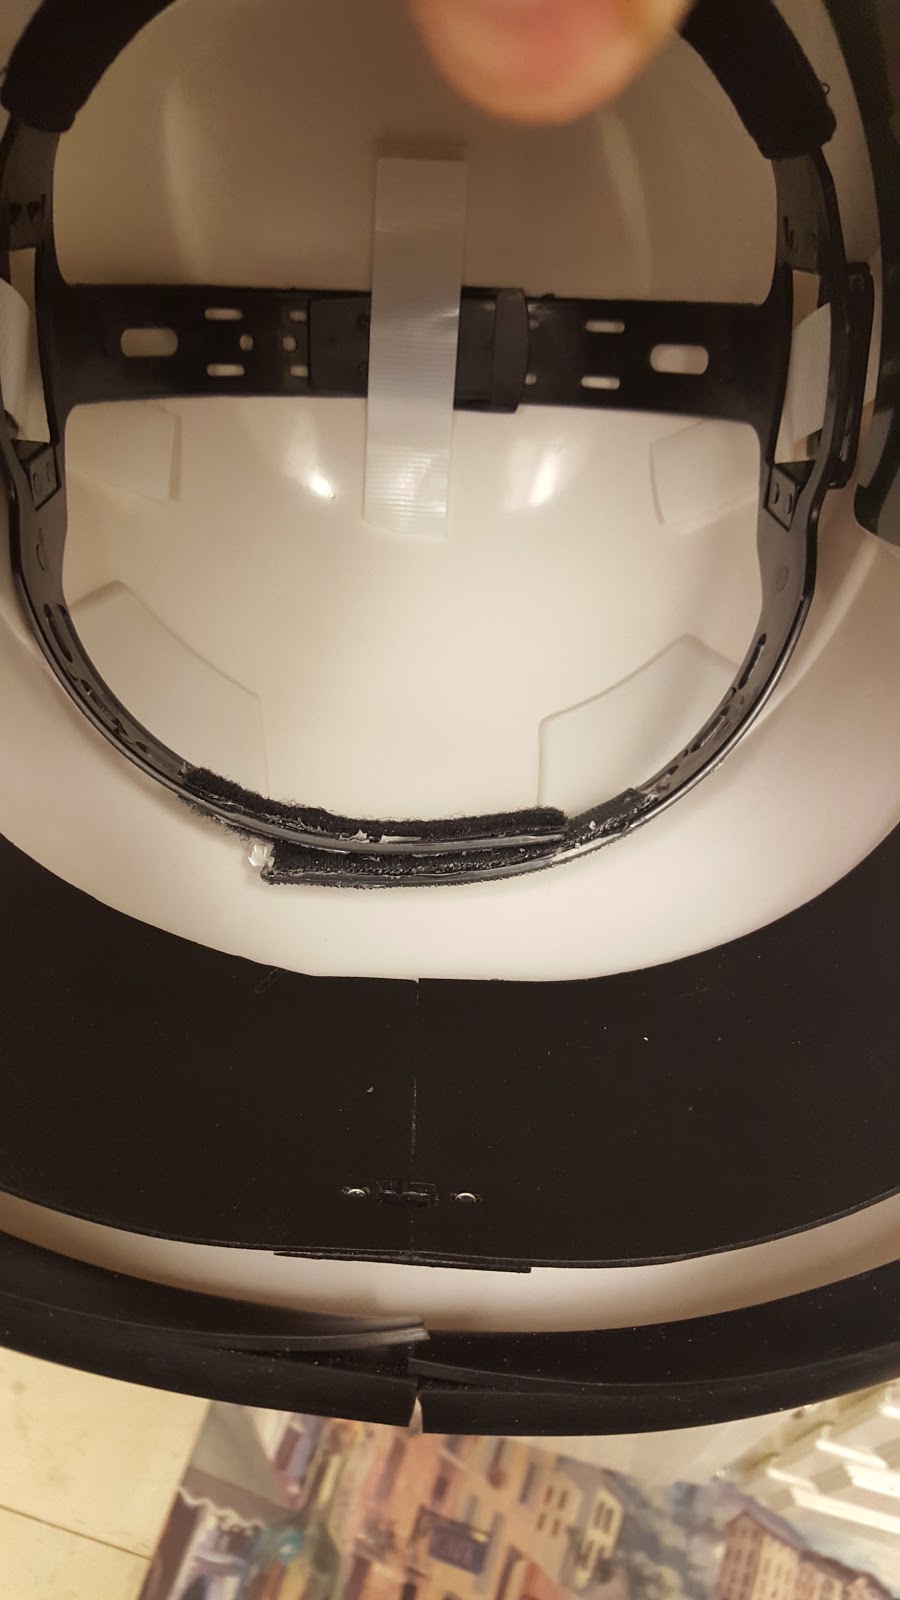
It won't be easy, but it won't be terribly hard either, with my knowledge of shimming thanks to my thigh backs. And I have most of the scraps I cut out in solid pieces, so they should be relatively easy to re-attach with backings and ABS paste. The only exception is the top of the left thigh, which came off in strips when I was "fitting" my thighs for fit (but not to the ab/ cod plates; therein lies the problem), so I'll fabricate a new piece to join there after doing some "forensics" to mimic the original shape. I will probably need some ABS sheeting from Home Depot or Amazon though, in order to create new back (and possible front) cover strips to help make the operation easier. Fortunately, once I have all the parts in place, I don't think it will take more than a few hours to perform, given how fast the ABS paste seems to set up.

I'll be covering this in detail... in my next blog post.

Before I end the post, though, I'd like to give a shout out to my parents, who helped make me the hobbyist and Star Wars geek that I am today - and now a member of the 501st. My father has worked with models since he was a boy, which is how I picked up my love of modeling. In the 1980s, he even created a Space Shuttle launch pad from scratch, which Revel later used to help create their own model kit of the same. If you want to check out his site, you can find it here at lakecountyspaceport.com

April 14th OC Squad Armor Party & Squad meeting; Improving the Helmet Fans

After self-submitting my photos to the SoCal Garison GML, I recieved an email the following Wednesday from the GML indicating that it would take a week to review my submission for approval.

I attended the squad's armor party and squad meeting on the following Saturday to meet with the squad, fellow ANOVOS builders, and to get some advice on some armor pinch, especially around my the back of my left knee.

The meeting went really well. The OC Squad of the SoCal Garrison was apparently only formed just last year, right before Star Wars Celebration Anaheim, with 17 members. For reference, I'm in line to be the 77th member of the squad. That's obviously some exponential growth within the past year, between ANOVOS builder joining the group, other builders joining, and current 501st members transferring from other squads.


For the pinch, there wasn't mush to be done in the way of trimming, and after consulting with fellow squad mates, I decided to put some foam near the pinch area to help prop it away from the back of my knee to keep it from pinch. The results were moderately successful. Obviously, there's not a lot one can do without affecting the look of the armor, but I apparently have more flexibility in my legs than most troopers, owing to the cut-outs in the back of the knees and a good armor fit. I'll take pics of the shin foam on my next update.

While I was giving advice to builders and trying on parts to test for pinch, I also worked on my helmet fans again. I decided that I needed to add some foam in order to reduce vibration between the helmet and fans, so I purchased some D-type door insulation from Home Depot. Lamentably, it only came in white.


So what was I to do? Coat it in black PlastiDip, of course, after cutting out the desired lengths to match the geometry of the blank's perimeter.


Because it was a hot day and I was spraying in the sun, the PlastiDip dried very fast, allowing me to get multiple coats done within less than an hour. I also used a pencil to help hold the pieces while spraying. I also took the opportunity to patch the places on the blank where the PlastiDip had separated when I was placing the battery boxes.

After all the pieces were coated to my satisfaction, I removed the adhesive backing and installed it onto the blank, on the side with all the electronics affixed.


Installed in the helmet, it looks very good. I forgot to take a picture, but I'll add this to my next build post as well. Until then...

Monday, April 11, 2016

Submission, hold.

The Southern California Garrison's OC Squad just hit their 76th member this past Saturday. For a few reasons, I'm hoping to be it's 77th member. Therefore, having addressed all the concerns I had with the armor upon my last fitting, I decided to take my own submission photos before it was too late. As I'm submitting for the Southern California Garrison, I used the steps outlined on their page here.


I'm hoping for Tier 2 EIB (Elite Infantry Battalion) with the armor as it currently is (the 501st CRL can be found here).  I've included some close-up here for further reader reference, for those things required for at least Tier 2. Unless otherwise noted, everything was supplied by and constructed per the instructions of ANOVOS.

* Rivets for the right knee ammo pouches. Rivet heads are painted white (not mentioned in ANOVOS instructions).


* Sniper knee follows counters of leg armor, no rivets present.


* Minimal gap between ab and kidney plates (NO gap required for Tier 3).


* In addition, left ab and kidney plates use three split rivets and bands to connect to each other; rivet heads are painted white (altered from ANOVOS instructions).
* Holster is affixed with two fasteners (the other fasteners have been covered to mimic the Stunt look).


* Shoulder straps have no rivets and are glued into place.
* White elastic shoulder straps with an elastic strap for the ABS shoulder straps (NOT required for Tier 2 but required for Tier 3) (NOT ANOVOS supplied or instructed).


* Rubber gloves (latex or rubber hand guards required for Tier 3).


No inside edges on the wrist ends of the forearm armor (NOT required for Tier 2 but required for Tier 3) (not ANOVOS instructed).


* Proper button color (required for all levels) and a belt with three rivet covers.


* Two male snaps in the posterior plate and one rivet in the ab plate cod piece.


* The thermal detonator's clips must be touching or very close to the cap ends.


Obviously there were other things I did to the kit outside of the scope of the ANOVOS instructions, but these were the most important for Tier 2 EIB.

Looking at Centurion specs, I'd have to make the following adjustments to the armor to be certified:

  • Eliminate the gap between the ab and kidney plates, through either getting in better shape or shimming the kidney plate (and re-doing the rivets) (Cost of new rivets + my labor in shimming, ABS paste, sanding, polishing, etc.)
  • Replace the hand guards with rubber or latex versions, cemented to the gloves ($35 - $40).
  • Replace the belt with a better 3rd party belt, like a Kittle belt or similar ($40 + my labor in transferring the ANOVOS belt hardware to the new belt; non-trivial due to eh rivets and glue used on the ammo pouches).
  • (Optional) re-do the rivets on the ab and kidney plates for better vertical placement (Cost of new rivets + my labor in shimming, ABS paste, sanding, polishing, etc.).

For reference, the helmet as-is from ANOVOS is fit for Level 3 Centurion certification (the flaws are screen accurate), although some garrison GMLs (but not all) are requiring the frown to be re-painted to remove over spray and to taper and extend it the frown,  andz/ or that the Hovi mic tips to be replaced.

I'm on hold with any building until I get approval or suggested fixes. Until then...

UPDATE: being new to the process, I've been informed that the GML will grant basic approval if the costume passes muster; thereafter, EIB or Centurion approval goes through whitearmor.net. I'll start this process once I get approved.

Final Touches Pt 2 - Electronics

Once the E6000 was dry for my tabs in my chest plate, I took out my Pyle Pro, removed the neck/ waist strap that comes with it, got some extra Velcro loop (that I purchased for my boots), and fashioned a harness to keep the box in my chest plate. I don't currently have an iComm, so it will sit center in my chest. With the E6000, I can easily change this configuration if/ when I pick up an iComm.


After getting all the other items taken care of, it was time to finish the helmet fans I had started a month ago while working abroad. All the pieces were there, but I had to re-solder all the joints to fix a cold solder joint (it ended up being a lead from one of the battery boxes).

Before I started fastening the wiring and fans in place, I used two 40mm x 40mm pieces of screen (leftover material from a screen window kit) over the fan holes, to protect my face from the fans during operation. These were fastened in place with low temp hot glue. The fans themselves are 30mm x 30mm, leaving area for the screens' hot glue without interfering with getting the fans flush with the blank.


I started by gluing the battery boxes with low temp hot glue on either side at a correct width such that they'd fit inside the respirator areas at the bottom of either side of the helmet (in-universe schematics for the helmet can be viewed here :D). I had to do and redo this a couple of times to ensure that the wires had enough slack to bend when the blank was curved to fit into the helmet. It made some of the PlastiDip pop off of the blank, but this is the side that will be hidden, so it hasn't a big deal so long as the pieces stayed in place when the glue cooled. I then fixed the switch into the blank with twisted and trimmed silver wire, and reinforced with low temp hot glue.


Finally, I added some cable keepers to the back for cable management. Cables were secured using more twisted and trimmed silver wire. The screws that came with the fan were meant to go through the fans' mounting holes and into the material, so I had to use replacement screws that went through the blank and secured into the fans' mounting holes (fortunately I've built more than a few desktop PCs and have plenty of spare mounting screws).

When finished, the business side looked like this:


Here's the side the will face towards the inside of the helmet:


When mounted in the helmet, the fans sit behind the inductor filters (where the Hovi mic tips are mounted).


The back center of the helmet has the switch that turns both fans on and off.


Overall, the fans are a little noisier than I expected. Like the Echo fans, I may add foam to contact points on the blank to reduce vibration of the fans against the helmet and therefore reduce noise. I'll have to do some initial testing to see how well this will work and find optimal placement of the foam. I could also replace the digital switch with a slide switch to control fan speed and noise.

I plan to PlastiDip the inside of the helmet, but not until I have 501st approval, so I have one less thing to worry about if approval doesn't go smoothly and I need to fix or replace something. I'll cover my submission on the next blog!

Saturday, April 9, 2016

Final Touches Pt 1 - Let's Touch ALL THE PIECES

As I get into the final stretch of this build before submitting for the 501st as IEB (Tier 2), I need to correct the issues I found during my last fitting.


First, I started with the rivets on the left side of the armor. I scuffed up the heads with 350 grit sandpaper, being careful not to scuff the armor, and then painted them gloss white per the CRL.

Next I wanted to tackle the extra Chicago screws in the belt that are not in the Stunt CRL but have been installed by ANOVOS. Instead of removing them and covering up the holes, I doubled down and not only kept them, but added washers to the upper two. The reason behind this was that I've already seen the two remaining screws tear through a few ANOVOS belts, so I wanted to keep all the screws to give the belt extra strength - not only that, but reinforce the upper two screws, as I was going to cover them up with iron-on patchwork.

My main issue is that the patch I had was too white. So to rectify this, I made a tea bath to stain the patch off white; then, I soaked the patch in the tea bath for less than a minute.


The patch came out a shade darker than the belt.


I ran it through a slight bleach soak. After that, it was about as right as I could get it without messing it up. But before I installed the patches, I installed the washers with the Chicago screws. Then the patches were installed over all that hardware.


I also took the time to put some loop tape over the hardware on the back of the belt, as the screws and rivets scratched my armor during the last fitting.


I gave the clips on the thermal detonator a similar treatment.


One of the things pointed out during my fitting was my wandering right shoulder strap. Without the elastic loop to keep it in place, it wanders too far center (at least I'm hoping so; otherwise I'll have to remove and re-glue it). For those loops to work correctly, though, I'll need a wider cloth shoulder strap underneath it.

the Stunt CRL for Centurion specifies that the cloth part should be white, preferably elastic. This being the case, I decided to take the plunge, deconstruct the ANOVOS shoulder straps, and replace part of them with white elastic. First I took 2' wide elastic and cut two lengths equal to the length of the current ANOVOS straps. I sealed the ends with CA glue to prevent fraying.


Next I took apart the ANOVOS straps by cutting the threading with a hobby knife; then I used those pieces along with the white elastic to make the new shoulder straps. I hate sewing, though, and decide to use E6000 to glue everything together.


After letting them site for a day, they came out very good. I simply needed to use some extra glue and magnets to tap down some stray corners.


Besides that, I also:

*Added elastic cinches to my TK Boots to make getting them into the shin armor easier (loop tape on the heal helps with initial placement and tightening)


*Trimmed the hand guards down for better presentation (untrimmed one on left, trimmed one on right). Used a hollow sanding on the front and back to add some curvature for better fit.


* Cleaned up the eyes of my bucket with the Dremel sanding drum, a hobby knife, miniature files, sand paper, and raw nerves (messing up was not an option).


* Refitted the sniper knee for better fit (NEEDED MORE CLAMPS):


* Cleaned up the right shin from a mis-installed sniper knee (thanks Shingate!)


* Glued down the final edges of the flannel I installed on the bottom of the shins to prevent damage to Te TK Boots


* Painted the rivets and gluing down the ammo pack on the right thigh


* Covered up the inside ends of the split rivets with low-temp hot glue to avoid catching on the undersuit (or my skin, for that matter)


* Cleaned up the ABS paste fill I did on the bottom of the left thigh to get rid of a huge armor gap


* Added some strap loops inside the chest piece for my Pyle Pro amp, using spare ABS from the kit


Finally, I also worked on the fan system for my helmet. I finally determined where the fans would be placed. I measured and marked the blank for fan placement. Using one of the fans and a Dremel burr, I marked where to drill the mounting holes, and then used a drill but to drill them out. I also used a Dremel cutting disk to mark a cut-out for the fan blades, but not how you might think. The disk only provided the stencil.


Using the drill and a drywall bit, I was able to remove the circular section; then I used the Dremel sanding drum to clean it out.


I then marked and cut a square hole for the switch in a similar manner, using a hobby knife for the 90 degree corners. The holes to either side of the square cut-out will be used to mount the switch to the blank.


Lastly, I clean the blank of burrs, sanded it, and commenced to coat it with PlastiDip spray.


That's it for tonight. And after tonight, the only thing I'll really want to do before sending approval pics is finish the fan system and get the Pyle Pro mounted in the chest piece. I eventually want to PlastiDip the inside of my bucket, but I plan on doing that after approval (if I mess up, it will delay me getting good approval pics).