
First, I started with the rivets on the left side of the armor. I scuffed up the heads with 350 grit sandpaper, being careful not to scuff the armor, and then painted them gloss white per the CRL.
Next I wanted to tackle the extra Chicago screws in the belt that are not in the Stunt CRL but have been installed by ANOVOS. Instead of removing them and covering up the holes, I doubled down and not only kept them, but added washers to the upper two. The reason behind this was that I've already seen the two remaining screws tear through a few ANOVOS belts, so I wanted to keep all the screws to give the belt extra strength - not only that, but reinforce the upper two screws, as I was going to cover them up with iron-on patchwork.
My main issue is that the patch I had was too white. So to rectify this, I made a tea bath to stain the patch off white; then, I soaked the patch in the tea bath for less than a minute.

The patch came out a shade darker than the belt.

I ran it through a slight bleach soak. After that, it was about as right as I could get it without messing it up. But before I installed the patches, I installed the washers with the Chicago screws. Then the patches were installed over all that hardware.


I also took the time to put some loop tape over the hardware on the back of the belt, as the screws and rivets scratched my armor during the last fitting.


I gave the clips on the thermal detonator a similar treatment.

One of the things pointed out during my fitting was my wandering right shoulder strap. Without the elastic loop to keep it in place, it wanders too far center (at least I'm hoping so; otherwise I'll have to remove and re-glue it). For those loops to work correctly, though, I'll need a wider cloth shoulder strap underneath it.
the Stunt CRL for Centurion specifies that the cloth part should be white, preferably elastic. This being the case, I decided to take the plunge, deconstruct the ANOVOS shoulder straps, and replace part of them with white elastic. First I took 2' wide elastic and cut two lengths equal to the length of the current ANOVOS straps. I sealed the ends with CA glue to prevent fraying.

Next I took apart the ANOVOS straps by cutting the threading with a hobby knife; then I used those pieces along with the white elastic to make the new shoulder straps. I hate sewing, though, and decide to use E6000 to glue everything together.


Besides that, I also:
*Added elastic cinches to my TK Boots to make getting them into the shin armor easier (loop tape on the heal helps with initial placement and tightening)
*Added elastic cinches to my TK Boots to make getting them into the shin armor easier (loop tape on the heal helps with initial placement and tightening)


*Trimmed the hand guards down for better presentation (untrimmed one on left, trimmed one on right). Used a hollow sanding on the front and back to add some curvature for better fit.


* Cleaned up the eyes of my bucket with the Dremel sanding drum, a hobby knife, miniature files, sand paper, and raw nerves (messing up was not an option).


* Refitted the sniper knee for better fit (NEEDED MORE CLAMPS):

* Cleaned up the right shin from a mis-installed sniper knee (thanks Shingate!)


* Painted the rivets and gluing down the ammo pack on the right thigh


* Covered up the inside ends of the split rivets with low-temp hot glue to avoid catching on the undersuit (or my skin, for that matter)

* Cleaned up the ABS paste fill I did on the bottom of the left thigh to get rid of a huge armor gap

* Added some strap loops inside the chest piece for my Pyle Pro amp, using spare ABS from the kit

Finally, I also worked on the fan system for my helmet. I finally determined where the fans would be placed. I measured and marked the blank for fan placement. Using one of the fans and a Dremel burr, I marked where to drill the mounting holes, and then used a drill but to drill them out. I also used a Dremel cutting disk to mark a cut-out for the fan blades, but not how you might think. The disk only provided the stencil.


I then marked and cut a square hole for the switch in a similar manner, using a hobby knife for the 90 degree corners. The holes to either side of the square cut-out will be used to mount the switch to the blank.

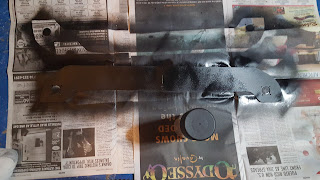
Lastly, I clean the blank of burrs, sanded it, and commenced to coat it with PlastiDip spray.

* Cleaned up the ABS paste fill I did on the bottom of the left thigh to get rid of a huge armor gap

* Added some strap loops inside the chest piece for my Pyle Pro amp, using spare ABS from the kit

Finally, I also worked on the fan system for my helmet. I finally determined where the fans would be placed. I measured and marked the blank for fan placement. Using one of the fans and a Dremel burr, I marked where to drill the mounting holes, and then used a drill but to drill them out. I also used a Dremel cutting disk to mark a cut-out for the fan blades, but not how you might think. The disk only provided the stencil.

Using the drill and a drywall bit, I was able to remove the circular section; then I used the Dremel sanding drum to clean it out.


That's it for tonight. And after tonight, the only thing I'll really want to do before sending approval pics is finish the fan system and get the Pyle Pro mounted in the chest piece. I eventually want to PlastiDip the inside of my bucket, but I plan on doing that after approval (if I mess up, it will delay me getting good approval pics).
This comment has been removed by a blog administrator.
ReplyDelete