Featured Post

The TKTalkie v4 - Press 6 for the Imperial March

Upgrading - the Path from v3.15 to v4.0 (Note: I had started this draft last year but never finished it, due to personal issues and cuttin...

Thursday, June 2, 2016

Personal Touches: Blacking Out the Bucket & Replacing Screws

Last week I wanted to get the PlastiDip in my bucket before I did an unofficial troop for the birthday party of my cousins-in-law's son, who was having a Star Wars themed birthday. Apparently they were joking about having me get in the armor (or so I found out after I'd done the work), but I was serious! In for a penny, in for a pound...

Anyhow, I actually like the ANOVOS helmet system, minus the fact that I had to completely redo the H&L tape they used for the harness as the adhesive on the tape was woefully unfit for the task (I covered this in a previous blog entry). The part that irked me about the system was the H&L tape, but in this case the stuff that secured the harness to the inside of the bucket. When I went on my first troop, some curmudgeonly kid hit me hard in the back of the bucket (before the wrangler could scare him off) and caused the strap to come unglued from the inside of my bucket. The inside of the bucket wasn't prepped right for good adhesion, plus I had to move the strap anyhow for better performance. But before I replaced the H&L tape, I wanted to remove all the hardware and PlastiDip the interior.

The PlastiDip can help add a little strength to the helmet (or a lot of strength if you go with the brush-in PlastiDip layered with cheesecloth like some troopers have), but it also reduces the amount of reflected light when wearing the bucket. I wanted to get this done before installing new H&L tape for the helmet harness. So I took out the fan system and began with ripping all of the tape and foam out of the helmet's interior, and removing the lenses and screen behind the teeth. I put the adhesive stuff on some aluminum foil in case I wanted to salvage anything.


There was some cracking on the bucket underneath the gasket, so I had to repair one spot by adding a backing of scrap ABS with some CA glue. There was also some other minor cracking in other areas that I may have to address later.


After all the hardware was out of the helmet, I started masking everything I didn't want sprayed or affect by overspray with blue painter's masking tape. I started with the eye sockets, then some on the inside of the bucket over the teeth, then on the outside of the eyes and teeth, then around the neck.


(I also removed the Hovi mic tips and masked over the screw holes, but forgot to photograph it.)

After the masking was done, I wrapped the outside of the helmet in newspaper and secured it with more tape, making sure that all my edges were secure.


Once I was satisfied with the masking, It was time to spray.

Before I began spraying, I scuffed the inside of the helmet with some 350 grit sandpaper - finer than the 100 or 150 grit, but enough to give better adhesion for the PlastiDip. After a light sanding and dusting, I started spraying the PlastiDip in even coats, waiting 20 or more minutes between coats (or overnight since you can reapply any time). I also sprayed the foam pads that go over the screws that secure the bucket pieces together, as they're also originally white.

A cardboard box helped hold the bucket while drying.

Over the course of two evenings I coated the inside of the bucket as well as I could. The front bottom of the bucket proved most tricky as it has a lot of crevices to cover, which is tricky to do without a lot of overs pray.

Since I was revamping the bucket anyhow, I decided to replace some of the ANOVOS screws in the bucket with more screen accurate screws, which happen to be #6 flat head flat drive screws. The problem is that most screws of this variety don't come short unless you order them online. At the hardware store, the shortest they had was 2", which meant I needed to trim at least an inch off each screw. Dremel tool with cutting disk to the rescue. I cut them to the same length as a screw I removed from the bucket after the last coat, but be advised that screws on one side of the bucket are slightly longer than screws on the other side. We're talking 1" vs 3/4", but it's a major difference when working in tight margins, and made putting the new screws in a little more difficult in the end since some where shorter than the original screws.


I forgot to photo the next step since my phone was low on power, but I scuffed the screw heads with some 150 grit sandpaper and painted the heads white. The next evening, after the paint had dried, I installed them into the helmet using washers and #6 nylon nuts. After installation, the paint on the screw heads was slightly scratched, so I'll need to re-paint these a touch when I submit Centurion pics (I need to retouch the armor rivets anyhow).

The screws removed from the bucket will actually be used for the thermal detonator, as they're more screen accurate for that piece. I may also be trimming the TD to make the length more screen accurate as well. If so, it will be content for a future blog post.

Back to the bucket, after the last coat of PlastiDip was dry, everything looked very professional.


Now it was time for the moment of truth - to see if all of my masking had prevented unwanted spraying. I carefully removed the paper and tape and was not disappointed. There was no over spray on the neck seal, teeth, eyes, or other seems, and the job turned out great!


I had to mask over the teeth in order to prevent over spray. To blacken them on the back side, I took some Testor gloss black and painted them by hand. The gloss black is shiner than the PlastiDip's satin look; thankfully, when the screen is reinstalled, it wasn't noticeable at all.


Speaking of the screen, I still plan to re-paint the frown on the teeth towards preparing for Centurion certification, so instead of re-fastening the screen with hot glue, I simply taped it to the inside of the bucket with black electrical tape, so I can remove it later when I perform that paint job. The tape is holding fine for now.

I purchased 15' of 3/4" black H&L tape from a local electronics store. Though slightly narrower than the 1" tape that ANOVOS uses, the adhesion was much better. After re-securing the foam with some extra double-sided tape, I used two strips on top of the foam for each side of the visor (I prefer the visor to separated eyes to help prevent fogging and increase air flow into the bucket around the eyes). Then I used more H&L tape to re-secure the harness to the bucket.

I used the ANOVOS H&L tape as the removable straps for now (hence the white H&L tape for one side of the fasteners) as I would have to tediously remove adhesive from the replacement tape to be able to use them for both sides.


I was now ready to face a bunch of kids wielding pool noodles.


Pics altered and cropped for the benefit of the kids.

Check out that pinata :D

Here I am with my smallest trooper

My older trooper got into the spirit too :D

Overall, the PlastiDip and new tape worked great! One strap did became un-fastened (but NOT un-glued) after I took quite a few pool noodle blows to the bucket, but this was easily fixed and not what I normally expect to do while trooping.

The armor will need some work though, For starters, one of my thigh shims is cracking, again. So I'll need to make more ABS paste and redo the seam again, after sanding down the joint a little and applying some CA glue to strengthen it. I'll also have to re-rivet part of the holster strap since it doesn't even appear that ANOVOS tapped the rivet to begin with. At least I have plenty of Tandy leather rivets from other costuming projects.


These are either simple fixes or otherwise well documented already, so I actually don't anticipate updating this blog until I:

  • Repaint the frown on the bucket
  • Work on the thermal detonator (it's a shade too long and I want to replace those screws)
  • Shim my kidney plate for girth (some slight pudge aside, I actually have slight scoliosis as well)
  • Replace the ANOVOS belt with a better one, and/ or
  • Replace the hand guards with latex versions
All will be required for me to get Elite and/ or Centurion certification, especially the belt (as I'm told that it won't even pass for Basic certification going forward, even modded as I and others have previously done; be warned).

That being said, the next update may not be for a while, but when I have time and/ or the funds, I'll start making improvements towards Centurion. Until then...

Monday, May 16, 2016

First Troop and the HyperFX E-11 Blaster

With the thighs now fixed, it was time to take the armor out for its first practical test drive. And the best way to do that was by doing what I signed up for in the first place - trooping with the 501st :)

Before I talk about that, though, I'll talk about the E-11 blaster I got from my squad's group purchase. The Southern California Garrison OC Squad did a gorup buy of over 15 blasters and 15 DLT-19s from HyperFirm/ HFx (http://www.facebook.com/HFx-Productions-1669859386576227/). This allowed us to get the Elite version for a lower cost.I received mine on May 1st, a few days after our squad coordinator received them. Their Elite version has more screen accurate power cylinders (the greeblies on top of the magazine feed), a mounted D-ring (required for Centurion blasters) and a generally cleaner look. Forgive the messy desk in the pictures as I was showing it off to colleagues.


For the ANOVOS holster, it's pretty easy to scrunch the thing by pressing the two lengthwise edges carefully towards center, until the opening is big enough to accommodate the blaster. Alternately, shoving a glass soda or beer bottle into the holster and leaving it there for a few days to stretch the opening can also help. The retaining strap is big enough to easily accommodate my blaster.

Ironically, the troop I went to on Friday May 13th did no allow blasters, so the Elite stayed at home. However, I don't chagrin this. As it is, May 13th is the birthday of Albin Johnson's late daughter Katie, so it was an honor to be able to do my first troop that day, for the kids of Highland Elementary in Norco, CA, for their PTA Country Fair.

In the future, I may make a separate blog for trooping, but I've included my experience from my first troop for ANOVOS builders wondering about the experience, and how my armor held up. Mind you, this was only a short 1.5 hour troop for me, with 1 hour prep time after travel.

I got to troop with my fellow ANOVOS ANH Stormtrooper rookie Teri, as well as a few veterans from the Inland Empire Squad and a couple of members from the Rebel Legion. For the sake of the privacy of attendees and troopers, I took no pictures of the staging area or event, but our wrangler took some pictures of the event.


Teri's a little shorter than I, but I also differentiated myself by using my orange pauldron, a gift from a coworker when he discovered I was going to put this armor together.

Each event is different, and the POC will check with the requesting party to see if there will be a changing/ staging/ break area, refreshments for troops, parking, if blasters are allowed, etc. In our case, all the above was available, but they requested no blasters as the event was at a school. 

The prep space was more than large enough for the five of us from the 501st and the two members of the Rebel Legion. Everyone arrived on or just after call to suit up. Everyone had their bins set up to pull out their armor and replace the contents with their day clothes during trooping. It was interesting seeing the different hard armor kits, especially for the guys dressing as Rex and Cody. The Sandtrooper (TD) also had a different kit, so it was interesting to look at the differences up close.

There were also plainclothes members acting as wranglers, who help direct troopers and make sure the troopers are OK (and that unruly kids behave around the troopers!), as well as some plainclothes "bounty hunters" manning the small Star Wars themed jail that was part of the Fair (I had a similar experience being "captured" at Star Wars Celebration by Mandalorians).

As far as my armor was concerned, I had some issues with the head strapping, especially after my bucket took a thump from behind from one ballsy boy, which cause the H&L to separate from the helmet (which required me to duck back into the prep room to re-secure (with the help of some masking tape I brought for any emergencies). Also, the left thigh was actually low, which I dealt with and fiddled with until we took our break, at which time I was able to remove my left shin, un-snap the strap from my belt, remove and re-place the H&L tab farther down the thigh pieces, snap it back into place, and put my left shin back on. It's one major advantage of the H&L system - being adjustable on the fly. Other than that, I had zero issues, and the fan system worked well also.

I had to leave the troop a half hour early to make it to my own kid's school open house, but I had a lot of fun with the troops from the IE Squad and look forward to trooping with them again.

I also had an Orange County Squad armor party the next day, where I polished my thighs a little more. There was a very small crack on the edge of my left thigh where I put some ABS paste to re-create the armor thickness, but it should be easily fixed. Otherwise, I say no significant damage to the armor. Consensus from my squad mates and the guys from the IE Squad was that the thighs looked great considering the shimming I'd done, so I'll take that as a sign of a good repair (along with the comments I've received on FB from the ANOVOS builders group).

To eliminate the H&L issues with the helmet, my next step will be to take out the helmet hardware so I can finally PlastiDip the inside of the helmet after copiously, tediously applying masking tape to protect the parts I don't wish to paint. Once that's completed, I can replace the ANOVOS H&L tape inside the helmet with higher-quality tape, as I actually like the rebuilt harness they included with the helmet. I'll leave that for (hopefully) my next blog update.

Monday, May 9, 2016

The Thigh Re-Re-Master Pt 2: Mr. Sandman

It took longer than I wanted to finish this project, but other events took precedence, such as preparing for my century ride for the Tour de Cure in Long Beach and, of course, my family and home. However, once the Tour was over, I was able to finally finish these pieces.

Before I moved on to the final paste layer and sanding, I needed some build-up on the edge of my fabricated piece, as it was too thin and especially thinning near the edge due to sanding. What I did is used ABS paste build-up by scraping the paste off on the back edge of the piece. The considerable layering and build-up required me to wait until the next evening, after the paste had hardened, to sand and shape the build-up to match the desired edge shape and thickness.


That was the last of the major work needed to be done to the pieces, and all but exhausted the "build-up ABS" I had been using to this point. For the final front layer of paste, in order to get the best color match to the rest of the pieces, I whipped up some new, pristine ABS paste, making sure to use only fresh scraps (and ensuring that none had the terrible film that sneaked into my last batch and had to be fished out of my work constantly) in a new glass jar. This mixture was more liquid than paste to help ensure the coating was more uniform and less thick to reduce the amount of sanding required, since it was only being applied superficially and not structurally.

Once this paste was ready for application, I applied it using my fingers (using clean, washed hands) like one would do when finger painting. I dabbed a bit onto the seam area and spread it with my finger until the paste started to set, then I would repeat until the entire work area was covered. After coating the entire work area of one thigh, I moved to the other. When that thigh was done, as the paste set up fast due to its thin coat, I started sanding the first thigh with 150 grit paper to remove streaks, and repeated on the second thigh. I then repeated this entire process to add a second coat. Overall, it minimized the seams between the pieces significantly.


With that process done, it was now time for final sanding and polishing. this was accomplished using the following sandpaper grits and processes:

  • 350 grit
  • 600 grit
  • 600 grit wet
  • 1500 grit wet
For the wet sanding, for those unfamiliar with the process, I simply dipped the sandpaper in a plastic bowl of water to get the paper wet, and then sanded with the paper and water. This method helps to polish the area before final polishing, and is also used in automotive finishes.

As I sanded, I took care to look for deeper scratches (drying off wet areas with a paper towel to inspect work areas). If need be, I'd drop to a rougher sandpaper or start over on certain sections to help remove deep scratches.

Once I was satisfied, I applied Novus 3 and then Novus 2 plastic polish until the thigh was nice and shiny.


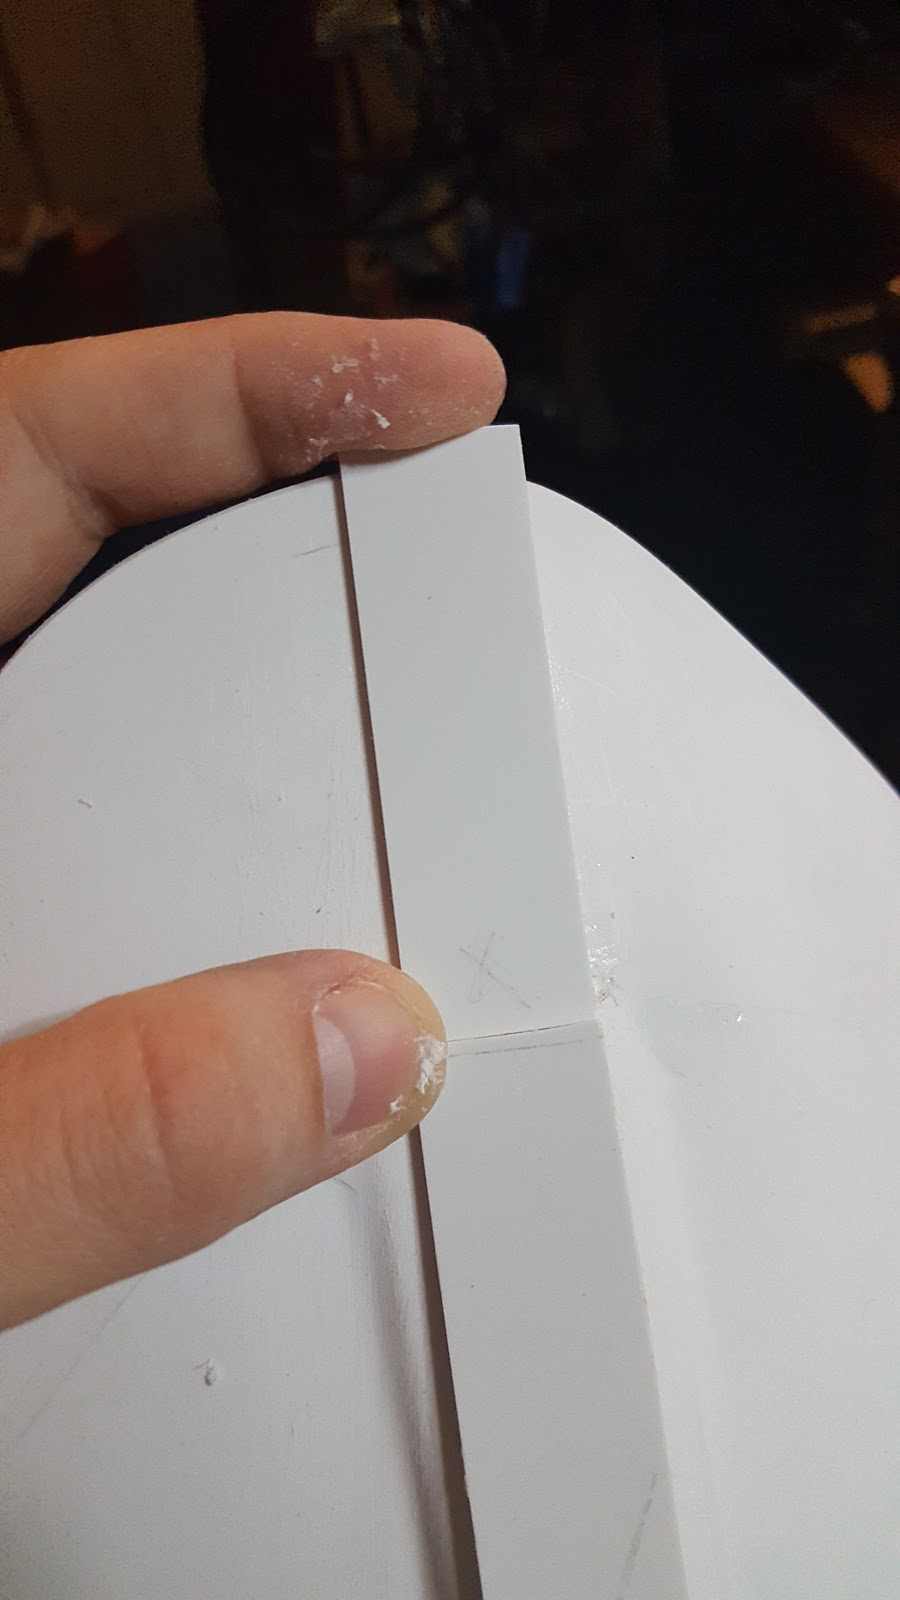
The above processes where also applied to the strips simultaneously. Satisfied with my work thus far, it was now time to re-apply the strips. I simply needed to cut a small amount from the top of one strip, notch both strips with 45 degree angles for aesthetics, and re-attache them to the thighs using good old E6000 (this gives me the option to replace the strips with new ones in the future). 24 hours later, and the pieces are fit for trooping once more.


There are still some scratches to remove from the multiple sanding sessions, but nothing more than what would be considered normal scuffing in most spots. In any case, I wanted to at least get the strips back into the pieces so I can continue removing scratches so I con polish them even further.

Overall, this rebuild took a bit of work, but I would have actually been finished earlier if not for the tour Tour most of all (as I had to get my gear ready for the century ride). I'm now ready, I think, to start pursuing my first 501st troop.

Obviously, there are still tweaks I'd like to make;with the addition of my HyperFirm E-11 blaster, I may end up replacing the limp ANOVOS belt with a more firm belt sooner rather than later, which will be a bit of work removing the plastic parts from the current ANOVOS belt due to the rivets and the dreaded pink glue on the rivet covers (I'll probably opt for another method to fasten the plastic to a new belt, as other troopers have). After I make some minor tweaks to the bottom of my shins (to further reduce rub against the boots), my hand guards (adding a second elastic loop to prevent slipping up or down my hands) and my abs plate (retouching button paint due to minor scratch), I'll through all the armor back on along with the new blaster and see how things go. And I still want to Plasti-Dip the inside of the bucket so I can work on future mods there.

Until my next update...

Monday, May 2, 2016

The Thigh Re-Re-Master: CTRL-Z, CTRL-Z

To recall from my last blog post:

The thighs, though, they don't go up any higher, and as you can see in my photo above, I'm showing way too much black on my hips. Sure, the thighs are comfortable to walk in, but they probably won't fly for EIB or Centurion approval.

I've honestly been thinking about this since I sent my approval in, and it's been one of the few things I've been fretting about in regards to the armor and being approved at all. So, I've decided to revert the thighs to (close to) original condition.

Thighs in their current condition not only look strikingly different from other TKs, but they could harm my chances of eventually taking this kit to EIB or Centurion status. It was time to revert them.

Reverting these pieces isn't like hitting CTRL-Z on an art file and undoing it magiacally. As I so sagely stated in a previous blog, to paraphrase, It's a lot easier to remove pieces than to put them back on.

Although I'm not yet completely done as of time of writing (6/2/16), I'm 90% there, and some have asked for pictures and description of the procedure, so let me document what I've done so far and make another entry later with the finished product.

Let's start with the thighs as they were for my 501st submission:


As previously described, they need to come up underneath the drop-down boxes on the belt, and hug the cod plate better.

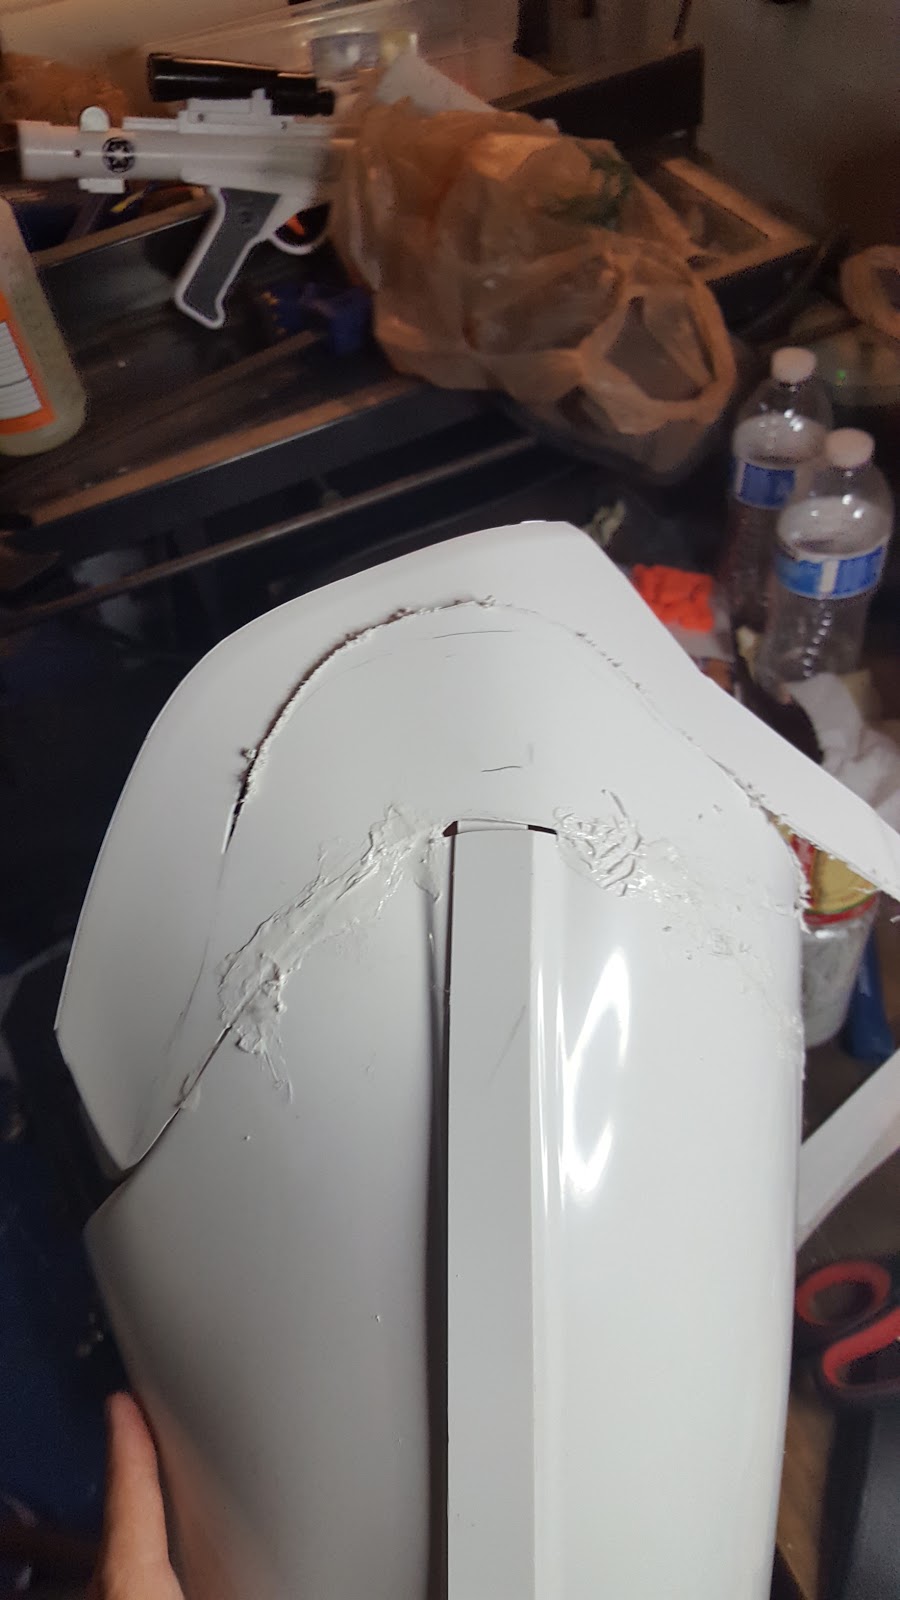
I first retrieved the last pieces I cut off from the outside of each thigh. I re-connected these by butt joining them to the thigh pieces with ABS paste and clamps, to better ensure that the re-added pieces were flush with the thigh pieces as best as possible. This was necessary to not only avoid unnecessary sanding, but to ensure that the pieces were as continuous as possible for a good look.


I then found the pieces I had originally cut from the top. One thigh had this as one large section; however, during my "fitting" I had cut the armor off in sections until (I thought) I had the right fit. This piece wasn't going to be fit for re-adding to the armor as it would require a lot of shimming in and of itself before I could consider shimming it back onto its original thigh.


I was, however, able to use the strips taped back together as an outline of what a replacement piece should be shaped like. Using these pieces and a spare piece of ABS cut out from the inside of the thigh during de-molding, I was able to fabricate a new piece for this thigh, in almost the same shape as the original. (Note that I've omitted the spiky points near the top as I find them terribly annoying.) Thankfully the edge return (on which the strip rests) for the fabricated section was minimal on the original pieces, and nothing I could't re-add with a few layers of ABS paste and sanding.


The top pieces were shimmed back on using backing supports, glued to the thighs and shimmed pieces using CA glue, as they'll be permanently attached and require added strength, since the tops of the thighs take extra stress as they often get crammed into a trooper's hip when the leg is flexed. Other strips were also added to the sides to help retain the shape of the thigh in those areas.


Once cemented in place with CA glue, ABS paste as added to the joints to form the pieces together with the cover strips neat the top of the thigh pulled away to access the whole jointed area.

To be honest, the easiest way to apply ABS paste in these situations is to just use your fingers. This way, you can press it into the cracks, smear the more liquid paste like finger paint, or sculpt more solid paste like soft clay. When you do this, make sure your hands are clean or use silicone gloves. Remember to wash your hands when you're done.


The rough ABS paste was sanded down. Then, more paste was added in divots, pock marks, and other depressions in the armor, and then sanded down. This process was repeated several times with 100 and 150 grit sand paper until the seams were smooth for the most part. ABS paste was also added at certain parts on the top of the thigh near the edges of the added pieces, to help better secure the pieces and to maintain the shape of the top of the thighs.


I plan to use a new batch of unadulterated ABS paste and very clean thigh pieces for the last coat, to color match the thighs as best as possible, as a final coat that can be lightly sanded and polished to make a natural-looking thigh piece. But before I did this, I had to figure out how to make the strips long enough to fit back onto the re-added pieces, since it had also been trimmed.

I had purchased a plastic sign from Home Depot to use as spare parts, however, after some experimentation I discovered that it wasn't made of ABS. So I went with an alternate plan: I shimmed scrap strip back onto the existing strip using the same methods I used on the rest of the thigh. And it worked surprisingly well.


The scrap strips were but joined to the existing strips using a carefully-cut matching joint and CA glue which, despite the small cross-section for adhesion, worked extremely well. Afterwards, I coated the seam with ABS paste and sanded down. When I put the final ABS paste coat on the rest of the thighs, I'll do the same here to even better hide the seam to give the appearance of one continuations piece of strip.


In the next blog, I'll show the finished pieces with the final coat of ABS paste, sanding, and polishing. Until then...

Thursday, April 21, 2016

Fit For Duty, but Room For Improvement

Yesterday evening almost a week to the minute from the initial acknowledgement of my submission, I received the following email:

Hi Erik,

Thank you for your patience! We have finished our review and have reached a decision. Congratulations! Your costume has been approved and I've moved your application into the next phase. Welcome to the 501st Legion!  
There are a couple of suggestions on changes to your armor to make it fit a little better.
1) Shorten the straps on your shoulder bells, this will reduce the black undersuit from showing through on the shoulders 
2) Bring you thigh armor up higher - you may need to simply shorten the straps on this as well 
Once you receive your TKID and welcome letter from the 501st legion, here is some information you'll need to get started: (...)

It's official - I've been approved to be a member of the 501st!

Approved - but with caveats.

However, I found the email slightly bittersweet as it confirms something that I've known was probably true - I trimmed my thighs too short.

The shoulder bells will be an easy fix as I just need to fasten the H&L straps farther into the bell - that's just a donning issue. The thighs, though, they don't go up any higher, and as you can see in my photo above, I'm showing way too much black on my hips. Sure, the thighs are comfortable to walk in, but they probably won't fly for EIB or Centurion approval.

I've honestly been thinking about this since I sent my approval in, and it's been one of the few things I've been fretting about in regards to the armor and being approved at all. So, I've decided to revert the thighs to (close to) original condition.

It won't be easy, but it won't be terribly hard either, with my knowledge of shimming thanks to my thigh backs. And I have most of the scraps I cut out in solid pieces, so they should be relatively easy to re-attach with backings and ABS paste. The only exception is the top of the left thigh, which came off in strips when I was "fitting" my thighs for fit (but not to the ab/ cod plates; therein lies the problem), so I'll fabricate a new piece to join there after doing some "forensics" to mimic the original shape. I will probably need some ABS sheeting from Home Depot or Amazon though, in order to create new back (and possible front) cover strips to help make the operation easier. Fortunately, once I have all the parts in place, I don't think it will take more than a few hours to perform, given how fast the ABS paste seems to set up.

I'll be covering this in detail... in my next blog post.

Before I end the post, though, I'd like to give a shout out to my parents, who helped make me the hobbyist and Star Wars geek that I am today - and now a member of the 501st. My father has worked with models since he was a boy, which is how I picked up my love of modeling. In the 1980s, he even created a Space Shuttle launch pad from scratch, which Revel later used to help create their own model kit of the same. If you want to check out his site, you can find it here at lakecountyspaceport.com

April 14th OC Squad Armor Party & Squad meeting; Improving the Helmet Fans

After self-submitting my photos to the SoCal Garison GML, I recieved an email the following Wednesday from the GML indicating that it would take a week to review my submission for approval.

I attended the squad's armor party and squad meeting on the following Saturday to meet with the squad, fellow ANOVOS builders, and to get some advice on some armor pinch, especially around my the back of my left knee.

The meeting went really well. The OC Squad of the SoCal Garrison was apparently only formed just last year, right before Star Wars Celebration Anaheim, with 17 members. For reference, I'm in line to be the 77th member of the squad. That's obviously some exponential growth within the past year, between ANOVOS builder joining the group, other builders joining, and current 501st members transferring from other squads.


For the pinch, there wasn't mush to be done in the way of trimming, and after consulting with fellow squad mates, I decided to put some foam near the pinch area to help prop it away from the back of my knee to keep it from pinch. The results were moderately successful. Obviously, there's not a lot one can do without affecting the look of the armor, but I apparently have more flexibility in my legs than most troopers, owing to the cut-outs in the back of the knees and a good armor fit. I'll take pics of the shin foam on my next update.

While I was giving advice to builders and trying on parts to test for pinch, I also worked on my helmet fans again. I decided that I needed to add some foam in order to reduce vibration between the helmet and fans, so I purchased some D-type door insulation from Home Depot. Lamentably, it only came in white.


So what was I to do? Coat it in black PlastiDip, of course, after cutting out the desired lengths to match the geometry of the blank's perimeter.


Because it was a hot day and I was spraying in the sun, the PlastiDip dried very fast, allowing me to get multiple coats done within less than an hour. I also used a pencil to help hold the pieces while spraying. I also took the opportunity to patch the places on the blank where the PlastiDip had separated when I was placing the battery boxes.

After all the pieces were coated to my satisfaction, I removed the adhesive backing and installed it onto the blank, on the side with all the electronics affixed.


Installed in the helmet, it looks very good. I forgot to take a picture, but I'll add this to my next build post as well. Until then...