Featured Post

The TKTalkie v4 - Press 6 for the Imperial March

Upgrading - the Path from v3.15 to v4.0 (Note: I had started this draft last year but never finished it, due to personal issues and cuttin...

Monday, March 28, 2016

Testing the Torso and Truncating my Trunk

I finished strapping up the torso by adding the chest and back plates. I don't have any pictures of the straps, but it's basically straight out of the ANOVOS instructions for these sections - four of the longer H&L straps, two per piece, to connect the chest to the ab plate and the back to the kidney plate. Then, connected at the top with the T-shaped shoulder straps. The final look, once donned, is impressive :)


One thing I noticed is that the ab and kidney plate likes to separate near the bottom, due to the slight gut I have. I guess I'll need to work out and wear a girdle in the mean time. It's the only place on my body that's overly fatty.


Additionally, the modified ANOVOS belt seems to be working well enough. The only thing left to do with it is to remove or cover up the upper two Chicago screws to qualify for Stunt Basic or EIB certification for the 501st. I plan to do this with small circular pieces of iron-on canvas patch, after I try adding some washers to the screws to reduce the chances of the holster tearing through the belt.

After the fitting, I finished trimming and gluing the painted ab buttons in place.


There were some places on the armor that had obvious rub, like the back plate into my shoulders and the posterior plate into my inner legs. So I sanded these down with the Dremel sanding drum to eliminate and taper inner edges.


I also noticed, as I did on my friend's armor during the armor party, that the posterior plate likes to stick out. To combat this, I added to two tabs on the inside of the piece, on the edge returns, so that the plate would hook behind the kidney plate when strapped into place.


I'd honestly be about done at this point, but after fitting the thighs some more, it occurred to me that, although I have the thighs properly trimmed for length, I don't have them trimmed for shape. However, more importantly, they don't come up as far as I need them to (when I'm standing). They're too tight, especially near the top where almost no material was trimmed (save the front edge returns). Therefore, I'll have to accept the fact that I need to shim them. I've already started this process, but will make another blog post dedicated entirely to the process. Until then...

Thursday, March 24, 2016

Time to Suck In That Gut

I started strapping the torso armor last night. But before I talk about that, I'll talk about the ab button plates and shoulder straps.

I used to paint miniatures. Admittedly, it's been a while. Here's something I did more than a decade ago, mashed up from parts, with some custom sculpt added, and painted by yours truly.


Painting these round buttons was a little harder than expected due to the rounded edges, but overall, I think I did a good job for freehanding it. Not my best work, but certainly not my worst.


Mind you, the edges will need to come off a bit, especially on the four-button plate, but I'll worry about that when I mount these pieces to the ab plate, which won't be until after the strapping is done.

But let's talk about the shoulder straps next.

The reinforced shoulder straps came out very well, and flush on the bottom.


I measured 4 bars plus the first front bar, just to be on the safe side to have enough in the back. It looked great on fitting, so I marked where the the straps would lay and scuffed the chest plate on those areas, as well as the length of the straps that would cement to the plate. Then I applied cement and clamped.


I unclamped them after two days, and the look great. They're nice and flush on the armor, even with the reinforcements.


NOW let's talk about strapping the ab plates.

I connected the three split rivets on the ab plate to the straps already joined to the kidney plate. Because I ended up covering both the "mistake" holes on the cod plate with AB paste I also connected the groin strap to the cod after I drilled a new hole in the code 20mm from the edge. I forgot to take pictures of this, but the cod looks great, like the mistake never happened. I'm just waiting on some Novus 1-2-3 to bring back the mirror shine after I sanded with 150, 350, and 600 grit sandpaper.

After the split rivets, it was time for the easier stuff, namely putting on the ANOVOS H&L straps. Besides replacing the straps on the left side with the full split rivet treatment as described in the 501st Stunt CRL, I'm currently trying the ANOVOS strapping system until I need something better, as laid out in the ANOVOS instructions.

I came up with a system for putting on the H&L tape. First, I marked the area where the tape would rest using a Sharpie, and scuffed it with 150 grit paper. After sanding, I cleaned the area with rubbing alcohol, which also removed most of the marks, but left just enough to easily help me place the loop end of the H&L tape, cut to just the correct length.


Although I didn't have enough time to get the chest and back plates before needing sleep, I was able to get the lower torso done, as far as the ANOVOS instructions go at any rate.


One thing I realized is that, at least with the test fitting, my pudge causes the bottom of the armor to pop away between the ab and kidney plates. I need to lose some weight, or at least get a shaper until I can shed what little weight I want to lose, which is mostly on my lower abdomen :P I've got a basic shaper, but I ordered a better one due in by the weekend, so we'll see if that helps.

Next on the build comes the chest and back plate. Until then...

Monday, March 21, 2016

Oh, snaps! (And rivets, and ABS paste...)

So I did a bit of work over the past couple of nights. Where do I begin? Probably with the ab plate this time.

The instructions and 501st CRLs call for a snap in the upper right of the ab plate. I followed UKSWrath's blog for more details. Marked the hole, double-checked the measurements, drilled, and tapped the rivet, male end towards the inside (to snap to the strap). Easy.


I needed to start getting the torso plate ready for strapping. Now, if you're using the ANAOVOS instructions, you'd just toss some H&L tape into the left side of the torso and call it a day for that side. But as it is, I (eventually) want to try for Centurion some day (I'll probably have to settle for EIB for the moment due to budgetary concerns, and not wanting to replace the belt just yet). This means that you need three MORE rivets on the ab plate's left side to correspond with the three on the kidney plate. At least ANOVOS gave me PLENTY of spare split rivets :D


Now, where you measure from top to bottom is debatable. UKSWrath does it one way, but since I started out with the kidney plate and am a noob to this, I did it another way. Fortunately, it doesn't matter so long as the rivets or 10cm from the edge of the plate and evenly spaced. This is because the belt will cover up the bottom rivets anyhow. The 501st will accept them in either configuration (if that's your goal).

So instead of having to re-do the kidney plate rivets out of OCD, I kept them as-is and drilled the holes in the ab plate to match. I first lined up the kidney plate, made marks for approximation, verified the measurements on the ab plate with a rule, and drilled.

Now it was time for the groin snaps. Wait... the split rivet is supposed to go in the cod plate, NOT the snaps? ... well f**k.


Yeah, I messed up. Thankfully, snaps are easy to remove with some pliers and "gentle persuasion" (and I have spare #6 snaps from my snap anvil set), but the holes don't exactly disappear with an eraser. And even if I keep one of the existing holes, the other has to go bye-bye. I'll have to make some ABS paste.

Until then, I can get the snaps in the proper piece - the "posterior" (butt) plate. Easy peasy. I drilled a hole about 20mm from the edge of center, then another hole 20mm from that, to match the strap supplied by ANOVOS. Then I set my snaps. I ended up using the snaps that came with my snap anvil as they worked better and match the snaps on the strap.


At least the snaps are in the right place now. In my butt... plate.

Now for the shoulder strap plates. During the armor party, the sqaddies advised us that these straps just love to snap in half lengthwise while trooping, and advised us to reinforce them with scrap ABS on the underside. That being said, I had plenty of scrap ABS, but wanted to match the shape of the straps as much as possible. I tried a heat gun at my office but encountered some "baconing" (where the edges of the pieces start to look like cooked bacon). So I had them take a hot water bath.l


This was challenging for me as a novice builder, but worked out as I was subjecting scrap ABS to the hot water bath as opposed to "real" pieces. What I did was soak the scrap in boiling water for 30-40 seconds, removed the piece, and formed the curve to the room-temperature shoulder straps by hand using my Gorilla Grip gloves. I further used the old rolling pin to remove baconing and any other warp. Each scrap required a few passes. I found it's better to be slow and methodical than to try to rush, lest you ruin the piece and have to start over.

Once the pieces were finished being curved, I used the Dremel sanding drum and sanding block to remove an leftover warping, then glued the pieces under the straps with several clamps and plenty of E-6000.


Later in the evening I went to Home Depot and picked up some industrial acetone for about $8, to start making ABS paste.

Only one of these items is for human consumption.

In a nutshell, here's how you make ABS paste:

Get a glass jar. Add some cut some scrap (make sure there's no clear protective film first; it won't dissolve in the acetone), add acetone until pieces are slightly covered, and then wait a few hours, mixing occasionally with a metal or wood stirrer. Once applied, it dries pretty fast. One can probably work with it in a few hours after you put it on, although I've been waiting 12+ hours due to real life.

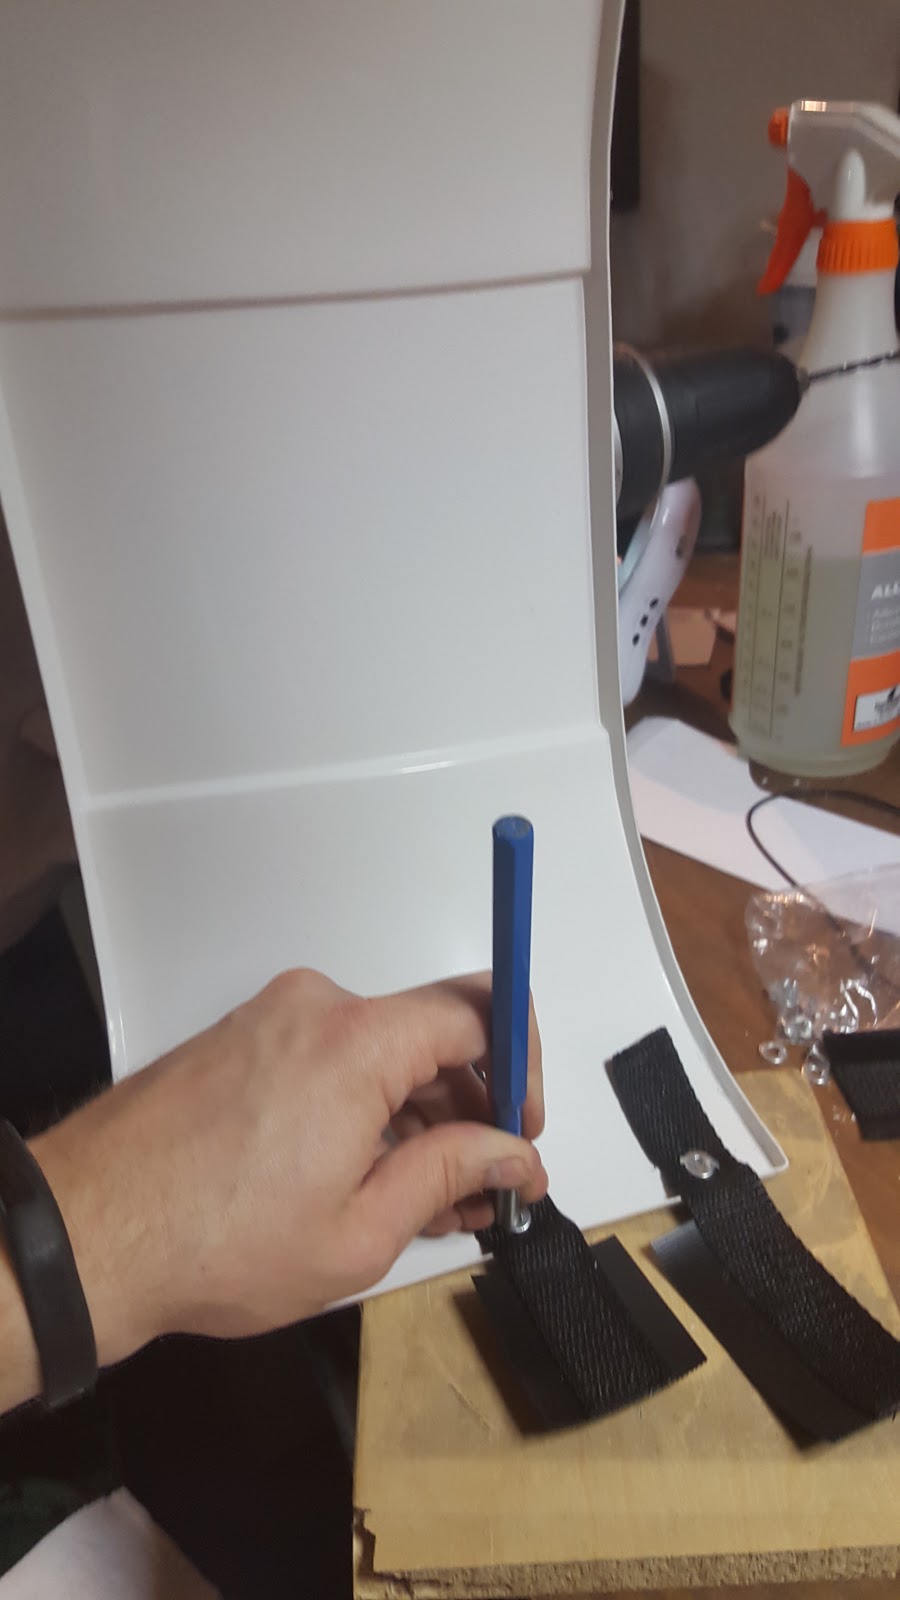
But while that was setting up, I decided to work on another part of the ab plate - the snaps for the belt. Using a mix of the instructions from ANOVOS and UKSWrath's guide, I put my marks at an ideal height exactly 170mm from center in each direction (340mm or 34cm total from snap to snap) at a height determined by using a clamped straight edge as a guide line.


I also placed the belt over the plate as I wore it to ensure the snaps would line up.


After triple-checking, I drilled the holes and set the snaps. Now, getting the belt onto and off of these snaps is a pain - it's like the crimped the snaps on the belt stiffer than those on the ab plate straps (which use the same size snaps). I applied a very very slight amount of WD40 to the male snaps on the ab plate to help hasten them, which seemed to help a bit. When donning the armor, you'll probably want to fasten these snaps BEFORE putting the armor on, and unfasten AFTER you take the armor off, to avoid damaging the plate. But yes, the belt fit just fine with the measurements as described above.

Now that the ABS paste was set up, it was time to cover the one hole in the cod piece. I applied paste to the hold and both sides of the plate, using a scrap ABS piece as a scraper to control lumping.


Time to let that set.

Working with the belt, I found it flaccid, to say the least. So I took the advice of other ANOVOS builders (beyond replacing the cloth part of the belt outright) by gluing the ABS plate to the belt, and applying clamps and magnets.


Since the top is the part from which the cloth will hang, I clamped the top foremost, and used magnets elsewhere. That should help stiffen up the belt for now, and allow me to replace the cloth with a Kittle belt in the future. This is because, according to UKSWrath, the stock ANOVOS belt won't fly for Centurion status, even modified (I still need to remove or cover up some of the holster rivets for Stunt cert). But I don't have $40 to spend just on a belt at the moment, so that will have to wait until later. For now, this mod will get the job done for at least Elite certification (once I take care of those rivets).

That's it for now. I was able to get started on sanding the ABS paste on the cod, but because the snap had left a circular score ring, I had to sand down again and apply a second coat (no pictures). Next session I'll probably be finishing up that area and finally getting the strap and split rivet in place. once that's done, I can apply the left and right straps for the ab and kidney plates, and then the butt, chest, and back plates, then the limbs, and then... close to done? We'll see.

Until then...

Friday, March 18, 2016

Rally Round the Thighs and Split Rivets

At the beginning of the week I was beset by The Cold From Hell. Added to that the DST change, and I wasn't able to get much work done until last night. But I was finally able to rally last night to get some genuine work done after getting the kids to bed.

I hadn't unpacked my armor or tools since coming back from the armor party on Sunday. After getting my work space prepped again, I started tearing stuff out. Noticing that the H&L on one of my shins doesn't like to stay in place; may have to E-6000 that stuff later.

Edit: DO NOT trim thighs for length until the end of your build. Mistakes were made. Consider the following a cautionary tale.

For now, I'm looking at the thighs (again) and a conversation I had on FB with a fellow builder. Last time I touched the thighs I heavily trimmed the front down. Here's what they look like coming out of the armor party, both being trimmed in the front:


Mind you, I'm not messing with the inseam, which seems to be fine for me, but rather the peaks on the fronts and backs of the thighs where the shells come together. I realize that they are poking me in the... posterior.

So I decided to take off the first inch or so for about 11" in length in the rear (the front for bother pieces is about 13.5" for me).

Before...

... and after.

The belt sander would have been nice, but I was able to do the sanding with the Dremel sanding drum and the sanding block after cutting with the Dremel cutting disk.

Since I was on the subject of the thighs, and wanting to handle split rivets in a proper fashion, I decided to put on the right thigh ammo pouches, which attach near the knee. Using UKSWrath's guide, I found placement not too difficult, although liking symmetry, decided to center the center pouch on the thigh's front strip.

First I drilled the holes on the pouch at the indents provided on the piece. I placed scrap wood underneath as to not drill into my work table. This would also come in handy later for setting the split rivets.


Once the holes were drilled, I used the piece to help determine where to drill the holes in the thigh piece, with that center pouch lined up just so.


After measuring more than a few times, it was time to drill holes in the thigh. I decided to do this one hole at  a time, wherein I would drill the first hole, mount and rivet that side of the pouch, and then repeat on the other side, to ensure a good fit. After a gut check, I drilled.

With the first hole drilled, I took to setting the split rivets, using three primary tools - a standard screwdriver to split the rivets, a metal tap to flatten the splits, and a plastic mallet to prevent damage to the two aforementioned tools.

The sanding block was there for moral support.

Splitting the rivets on the already-assembled thigh piece was challenging, and probably not a great place for someone with less experience to start. But I've had plenty of experience with leather work, rivets, and snaps, so having the right tolls (unlike at the armor party), I set off with care.


Getting the screwdriver in the area was trick, but I was able to get just enough of a split to start working with the tap. The trick with the tap was to turn the rivet after ever few strikes in order to ensure that both sides of the rivet were being tapped down as equally as possible. A pair of needle-nose pliers helped rotate the rivets since the ends can by point for fingers. After some work, it was pretty.


I repeated the process on the other side after again measuring placement and drilling the other hole. Once finished, the ammo pouch was done.


Since I was on the subject of split rivets, it was time again to revisit the kidney plate. I mangled one of the split rivets when I tried to start the strapping at the armor party. THANKFULLY, ANOVOS gives you extra rivets, in case you screw up one or two of them (like yours truly). So without reservation, I carefully cut off the mangled rviet without hurting the kidney plate or strap.

The kidney plate has three straps, although the top strap doesn't look like the one depicted in the instructions (but the odd strap is the only one that doesn't match any other straps, so I was able to deduce its purpose).


These straps require you to place a hole in them, a tricky prospect without fraying the fabric in the process. The best way to do this, I found, is to use something that will sear the hole and minimize fraying. So I made the holes with a soldering iron.


With the soldering iron, I had to be quick to ensure I didn't make the holes too large - larger than the rivets for easy of installation, but smaller than the washers. But the iron made quick work, once I figured the location of the hole for each strap. I unplugged the iron and set it aside as to keep it far away from my impending kidney plate.

Using the drill gun as a support, and the scrap wood underneath as for the thigh rivets, I easily placed three split rivets through the kidney plate and each strap.


Note that I'm placing the straps close as I plan to have no gap between the ab and kidney plates, which fits me just fine and is required for 501st Centurion anyhow.

Having made enough noise in the garage, I left the last split rivet (in the butt plate) and other strapping for another evening. Until then...