Featured Post

The TKTalkie v4 - Press 6 for the Imperial March

Upgrading - the Path from v3.15 to v4.0 (Note: I had started this draft last year but never finished it, due to personal issues and cuttin...

Tuesday, February 9, 2016

Compelling Two Sides to Meet

After I got the kids to bed last night and did the dishes, the main task was finishing the gluing on those forearms, so I could finally match the seams up on the biceps and get those fit to my "massive" 13" guns. So I picked up the biceps and un-clamped them from their glue run last night.


Because I had to trim a bit to get the proper fit for my "massive" forearms, I was left with a pretty sizable gap in both arms. Thankfully, the ABS is pretty flexible, and the E6000 provides a firm hold once it sets up, so it was just a matter of applying the glue, getting the loose edge onto the strip, and clamping it in place.


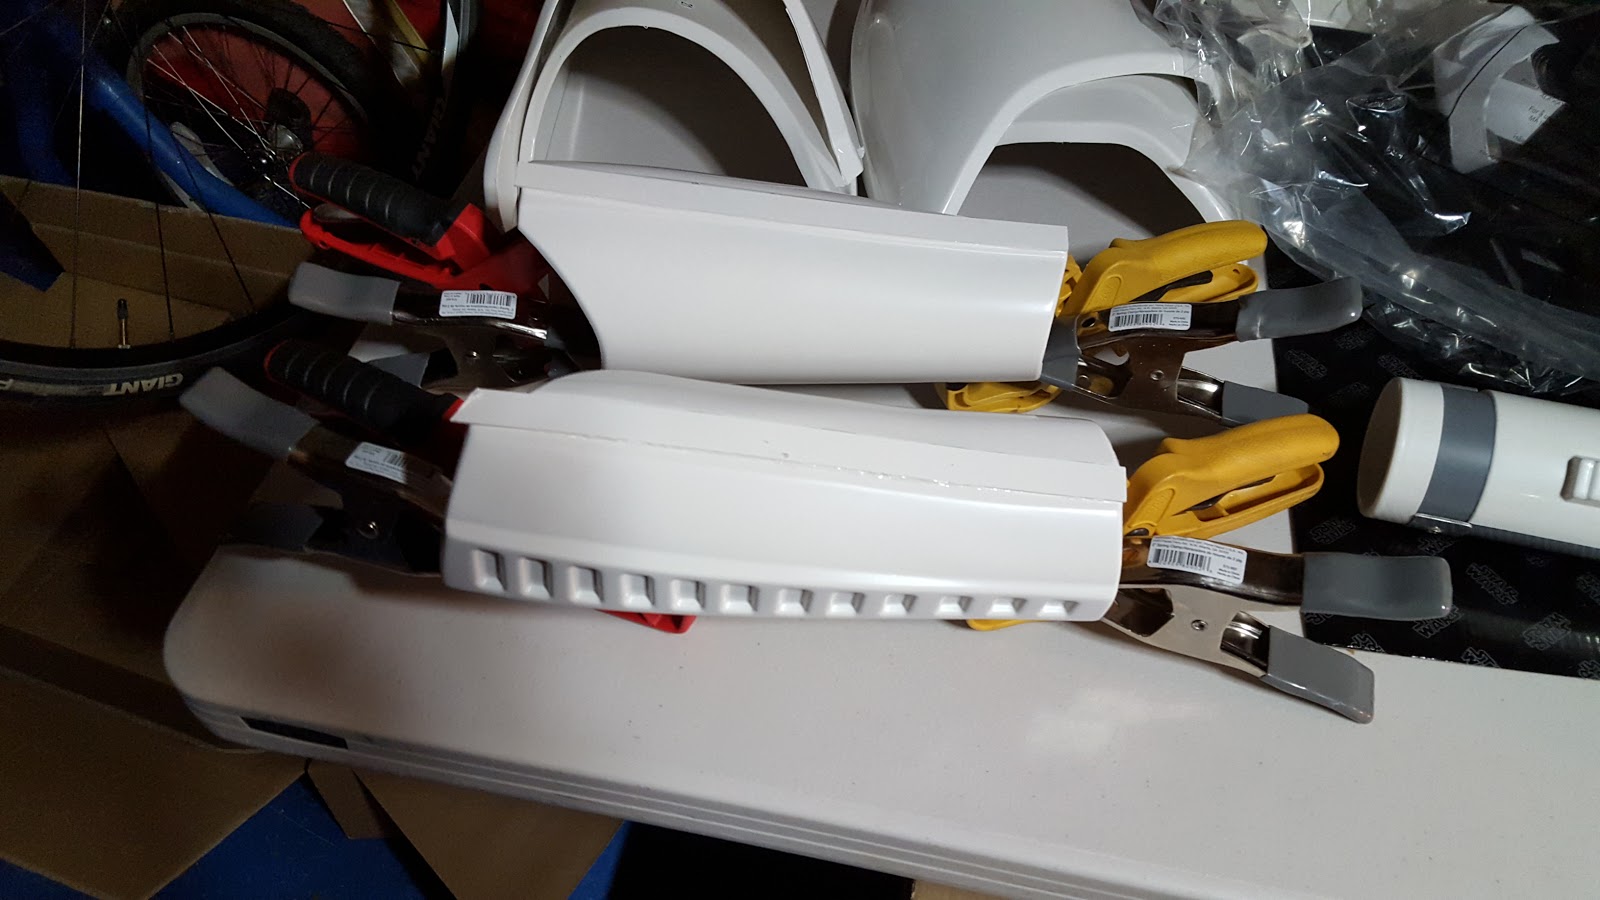
I started with the left forearm. The first task was to ensure that the wrist end lined up and was butted against its mate before clamping. The large spring clamps make this task easy.I  then butted up the elbow end as tight as possible and applied another large spring clamp. After those where in place, ensuring that the edges were butted up as much as possible, I applied the heavier clamps, and then magnets in the middle. 


Once I ensured everything was in place and my technique was sound, I repeated the process with the right forearm. I carefully placed the pieces on the table to set for the next 24 hours or so.


Then it was just time to wait. Tomorrow I hope to do final fitting on the biceps so I can start stripping and gluing them as well.


To finish the night, I cut out the shin pieces, Pieces 24, 25, 27, & 28. I usually work while listening to classic rock on Pandora. I wondered if some of the songs were playing in the workshop when they were building armor in 1976. Perhaps, but there was probably more smoking going on too, I thought, the LOL'd.

Anyhow, and notably, these pieces don't follow the odd number = right, even number = left convention, so I'll have to make doubly sure I don't botch something up, and also number the pieces on the inside to eliminate confusion. I used the same technique as I did for the thighs, namely score & snap. The inside of the shins was tricky, but a steady hand and a relief score down the middle ensured that the inside fill came out without issue.


I'll probably start on my shins as my biceps go through their glue stage (again). Notably, another FB member on the Anovos group page is having issues mating his shins, due to the fact that the back edge is fastened with hook & loop, so clamps & adhesive won't easily solve that issue. I'm going to research UKSWrath's post on the subject, as I know he's already done these pieces, to see how he recommends sizing and fitting these pieces.

Monday, February 8, 2016

Back to the Grind (and Score and Snap...)

My son is all right, with a cast and a temp pin in his arm for the next 4-6 weeks, but already getting back to what 4 year olds do, thank goodness. Needless to say that I was occupied basically the whole weekend taking care of him. I finally got a moment to myself tonight.

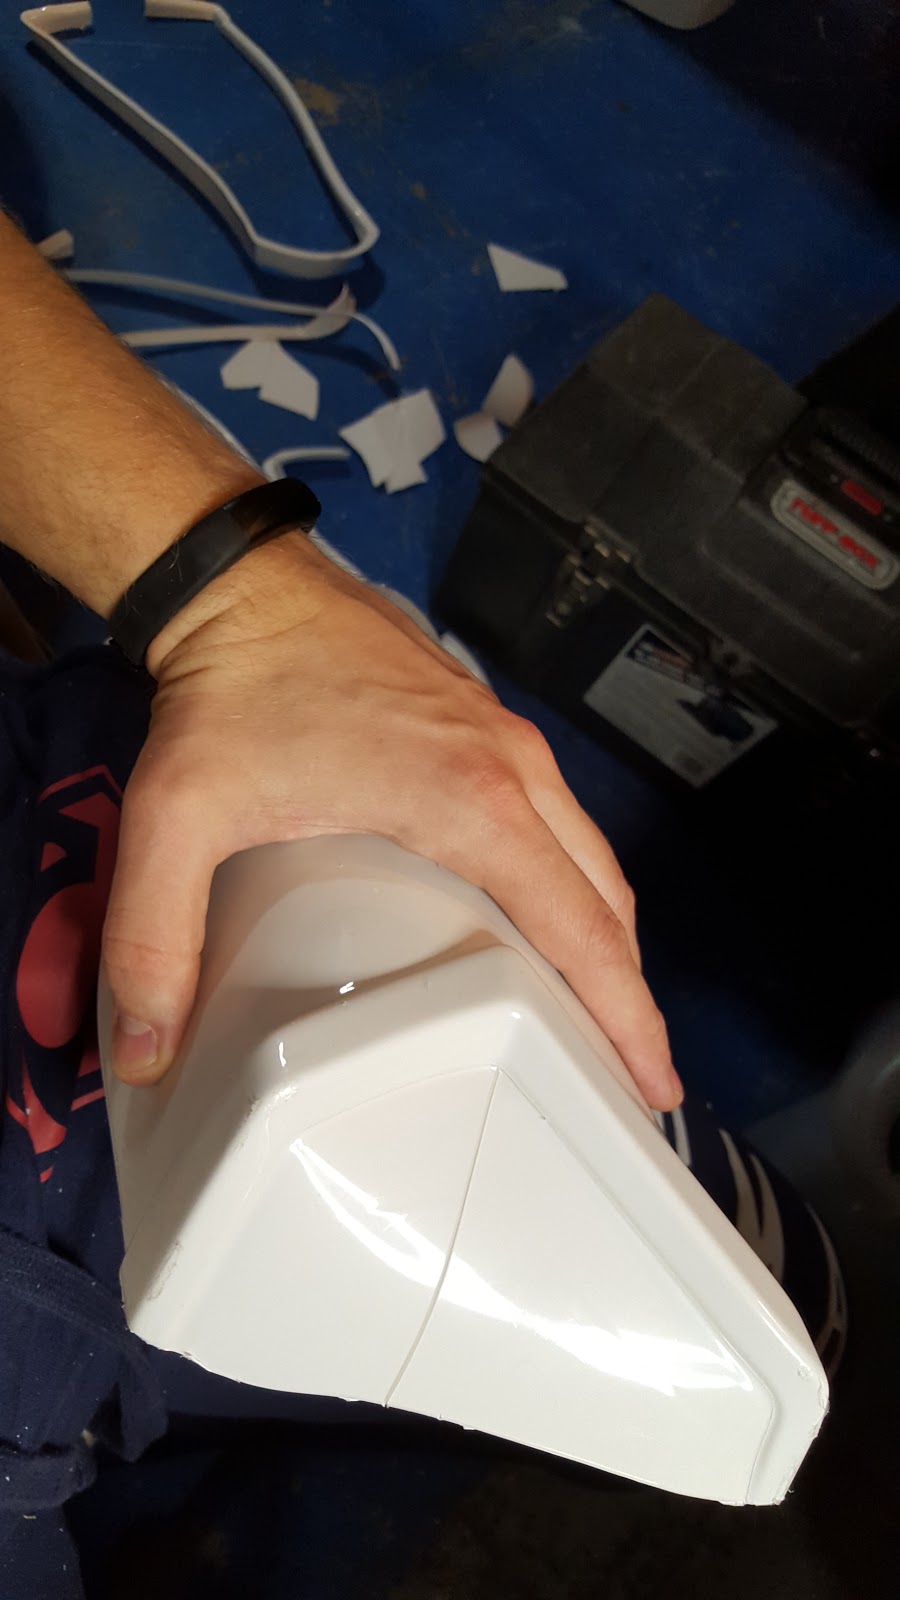
But while I was spending some time with my son while taking the afternoon off from work, I decided I would try the score & snap approach to trimming the armor, or at least breaking pieces from the molds. And having already seen Trooperbay and others do it on YouTube, I gave it a shot on my thigh pieces, Pieces 20 - 23. All in all, it worked, with very minor slippage of the knife and workable rough cuts.


I cut around the inside arcs of the armor pieces, scored those lines, added relief scores, and popped them out like Trooperbay's method and what I did with the Dremel for the arms. When the score didn't want to split, I just scored it more until it popped. Since the pieces still need to be measured, cut, and fitted before final assemble, any roughness on the cuts doesn't concern me.


After the kids went to bed, I was able to get back into my work space and continue work on my forearm pieces.

One thing I immediately decided to do, based upon the fit and a reference shot of some film-used armor from posted on whitearmor, was to remove the elbow-side edge returns for easier wear and movement. I did this by making some rough cuts with the Dremel cutting disc, popping out those parts, cleaning up with the sanding drum, and finishing with some hand sanding. At the same time, I rough trimmed the strips in order to prep them for after the pieces were assembled, and to make removing the edge returns easier. Results were great.

The key is to fit, adjust, and refit. Remember: tape is cheap; armor is not. If you're like me, you'll probably use a lot of tape fitting and refitting as you go along. That's fine. It's better to measure twice, three, six times, etc., than to accidentally take off too much and permanently screw up a piece, or try to shim it back to fit.

EDIT: also, read this post for clarification between "edge returns" and "inside edges." As the arms pieces include no actual "edge returns," read the above and remainder as referring to "inside edges".


On the left forearm, I removed these edges with the pieces taped together; on the right, I removed them with the pieces disassembled and then taped them together to ensure a final fit. Either method was fine, I discovered.

With the final edge returns removed and the fit finally good, it was time to start assembling the two halves for each arm. I started with the front edge of each piece (the side with the ridged edge). I applied the E6000 to the alread-attached strip, placed the other piece on the strip, checked for alignment, and clamped/ set magnets. Because the raised edges form a valley inside the armor, I was limited with clamping as the larger clamps wouldn't fit into this valley on the left arm; the mold on the right arm was more forgiving and I was able to use two larger clamps on it.


Because I'm going to need to coerce the other edges together using larger clamps, and because I needed all my magnets for the front edges, I decided to only glue the front edges tonight. The back edges will get glued tomorrow once the front edges set, allowing the clamps to "muscle" the back edges together.


You can see the thermal detonator in that shot. Because I want to try to line up the strips on the biceps with the strips on the forearms as best I can, and I can't do that until the biceps are done gluing on both edges (and I REALLY didn't feel like starting to measure and fit the thighs yet), I decided to move away from the limbs for a moment and work on the detonator with was an easy build - and one I modified for extra use :)


I started by reading the instructions and the 501st ANH Hero specs, which go a long way towards telling you exactly how this piece should be assembled, even if you're not planning for 501st approval. After I understood the build, I put one of the caps on the end of the grey cylinder - this would be the left cap. I put the right cap on, dry a line to mark its edge, and carefully removed it. The caps have a super tight fit, but I want to be able to remove the right cap so I can use the cylinder as storage while trooping. After the cap was removed, I used the Dremel sanding drum on low to carefully sand down the right edge of the drum, hand sand with a small piece of sanding paper, and repeat, enough that I could remove the right cap without the contact becoming too loose.


After sanding the edge down to an acceptable level, I put the right cap on and went to the nearest door jam to draw a straight pencil line onto the tube, to line up the metal clips (the door jam trick is something I learned when I built model rockets with my dad as a kid). With the caps and line in place, it was easy enough to place the clips on, mark the holes, drill pilot holes with the drill, and screw the clips on. Later I will probably replace the screws with short machine bolts, nuts, and locking washers, so I can store stuff int eh cylinder without poking it with the screw ends.


With the clips installed, I cleaned up the edges of the control piece and sanded its back. I then placed it onto the grey cylinder (Just resting on the edges of the clip, facing up when attached to the belt, with the round part towards the trooper's right side) and marked with pencil its resting location. I sanded down the area on the grey cylinder for better cement adhesion, applied E6000 to the back of the white piece, placed it on the grey piece, and taped it down with masking tape.


I'm a storage container now, too! :D

Finally, I also took out some of the return edges in the armpits of my bicep pieces for better fit, in a similar fashion as the forearm pieces.


That was it for the night. Tomorrow I'll finish gluing the forearms and perhaps cut out the shin pieces so I can begin working on the legs as I finish up the arms and biceps.

Friday, February 5, 2016

Hiatus

No build updates tonight. My 4YO son broke his elbow and requires surgery, so I'll be away from home for a bit. Thanks for your understanding.

... and This is Why I Use E6000

I'll be paying attention to this build from 501st member ukswrath, who's going to make a few mods on the kit for fir and comfort. I'll be following my ANOVOS instructions for the most part, but if things get wonky with the included hardware, it will be nice to have another reference for alternative fitting and fastening methods.

I especially will be referring to this post as it's the best reference I've seen for fitting the armor. Hopefully my bicep kits fit fine, but if not, it's a good thing I'm using E6000 in case I have to tear my finished one apart or remove strips for a proper fitting on the other one.

I'm already eyeing replacement latex hand guards for future Centurion (Level 3) Hero certification, as well as replacement eyes for the bucket (to replace the inside visor piece which may perhaps improve my ability to wear the bucket with glasses if I so desire).

...

... and as soon as I got home I knew I'd have to un-glue my biceps and forearm pieces. Based on ukswrath's measurement instructions, my forearms were off... WAY off. Like as big as a Mega Man Arm Cannon on my right forearm (even after cutting to the 2nd cut line on Piece 19 IIRC).

Fortunately, E6000 made this incredibly easy, as it's basically beefy rubber cement. I simply grabbed the excess on my strips and lifted CAREFULLY. All the strips came right off without damage. Yeah, I lost time in gluing, but I'd rather get it done right than have huge pieces of armor that jiggle around everywhere.

NOW it was time for the steps I'd missed - taping, measuring, and cutting.

As ukswrath points out in his thread, the front raised edges are the important parts, and you want to leave 15mm overall, split as evenly as possible between the two edges on either side of the forearm piece. (In this case, the left pieces are almost spot-on in this regard, but there's a LOT of material you can remove in this area on the right pieces to get that 15mm size, especially Piece 19 IIRC.) Therefore, most of the excess came off the back of the pieces. And there was quite a bit for me, because "I'm not the world's most physical guy."

Measuring with a tailor tape measure the circumference of the biggest part of my forearm and my wrist, and then measuring the circumference on the same places on the taped-together pieces, I was able to see that I needed to take more off the wrist side than the elbow side. I marked measurements on the armor and used a flexible straight edge to connect the measurements together (which is perfect since the strips themselves are flexible straight edges).


I kept the front edges taped up after I trimmed those to a 15mm tolerance or close...


... and kept adjusting the back edges of the armor for the fit.

After cutting the front parts so that I'd have enough raised edge for the strips, I used a combination of measuring, marking, and overlap & taping to test the fit before doing any cutting. When it came time to cut, I generally cut less than the mark, because it's obviously easier to cut in increments than to try to add material back on with oversized strips. If more needed to come out, then I marked and made another cut.


The result was forearm pieces that fit better but still allowed the arming suit when it comes in. You can see some armor pinch on the top of my forearm; most if not all of that return edge will probably come out once I glue the pieces together (especially since it's catching my elbow when I bend my arm), but I want to see what the final fit will be before I remove too much material. No need on making more potential mistakes - especially ones that can't be so easily undone as E6000.

All in all, I actually didn't lose too much time since I really needed to do this step anyhow. I have to remind myself that putting this together is, as one FB poster put it, "a marathon, not a race."

Sanded the glue points, added E6000, and clamped the strips back on. Tomorrow I'll adjust the bicep pieces in a similar manner as I start to glue the forearm halves together, and start cutting out leg pieces :)


Edit: for reference, kman on whitearmor posted a reference shot of film-used arm armor :)

Wednesday, February 3, 2016

Give 'em the CLAMPS!

Quickly unclamped the bicep pieces this morning before work to glue and clamp the strips on the opposite edges. That way, I’ll be able to glue and clamp both sets together tonight, provided I get more clamps and magnets at Home Depot today. I set the alarm on my phone as to not forget.

Created the blog today and added the back posts. Posted the blog to FB on the Anovos group and my personal page. Instantly got a lot of good reaction :D One of my friends pointed me to the local 501st garrison, and now I'm part their FB group and two other closed groups. As if I weren't buys enough :P (Be careful what you wish for...)


Went to Home Depot and picked up 20 mini clamps for $0.37 each. I thought about using clamp-style paper clips, but the mini clamps have rubberized ends that won't scratch the armor or require me to cover parts with tape to prevent scratches.  I also picked up two larger spring clamps (to complement the two I already have plus the four c-type spring clamps) for $0.99. Also got some magnets, though they were low on selection. But overall, I'll have enough mini clamps to strip four edges at once, then enough magnets and other clamps to fit one arm or leg piece together.

(later)

After taking care of kids and chores, it was past 11pm, so I wasn't able to cut out any more pieces, but I did get a bit of gluing done.

But before that, somebody on FB asked for close-ups of the removed return edges on the forearms, so here you go :) The still need some slight sanding but as you can see, the edge returns are nothing but sight raised edges now. The edges also look slightly rough due to the still-attached protective film fraying at the sanding edge (clicking on any photo should display it full screen).


Began by removing the clamps for the bicep pieces. I trimmed the slight overage off the strip near the elbow joint (BTW, Parts 41 by label are Parts F in the instructions; all the strips are mislabeled). Since the elbow needs to be flush most of all, it's a good base for lining up the inner and outer shells.


When you sit the pieces together flat on the table, the elbow ends are even. The upper ends are not; this is why I left the strip ends on this side uncut, so I can make these edges more even after gluing.

Edit: I know some (like this fellow ANOVOS builder) are having issues with the edges of the armor matching up. Keep in mind that these kits are screen accurate, meaning they have all sorts of inaccuracies inherent to the original 1977 armor. What I did to fix the edges (as opposed to heavily relying on the edge strips to cover gaps, was this: I matched as much of the butt joint together, marked the overlap portion with a line, and cut off the overlap. Worked great with my bicep and forearm pieces. Nice matching edges for the strips. The lines aren't 100% straight, but certainly 90% and more than enough to cover up with the strips.

That being said, I removed the film from un-stripped outer piece and lightly sanded the very edges of the butt joint. I then applied E6000 to one of the strips attached to the inner piece, lined the pieces up, and clamped. I then repeated the process on the other side. The results look very heavy duty as far as the clamping and magnets go :P


The other bicep will have to wait until tomorrow; I'll only be able to perform this sort of final clamping on one piece per day, but I'm in no rush.

With the mini clamps procured, I was ready to start initial gluing on the forearm pieces. Firstly, there are the strips (as with the other strips, Parts 40 by label are Parts E in the instructions; all the strips are mislabeled). As opposed to Trooperbay, who marks the pieces with lines, I marked the strips by putting a line halfway along the length of the strip, after I sanded the strips for better cement adhesion.


Then, I removed the protective film and sanded the butt edges of the two inner forearm pieces, 18 & 19. Wiping off the dust, I applied the E6000 to one of the the butt edges of the forearm piece, lined the strip up according to the line I placed, and clamped. Since this piece is bowed outward, I clamped the ends first, then the middle, and then put a clamp in between each side, for a total of five clamps. I repeated this process until I had all four strips clamped to both inner forearm pieces.


That's it for tonight. I'm hoping to start cutting leg pieces tomorrow so I can have all my limbs accounted for :P


Tuesday, February 2, 2016

Forearm Pieces and Bicep Gluing

Found the Trooper Bay playlist on YouTube. After only watching three videos, and finding more info on whitearmor.net, I found my answers. End returns are to be kept in specific places and removed in others. Ankle and wrist returns should be removed, but others in the arms and legs are optional for fit. I think I’ll glue the pieces together first and then use the Dremmel and sandpaper to adjust fit as needed.

Also found a good whitearmor post on modding the Disney E11 blaster. Saving this link for later. Might have to buy those Hasboro conversion parts to get my blaster up to 501st specs.

(later)

The Trooper Bay guy cuts his pieces using the score and break method. I tried this on a small piece of my armor to adjust the butt seam for gluing, and although effective, it has to be done from the outside of the armor due to the protective plastic film that protects the armor from scratching during shipment and pre-assembly. For now I’m going to stick with the Dremel method; it’s messier, but I feel I have more control and cut through the film and armor without too much fuss. I'm also afraid the knife will slip and mar or ruin a piece (or me).

Finalized the butt fit for the bicep pieces by removing hte protective film from all parts, sanding the underside of the strip and the very edge of the bicep pieces, then gluing using clamps, magnets, and the E6000 cement. Magnets were wrapped in tape per a tip from the FB group to avoid scratching the armor and make placement easier.


The Trooper Bay guy uses CA glue and a curing catalyst, but I feel safer using the E6000 in case I have to unbond pieces. He said this stuff smelled bad, but it doesn’t smell as bad as other chemicals or adhesives I’ve used. Application is tough though since it’s not a fine point application. Still, I managed to apply it with almost no excess, smoothing and wiping with a paper towel. Applied the plastic strips to the armor without cutting; the armor will need trimming afterwards, so I’ll just cut the strips then with the Dremmel and a steady hand. Definitely need to hit Home Depot tomorrow to get more clamps and magnets so I can do more than two edges at a time. Letting them set up until tomorrow morning at least.


Cut out the forearm pieces, 16 - 19. One of the pieces for the right arm had two cutting lines, so I cut to the first line until I had the ends cleaned up a bit. Upon test fitting, decided to cut to the second line as I don’t have giant forearms. Also, for Level 3 certification, the wrist return edges were removed using a combo of the cutting disk and the sanding drum. I’ve decided to leave the other return edges in for the mean time, until I’m ready for a final fitting. Return edges are easy to grind out with the Dremmel’s sanding drum if need be.


Pieces cut, cleaned, and sanded, with the biceps starting their glue run, I’m done for the night.

Monday, February 1, 2016

Cutting Bicep Pieces

Joined the ANOVOS Stormtrooper Building Kit Group today on Facebook, where I learned some tips. It will be very helpful to have people in the same boat, getting advice from expert builders.

Also discovered that my kit was supposed to arrive with a poster and didn’t; sent an email to ANOVOS. They replied later to tell me it will be on the way in 2-4 weeks.

My wife letting me buy TK Boots for the outfit - so awesome!I think she wants me to try for 501st status :P (her Theater degree is showing.) They’re back ordered until the end of February, but I’m unworried. I may still be building my armor by then anyhow.

Also discovered that Disney is not selling their E-11 stormtrooper blasters ANYWHERE after removing them from the parks. Sent them a scathing email, and was forced to buy blasters for the boys from eBay at a price hike from a private seller, as I already have one for the costume.

(later)

Didn't have a lot of time to work tonight given chores and getting the boys to bed. Cut out pieces 12 - 15. Now, I’ll need to glue them together to make the two bicep pieces.However, I’m confused on if I need to keep the end returns (the 90 degree folds on the ends going into the armor) or if I can remove them.


Somebody on the FB group mentioned some good tips from Trooper Bay. Going to check that out tomorrow. Tonight I only had enough time to cut and prep the pieces anyhow.