Featured Post

The TKTalkie v4 - Press 6 for the Imperial March

Upgrading - the Path from v3.15 to v4.0 (Note: I had started this draft last year but never finished it, due to personal issues and cuttin...

Sunday, February 14, 2016

The Shin-dig

Before I get to then shins, I'll talk about the stock head harness. The adhesive on the H&L strips I tried to glue didn't allow the E6000 to set up properly, so I had a big mess to clean up. After trying rubbbing alchohol, I resorted to one of the best solvents - good 'ole WD40. With some of that and some elbow grease, I was able to get most of the bad E6000 and adhesive off the back of the H&L strips and the harness itself.


Once they were cleaned, I washed them in soapy water to remove as much of the solvent as possible. I also lightly sanded the part of the harness where the H&L strips would go for better adhesion. Then I dried and dusted them off. I then tried a different adhesive, E6000's close cousin, Shoe Goo, for its strength and flexibility. Back in the clamps it went.

EDIT: read this post before working on your shins. A small number of kits were affected by mis-numbering of parts.

Next were the shins, which I had measured the previous night. After final measuring and initial cutting and re-fitting, I decided each piece needed to measure 6" at the bottom and 8" at the top for a proper fit for my shins and calves.


Once final cutting and edge sanding was done, I started gluing on the strips to the outside shells, Pieces 24 and 27, as these pieces will have both strips glued down, whereas the inside shells will not. The front Strips C were easy enough - I put a line done the center lengthwise after sanding, beveled the corners, applied E6000 to the shell, and clamped them in place using the mini clamps.

Strips D are actually wider by 5mm, but this is to provide extra spacce for the white H&L strips that make up the closures for the rear calves. For these strips, after sanding, I measured 10mm, but left the remaining 15mm for the H&L strips.


I then glued the 10mm edge to the outside shells in a fashion similar to the other strips. (I also added magnets after taking the picture to increase clamping action.)


And after exhaustive measuring, re-measuring, cutting, re-cutting, clamping, and gluing (and celebrating Valentine's Day with my wife who encouraged me to buy this kit!), that was it for the night. I'll wait for these pieces to set up before doing more work next session


EPiC beer time!

Saturday, February 13, 2016

Getting My Head Into the Game; Arms Clean-Up

During the day this weekend I've started toying around with my helmet (bucket). Namely, like many Anovos owners, I'm not satisfied with the stock harness in the helmet. Some have replaced this with pads, or gone with a cheesecloth + Plastidip method. However, as I promised to some blog viewers, I'm going to work with the kit for now, at least until it's complete; thereafter, I might make post-build blogs regarding mods.

As the the sstock harness, the two problems are the hook & loop placement in the helmet that keeps the harness in place, and the hook & loop strips coming off the harness itself. For the latter, I've decided to take the nuclear option by removing the strips, applying a gerous amount of E6000 to the harness, re-placing the strips, and clamping (especially since I won't need the clamps tonight).


I'll let that set up and then start removing and re-placing the H&L inside the helmet for better placement. I need the harness as far back as possible to give my eye glasses space (if I want to troop without contact lenses), and for possible future electronics installation (like the Pyle Pro you can see in the above photo).

I unclamped, untaped and/ or removed all magnets from all the arm pieces and I'm satisfied with the results. However, given the "screen accurate" nature of the pieces, there's significant overhang on all the pieces post-fitting.


Using the Dremel cutting wheel and sanding drum, I was able to trim to pieces jutting over down to the lower pieces for a nice, even seam. I cleaned up the strips as well, using the knife, sanding drum, and very steady hand to add bevels post installation.


There's still some minor cleanup to do on the edge returns on the shoulder, elbow, and wrist edges, but otherwise these pieces are ready for final fitting once I move to installing the strapping. As promised, I'll be using the Anovos strapping for the time being when I get to that stage.

To finish up, I put the shin pieces on my legs to do initial sizing, by overlapping the pieces and marking the overlap to determine how much total material will need to be removed from both pieces in the rear.


Next session I'll determine how to split the differeence between the pices to make an even, center-most seam in the back of the pieces for strip and H&L placement for final assembly.

Friday, February 12, 2016

Pulling a Stunt & Pulling Out the Stops

So it occurred to me reading the 501st CRLs in conjunction with a post on the Anovos FB group that the Hero helmet is a completely diffent sculpt from teh Stunt helmets (especiallly in regards to the number of teeth in the "frown" and the general shape of it) that Anovos sold with the kit. Not that it bothers me too much, except that the helmet is Stunt-oriented and the belt is Hero-oriented. This bascially means that I'll need to remove two Chicago rivets from the belt and cover the holes, or buy a new belt. Fortunately, UKSWrath has already done the  former in a good fashion, so I'll again be using his expert notes to achieve that when I get to that point. Otherwise, what I've done on the build and what I have left to do (with the belt in addition) will remain unchanged.

That being said, I got a lot done this evening. Firstly, I unclamped the right bicep and decided it was just right. After testing the left bicep one last time, I decided it too was also fine as-is, with no further trimming. I clamped the curved edge with four clmaps, and then decided to clamp the other edge with four clamps as well. I just want the piece done, done, done.


After I was done with lefty, I went back to righty and found that one of the  seams was untrue and angled. So Iifted the offending seam, cleaned the old cement off the edges, re-cemented it, and used a large c-clamp, large magnets, and small spring clamps to clamp it true, as my other clamps were in use. It should hold fine until it's set.


Additionally, I was done debating about the right bicep. I lifted the offending edge, cleaned up the old cement, shaved about 3/8" off the overhanging edge, re-cemented it, and set the edge.


I used the smaller spring clamps on the edges, but since I was out of larger clamps for the middle, I resorted to smaller magnets and masking tape, which worked quite nicely to keep the butt joint against the strip.


And for my finale for the evening, I trimmed the front edges of my shin pieces using UKSWrath's  notes. I found the outside of the raised edge, measured in 10cm, and cut off the remainder using the score & snap technique.


After removal, I used the strips, which I had sanded on one side and put a mark lengthwise down the center, to ensure the cut was right and that there was enough materials for proper installation of the strip, when it comes time for gluing.


Tomorrow I'll be able to start final clean-up for the arm pieces, perform fitting and trimming on the back edges, and perhaps even start gluing the strips onto the front edge of the shins. It feels like I made a lot of progress today, in terms of building and experience.

Being Too Nitpicky?

Purchased some electronics for the helmet that came recommended to me by another trooper. Used, it was less than $10, even after tax. Looking forward to testing it out and mounting it in between working on other armor parts.

Didn't get much done last night as I had other distractions, like going to a concert :)


After the concert, though, I did final sizing for my right bicep. Now I'm just hoping it's not too snug. I set the edges with the crazy bend up in the clamps first. Then, when I got up this morning, I clamped the other edges together in order to give the first edge enough set-up time to deal with the crazy curvature with the particular edge.


The left bicep might need some very slight trim, but I want to see how the right bicep fits before I do that. I want to ensure that the right bicep isn't too tight, especially when flexing my bicep. Once I get a feel for rightly, I can see what I want to do with lefty before I glue it up.


I'm still not happy with the right forearm. The edge cemented this time, but it still feels too loose. I'm tempted to take up the outside edge on the front and take of 1/4" of material to make the raised edge better match up with the strip, and to give me a slightly better fit (you can see how the edge of the armor is still right of the strip in the above photo). I really wish I had an arming suit so I could test the fit over that, but the left forearm "feels" almost perfect, so I think it will need to be done. Going to wait to wait until the forearms are done before I revisit this piece, so I can fit shins while I re-cement the piece.

Some final fitting with the arms tonight, and hopefully I can start fitting my shin pieces, after I've done some reading on UKSWrath's thread :)

Wednesday, February 10, 2016

Covering the Big Guns

When you've got to armor up these 13" pythons, brother, what Are you gonna do?

Seriously, that's all I got.

Anyhow, before I talk about the "pythons," the forearms came out great!


Well, OK, so the right forearm didn't glue so well. I was probably too conservative with the E6000.


Good thing I didn't need the big clamps for the bicep pieces yet. Pulled the loose end up, applied more E6000 (probably too much, but I can clean up the excess after), and clamped the hell out of it (sorry, forgot to take a pick, but pretty much more of the same from last session). Fool me once, shame on you...

ON TO THE BICEPS!

The forearms came out pretty uniform, so I was able to make the biceps matching and pretty symmetrical to each other during the cut & fit. Before any fitting, though, I removed the elbow-end edge returns to make it easier to slide the pieces over my elbow during donning (no pics, but pretty much the same procedure I used on the forearms - rough cut with the disc, clean up with the sanding drum and hand sanding). I left the top edge returns in for now so that the armor can find purchase on my biceps for fitting; once I start fastening everything together, I may go back and grind them out if need be. Speaking of which:

A lot of people are confused by edge returns. According to the 501st Hero and Stunt build for the TK ANH (A New Hope) standards, only the wrist edge return removal is required for higher-level certification. However, looking at screen-used armor, the arms have no edge returns on any of the ends. Typically, you'll probably see this more on the Hero suits than the Stunt suits in the actual movie. Why? Because it takes more time to remove them, so the shop probably only removed them for suits that absolutely required it (especially for comfort for actors who would be doing a lot of movement and/ or be in them for hours on end) so they could build suits for extras faster, especially given deadlines and budgets.

Therefore, if you want your suit to look and feel better, feel free to pop out edge returns in the arms, as none of them are required if you're going for 501st cert (and if you aren't, pop them out anyhow, because it makes the arms much more comfortable and less pinchy). For more info in regards to 501st cert for the ANOVOS kits, you can find the Hero cert here and the Stunt cert here. Be advised that some edge returns, especially in the body pieces, are required, so don't go hog wild until you read up.

EDIT: also, read this post for clarification between "edge returns" and "inside edges." As the arms pieces include no actual "edge returns," read the above as referring to "inside edges".

I used the same technique as the forearms - measure, tape to simulated fit, cut conservatively, and repeat until they're fit bu not too tight. This time I used the score & snap method for the cutting.


After fitting my biceps, it was time to glue the strips on - again :P This time I cut the strips to length and applied a small 45 degree bevel on the corners before gluing in place.


The fit on the biceps was slightly loose on my final test fit. I may remove a fraction of material from the outside pieces before final assembly tomorrow, after a better test fit with the strip in place - especially if it helps marry up the butt joints. While the biceps are gluing, I can start on the shins and thighs, although I may need more rare earth magnets for the latter, given the size of the pieces.

My wife and I are going to a concert tomorrow night though, so I may not get any work done. All the better I suppose, as my wife is becoming an armor widow :P

Until next time...

Edit: for reference:

Tuesday, February 9, 2016

Compelling Two Sides to Meet

After I got the kids to bed last night and did the dishes, the main task was finishing the gluing on those forearms, so I could finally match the seams up on the biceps and get those fit to my "massive" 13" guns. So I picked up the biceps and un-clamped them from their glue run last night.


Because I had to trim a bit to get the proper fit for my "massive" forearms, I was left with a pretty sizable gap in both arms. Thankfully, the ABS is pretty flexible, and the E6000 provides a firm hold once it sets up, so it was just a matter of applying the glue, getting the loose edge onto the strip, and clamping it in place.


I started with the left forearm. The first task was to ensure that the wrist end lined up and was butted against its mate before clamping. The large spring clamps make this task easy.I  then butted up the elbow end as tight as possible and applied another large spring clamp. After those where in place, ensuring that the edges were butted up as much as possible, I applied the heavier clamps, and then magnets in the middle. 


Once I ensured everything was in place and my technique was sound, I repeated the process with the right forearm. I carefully placed the pieces on the table to set for the next 24 hours or so.


Then it was just time to wait. Tomorrow I hope to do final fitting on the biceps so I can start stripping and gluing them as well.


To finish the night, I cut out the shin pieces, Pieces 24, 25, 27, & 28. I usually work while listening to classic rock on Pandora. I wondered if some of the songs were playing in the workshop when they were building armor in 1976. Perhaps, but there was probably more smoking going on too, I thought, the LOL'd.

Anyhow, and notably, these pieces don't follow the odd number = right, even number = left convention, so I'll have to make doubly sure I don't botch something up, and also number the pieces on the inside to eliminate confusion. I used the same technique as I did for the thighs, namely score & snap. The inside of the shins was tricky, but a steady hand and a relief score down the middle ensured that the inside fill came out without issue.


I'll probably start on my shins as my biceps go through their glue stage (again). Notably, another FB member on the Anovos group page is having issues mating his shins, due to the fact that the back edge is fastened with hook & loop, so clamps & adhesive won't easily solve that issue. I'm going to research UKSWrath's post on the subject, as I know he's already done these pieces, to see how he recommends sizing and fitting these pieces.

Monday, February 8, 2016

Back to the Grind (and Score and Snap...)

My son is all right, with a cast and a temp pin in his arm for the next 4-6 weeks, but already getting back to what 4 year olds do, thank goodness. Needless to say that I was occupied basically the whole weekend taking care of him. I finally got a moment to myself tonight.

But while I was spending some time with my son while taking the afternoon off from work, I decided I would try the score & snap approach to trimming the armor, or at least breaking pieces from the molds. And having already seen Trooperbay and others do it on YouTube, I gave it a shot on my thigh pieces, Pieces 20 - 23. All in all, it worked, with very minor slippage of the knife and workable rough cuts.


I cut around the inside arcs of the armor pieces, scored those lines, added relief scores, and popped them out like Trooperbay's method and what I did with the Dremel for the arms. When the score didn't want to split, I just scored it more until it popped. Since the pieces still need to be measured, cut, and fitted before final assemble, any roughness on the cuts doesn't concern me.


After the kids went to bed, I was able to get back into my work space and continue work on my forearm pieces.

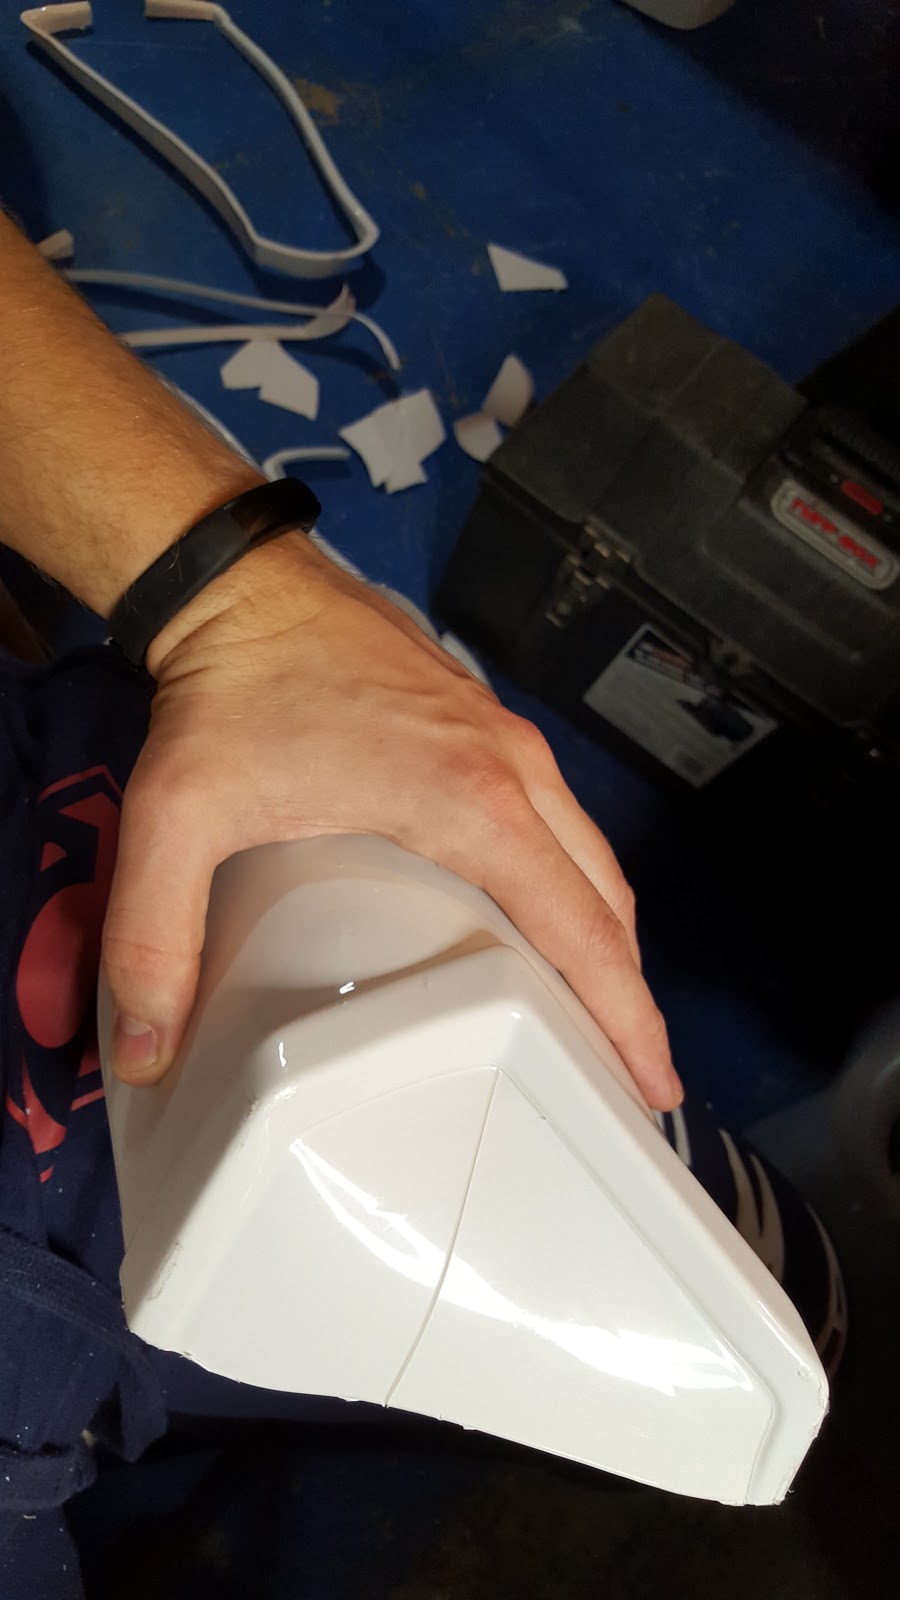
One thing I immediately decided to do, based upon the fit and a reference shot of some film-used armor from posted on whitearmor, was to remove the elbow-side edge returns for easier wear and movement. I did this by making some rough cuts with the Dremel cutting disc, popping out those parts, cleaning up with the sanding drum, and finishing with some hand sanding. At the same time, I rough trimmed the strips in order to prep them for after the pieces were assembled, and to make removing the edge returns easier. Results were great.

The key is to fit, adjust, and refit. Remember: tape is cheap; armor is not. If you're like me, you'll probably use a lot of tape fitting and refitting as you go along. That's fine. It's better to measure twice, three, six times, etc., than to accidentally take off too much and permanently screw up a piece, or try to shim it back to fit.

EDIT: also, read this post for clarification between "edge returns" and "inside edges." As the arms pieces include no actual "edge returns," read the above and remainder as referring to "inside edges".


On the left forearm, I removed these edges with the pieces taped together; on the right, I removed them with the pieces disassembled and then taped them together to ensure a final fit. Either method was fine, I discovered.

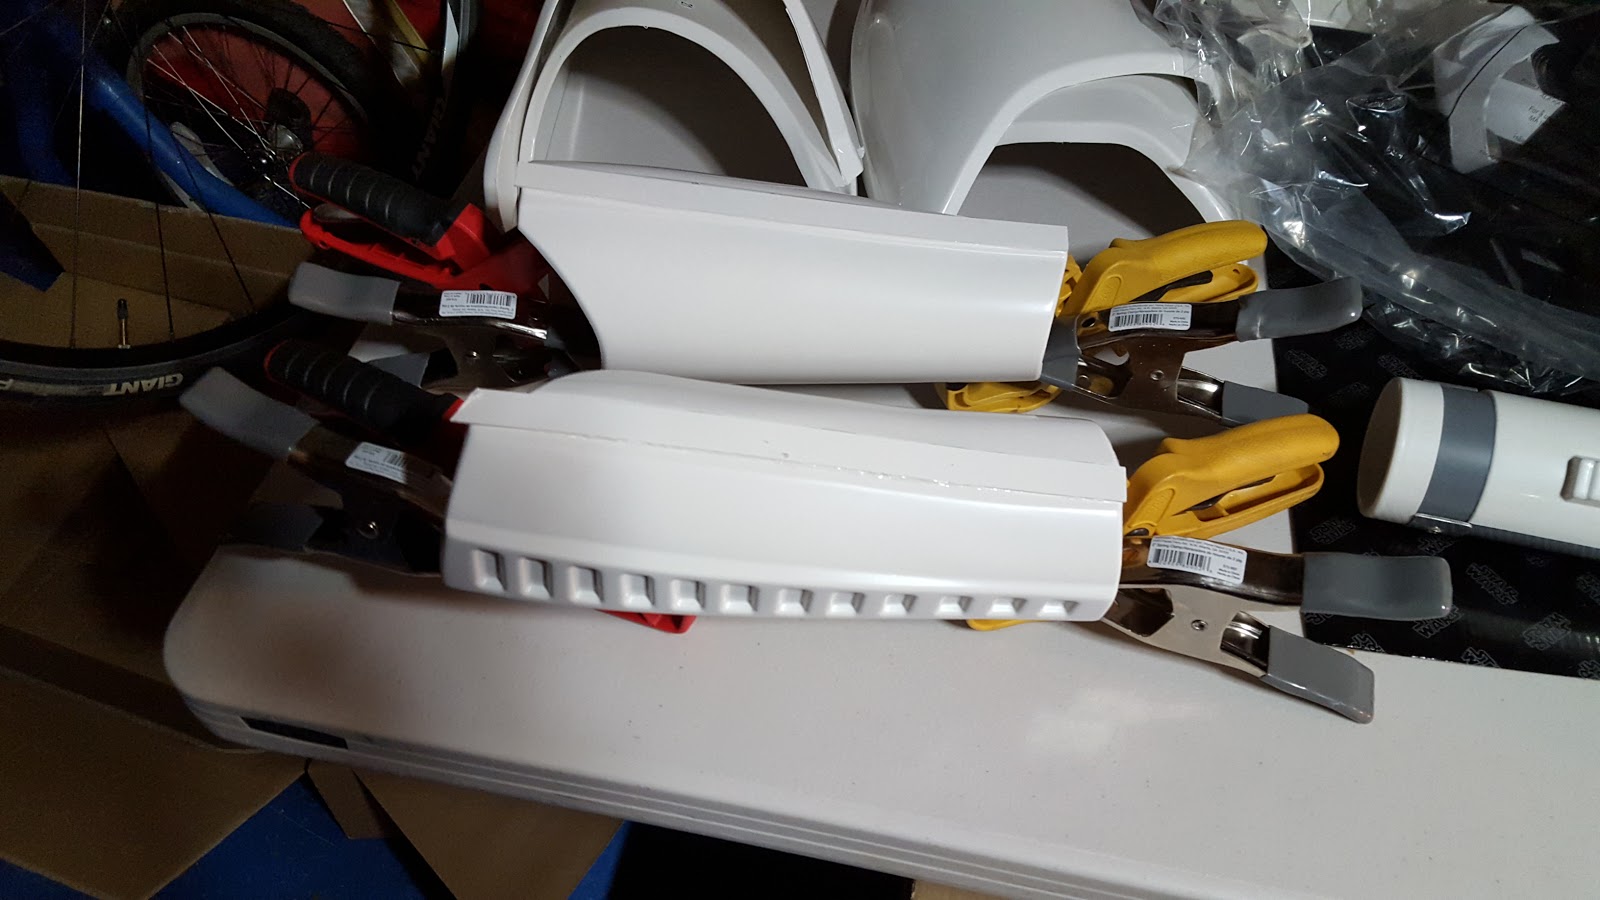
With the final edge returns removed and the fit finally good, it was time to start assembling the two halves for each arm. I started with the front edge of each piece (the side with the ridged edge). I applied the E6000 to the alread-attached strip, placed the other piece on the strip, checked for alignment, and clamped/ set magnets. Because the raised edges form a valley inside the armor, I was limited with clamping as the larger clamps wouldn't fit into this valley on the left arm; the mold on the right arm was more forgiving and I was able to use two larger clamps on it.


Because I'm going to need to coerce the other edges together using larger clamps, and because I needed all my magnets for the front edges, I decided to only glue the front edges tonight. The back edges will get glued tomorrow once the front edges set, allowing the clamps to "muscle" the back edges together.


You can see the thermal detonator in that shot. Because I want to try to line up the strips on the biceps with the strips on the forearms as best I can, and I can't do that until the biceps are done gluing on both edges (and I REALLY didn't feel like starting to measure and fit the thighs yet), I decided to move away from the limbs for a moment and work on the detonator with was an easy build - and one I modified for extra use :)


I started by reading the instructions and the 501st ANH Hero specs, which go a long way towards telling you exactly how this piece should be assembled, even if you're not planning for 501st approval. After I understood the build, I put one of the caps on the end of the grey cylinder - this would be the left cap. I put the right cap on, dry a line to mark its edge, and carefully removed it. The caps have a super tight fit, but I want to be able to remove the right cap so I can use the cylinder as storage while trooping. After the cap was removed, I used the Dremel sanding drum on low to carefully sand down the right edge of the drum, hand sand with a small piece of sanding paper, and repeat, enough that I could remove the right cap without the contact becoming too loose.


After sanding the edge down to an acceptable level, I put the right cap on and went to the nearest door jam to draw a straight pencil line onto the tube, to line up the metal clips (the door jam trick is something I learned when I built model rockets with my dad as a kid). With the caps and line in place, it was easy enough to place the clips on, mark the holes, drill pilot holes with the drill, and screw the clips on. Later I will probably replace the screws with short machine bolts, nuts, and locking washers, so I can store stuff int eh cylinder without poking it with the screw ends.


With the clips installed, I cleaned up the edges of the control piece and sanded its back. I then placed it onto the grey cylinder (Just resting on the edges of the clip, facing up when attached to the belt, with the round part towards the trooper's right side) and marked with pencil its resting location. I sanded down the area on the grey cylinder for better cement adhesion, applied E6000 to the back of the white piece, placed it on the grey piece, and taped it down with masking tape.


I'm a storage container now, too! :D

Finally, I also took out some of the return edges in the armpits of my bicep pieces for better fit, in a similar fashion as the forearm pieces.


That was it for the night. Tomorrow I'll finish gluing the forearms and perhaps cut out the shin pieces so I can begin working on the legs as I finish up the arms and biceps.